
Before you start
Everything in this article requires edit mode — check for the amber Edit badge in the header. If you see a blue View badge, you're in a read-only view and nothing here will be available, with one exception: you can still take measurements in view mode, but they aren't saved.
Placing media into a 360 scene
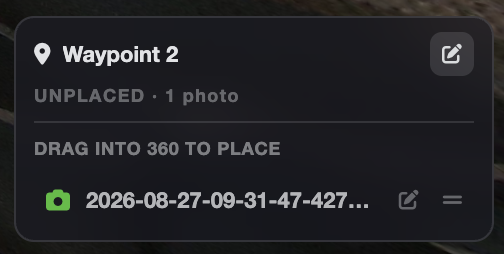
The Unplaced panel at the bottom right lists everything attached to the active waypoint that hasn't been positioned yet.
- Find the item you want to place in the Unplaced panel.
- Drag it out of the panel and drop it onto the exact spot in the 360 where it belongs — the wall with the water line, the piece of equipment, the ceiling stain.
- It becomes a pin at that position and leaves the Unplaced panel.
Once placed, you can:
- Click a pin to open a small bubble with view and remove actions
- Drag a pin to move it to a better position
- Remove a pin with Remove from 360 — this sends the item back to the Unplaced panel. It is not deleted from your project.
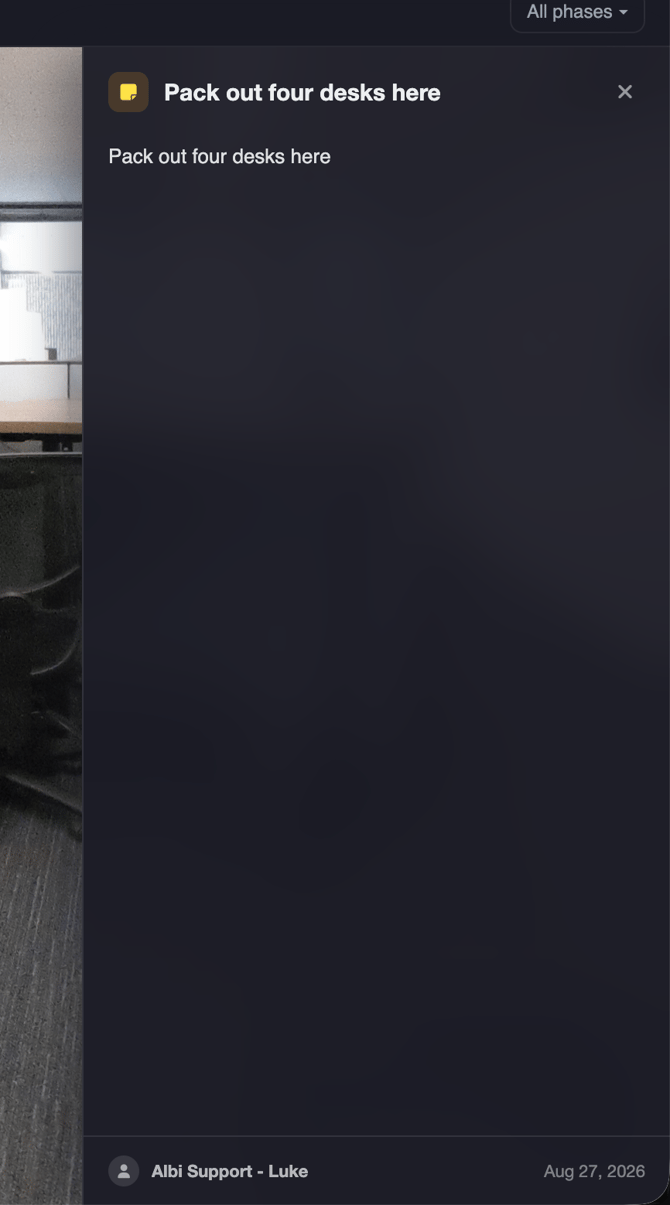
Photos and videos open in the standard lightbox. Notes open in a side drawer showing the full text and the author.
On a shared link or in view mode, items can only be tapped to preview — no dragging.
Pin types at a glance
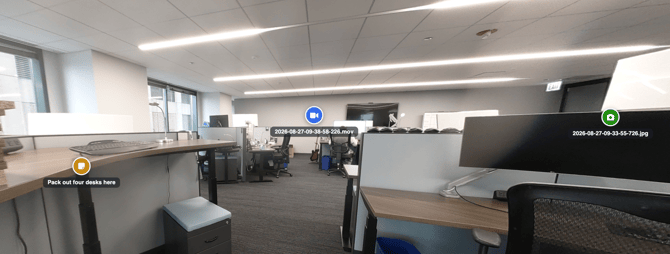
Each type of pin has its own icon and color:
| Type | Color | What it does |
|---|---|---|
| Photo | Green | Opens a photo in the lightbox |
| Video | Blue | Plays field walkthrough footage |
| Note | Amber | Opens a written field note |
Renaming waypoints, scenes, and pins
Hover over a waypoint name, a 360 scene, or a pinned item and a pencil icon appears. Unplaced items can be renamed before you place them, too.
Renames are tour-only. The underlying file keeps its real name everywhere else in the project, and the same photo pinned into two different 360s can even carry two different labels.
One exception: renaming a waypoint writes back to the floor plan sketch, so that name change is shared with your floor plan. This is why one rename sometimes shows up elsewhere in the project and the others don't.
Name length limits
| What | Limit |
|---|---|
| Phase name | 20 characters |
| 360 scene name | 255 characters |
| Pinned item title | 255 characters |
| Waypoint name | 255 characters |
Organizing scenes by phase
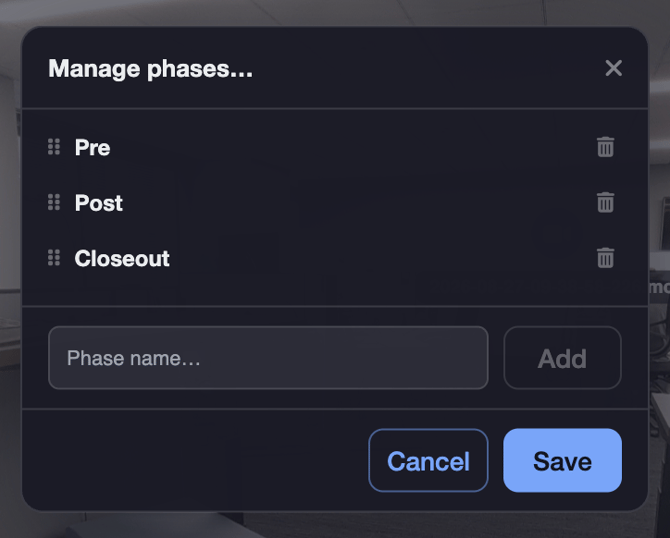
Phases group your 360 scenes by stage of the job, so you can document the same room as it changes. Every tour starts with three built-in phases:
- Pre
- Post
- Closeout
These three are always present and cannot be renamed or deleted. You can add your own phases underneath them, and your custom phases can be renamed, reordered, and deleted freely.
How to manage phases:
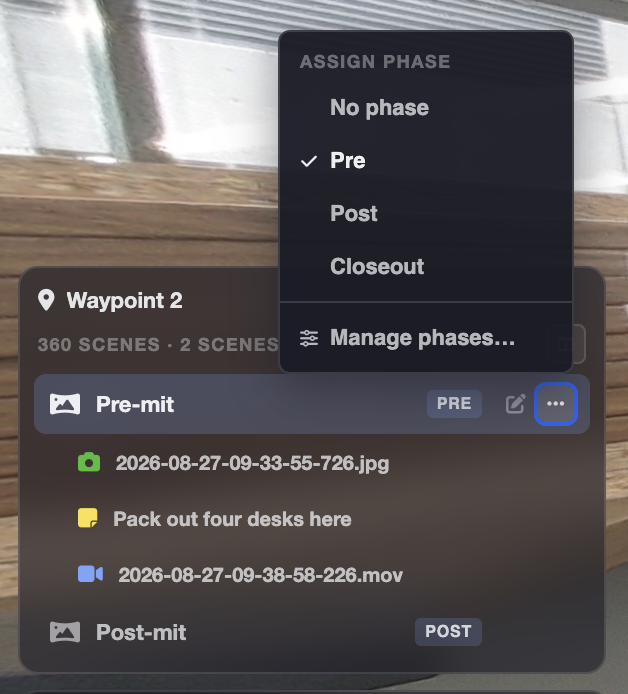
- Open the scene panel's … menu and choose Manage phases…
- Add a phase by typing a name and confirming. Names must be unique within the tour — capitalization is ignored when comparing — and can't reuse Pre, Post, or Closeout.
- Press Save in the dialog. Phases save immediately and don't wait for the main Save changes button. You'll see Phases saved successfully.
To assign a scene to a phase: use the same … menu and choose Assign phase, or No phase to clear it.
To view one phase at a time: use the phase filter in the header. It's set to All phases by default, which shows everything regardless of phase.
Deleting a custom phase does not delete its 360s. They simply become unphased and still appear under All phases.
Comparing two phases side by side
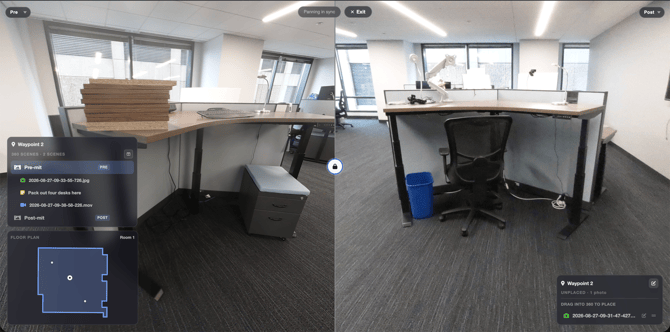
Compare phases splits the screen and shows the same waypoint in two phases at once — by default, the earliest and latest phase that have 360s at that waypoint. This is the before-and-after view, and it works on shared links too.
- The two sides pan and zoom together by default, shown as Panning in sync.
- Choose Unlock to align independently to move each side on its own, so you can line the two shots up.
- Choose Lock to pan in sync to re-couple them.
- Choose Exit to return to the normal view.
Measuring inside a 360 scene
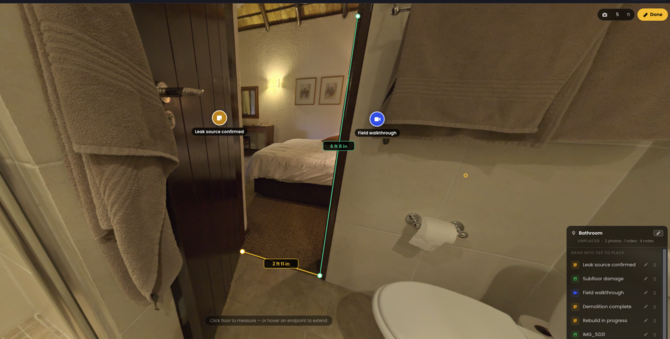
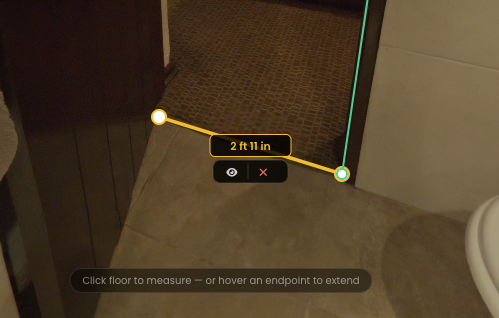
You can measure a room directly in the 360 viewer — floor distances, wall heights, and spans across a wall at height. Measurements can show in feet and inches (8 ft 11 in), inches only (107 in), or metres (2.72 m), and you can switch between them in the measure toolbar. The default follows the floor plan's unit system, or your company's if the floor plan doesn't have one.
You don't choose a measurement type. Albi works it out from how you draw:
|
To measure |
How to draw it |
Example |
|---|---|---|
|
Floor distance |
Click two points on the floor. |
Wall to wall across a room |
|
Height |
Start from an endpoint and move up. You can start a new height from the top of an existing one, and each shows its own length. |
Floor to window sill, then sill to window top |
|
Span at height |
Start from an endpoint and move sideways. |
Width across the top of a doorway |
Click a measurement's label to jump the camera to it, or to delete it.
Calibrating the camera height. Distances are calculated from the camera's height above the floor, which defaults to 5 ft. If the camera was mounted higher or lower, measurements in that scene will be off. To fix this, measure something whose size you already know — a standard interior door is 6 ft 8 in tall — then change the height in the camera-icon box in the measure toolbar until the measurement matches. The setting applies to the current scene only, and changing it rescales every measurement on that 360. A scene with no measurements yet starts from the last height you used.
Who sees your measurements:
-
In edit mode, measurements are saved with the tour when you click Save changes, and are visible to everyone who opens it, including anyone with the share link.
- In view mode or through a shared link, measurements last for that session only and are discarded when the tour is closed.
-
Each measurement belongs to the 360 photo it was taken on, just like pins. Switching from Pre to Post shows the Post photo's own measurements and hides the Pre ones.

Saving your changes
Everything except phases and sharing — including measurements — is saved with the Save changes button in the header.
- The button stays disabled until you actually change something.
- Your browser will warn you before you leave with unsaved changes.
- On success you'll see Tour saved successfully.
One thing worth knowing: When a 360 in your tour is deleted, moved off its waypoint, or the waypoint, room, or floor plan it sits on is deleted — by a teammate, or from elsewhere in the project — while you have the tour open, saving your scene changes fails with One of the 360 images in this tour is no longer on its waypoint, and nothing is saved. Not that scene, and not any of your other changes either.
This is a deliberate safety check rather than a bug. Saving submits your complete scene list, and anything missing from it is removed — so saving against a stale list could delete scenes someone else added while you were working. Reload the tour to pick up the current list of scenes, then redo your changes and save again.
Working on a tour with teammates
Two people editing the same tour at the same time isn't supported. The last save wins for the whole tour, including the scene layout and measurements. If a colleague opened the tour before you saved your measurements, their next save will erase them. Coordinate before you start editing.
Renames and labels behave differently — they're additive, so leaving one out of a save doesn't wipe it.
Next steps
- For what an Interactive Tour is and how to open one, see Interactive Tours: Overview and Getting Started.
- To get 360s and media into a project in the first place, see Capturing 360 Scenes and Media in the Field.
- To send the tour to an adjuster or homeowner, see Sharing Your Tour.
- If something isn't working, see Interactive Tours: Troubleshooting and FAQ.