
Everything that ends up in a tour is captured in the field, on a phone or tablet. There is no way to upload a 360 photo or create a waypoint from the web — the web editor only arranges and shares what your team has already captured.
The field workflow is:
- The technician drops waypoints while sketching the room on their device.
- The technician uploads 360s, photos, and videos against those waypoints.
- Processing runs in the background, so media can take a short time to appear.
How Albi recognizes a 360 photo
Albi identifies a 360 by the shape of the image, not by the camera that took it. A photo becomes a 360 scene when both of these are true:
- Its aspect ratio is essentially 2:1 — between 1.99 and 2.01
- It is at least 2,000 pixels wide
This is why most 360 cameras work without any setup: they all produce a standard wide panoramic photo. It's also the answer when a 360 shows up as an ordinary photo — the image was cropped, resized, or exported in a non-standard shape somewhere along the way. Re-upload the original, unedited file.
If the same photo is uploaded against two different waypoints, Albi links both to the single stored copy rather than rejecting the second upload.
Opening a waypoint on mobile
Navigate to the room you're working in using the floor tabs. Once you're in the right scene, tap an existing waypoint marker to select it.
Adding a note
With a waypoint selected, tap Add to waypoint. A sheet slides up with two options — Note and Image / Media. Tap Note.
From there you can either:
- Create new — opens a blank note form with a Note title… field and a Write your note… text area. Fill in both and tap Save note.
- Pick from existing — if notes have already been written for this job, such as from an earlier site visit, they appear in the Existing notes list. Tap one to attach it to this waypoint.
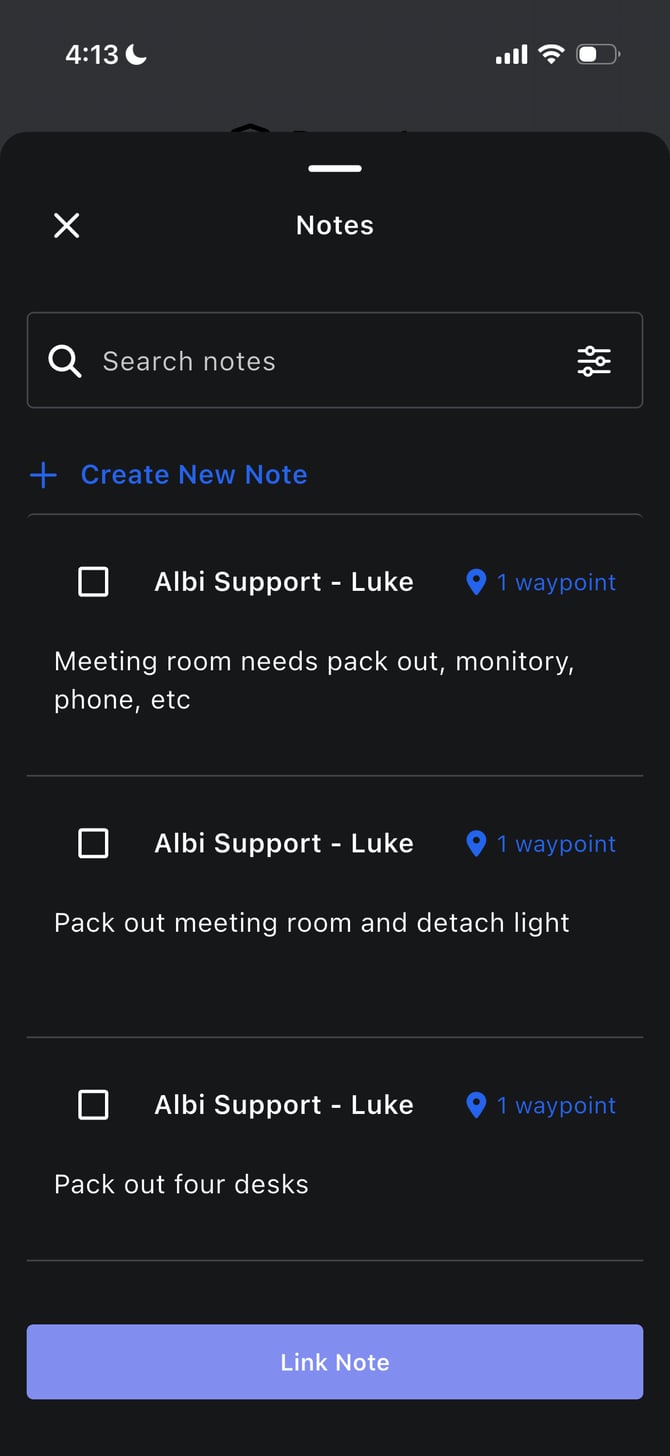
The note attaches to the waypoint and can be pinned into a 360 later from the web editor. Anyone viewing the tour can open it to read the full text, along with who wrote it and when.
Adding a photo or video
With a waypoint selected, tap Add to waypoint, then tap Image / Media. From here you can:
- Browse files — opens your device's photo library so you can select one or more existing photos or videos
- Upload — use your camera to capture a new photo or video and attach it immediately
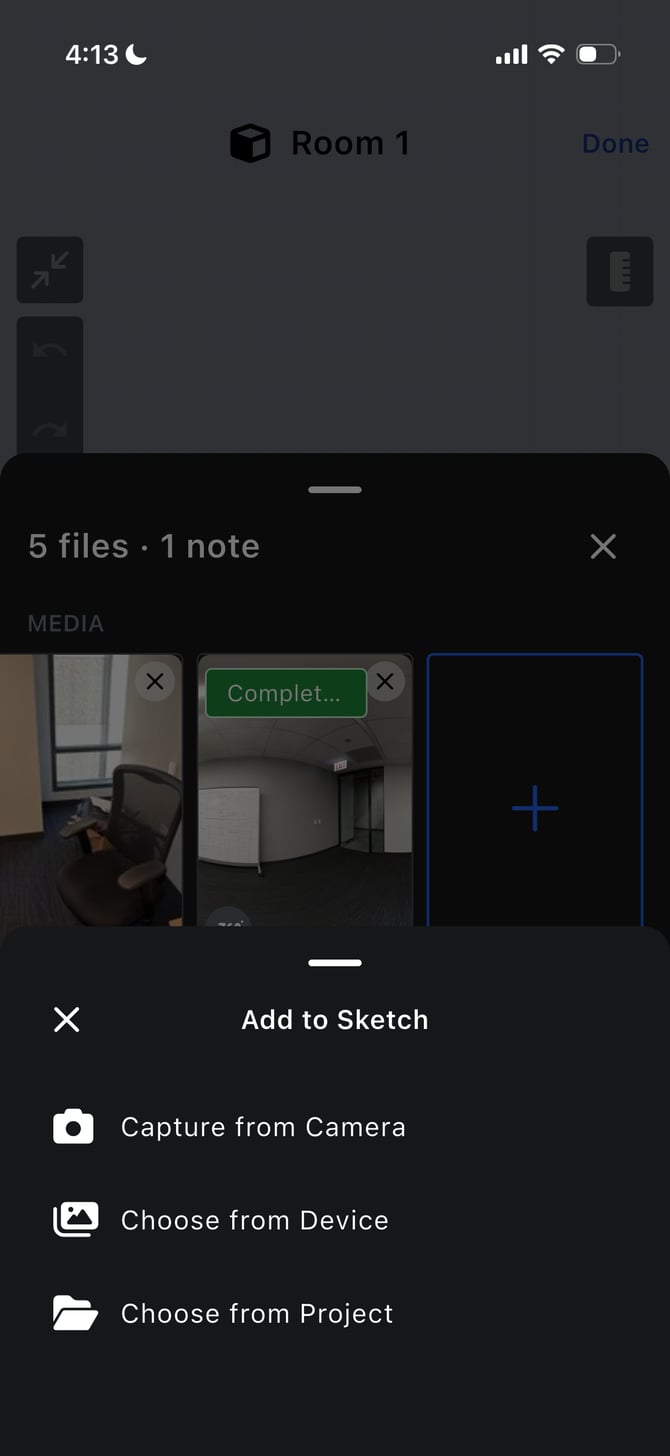
Selected media uploads and attaches to the waypoint. Until someone pins it to a precise position inside a 360, it sits in the Unplaced panel in the web editor.
Checking what's attached to a waypoint
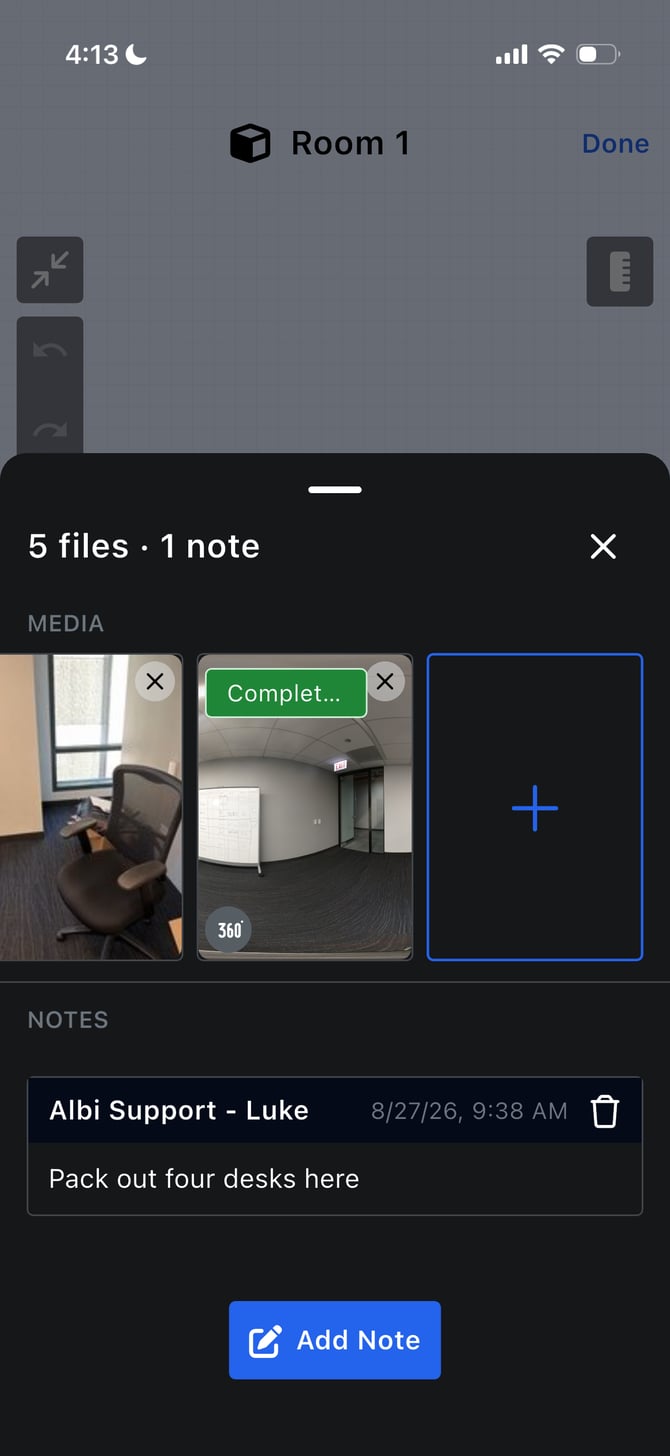
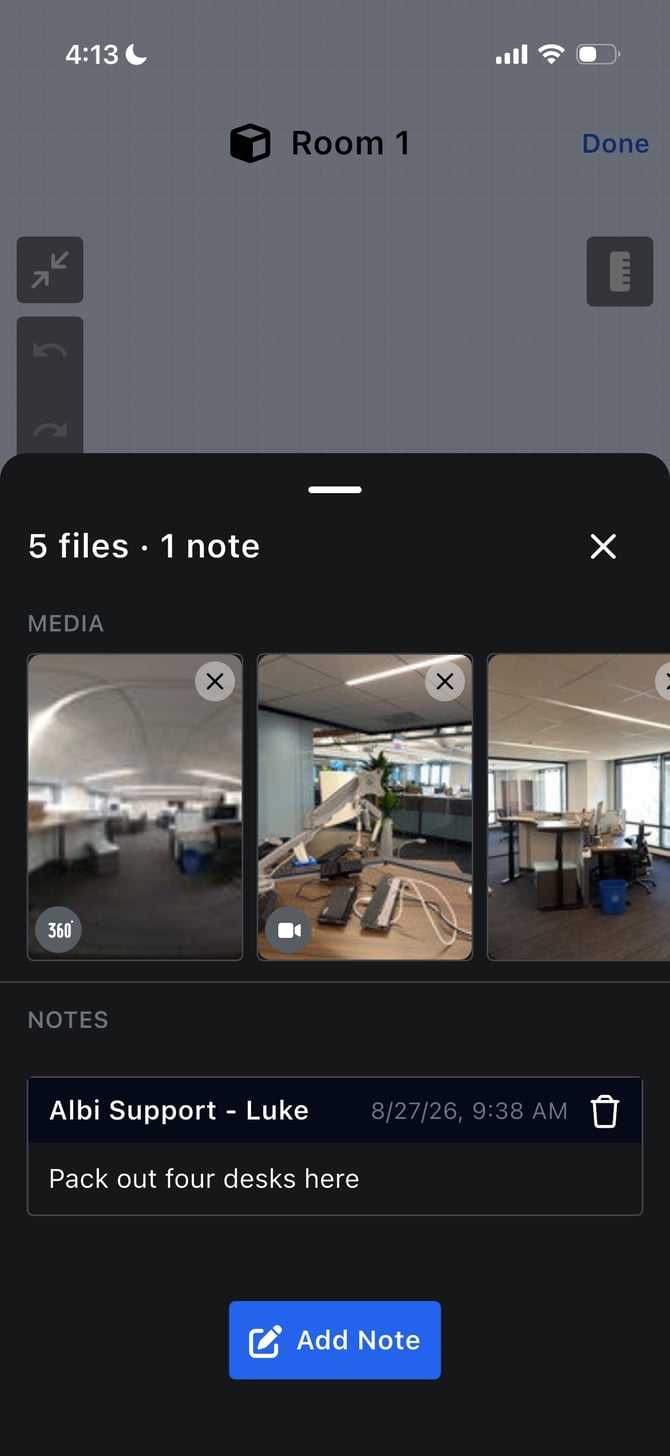
Tap any waypoint to see a summary of what's attached to it — a count of photos, videos, and notes. Tap an item in the list to preview it without leaving the scene.
To remove an attachment, tap it to select it and use the Remove action.
Building the tour is a web task
The mobile app is for capture only — dropping waypoints and uploading media. Arranging media inside a 360, renaming things, organizing by phase, and sharing all happen in the web editor. Assigning a scene to a phase is a web-only action as well.
Next steps
- For what an Interactive Tour is and how to open one, see Interactive Tours: Overview and Getting Started.
- To arrange captured media into a tour, see Building Your Tour: Media, Renaming, and Phases.
- To send the tour to an adjuster or homeowner, see Sharing Your Tour.
- If something isn't working, see Interactive Tours: Troubleshooting and FAQ.