Adding a Role
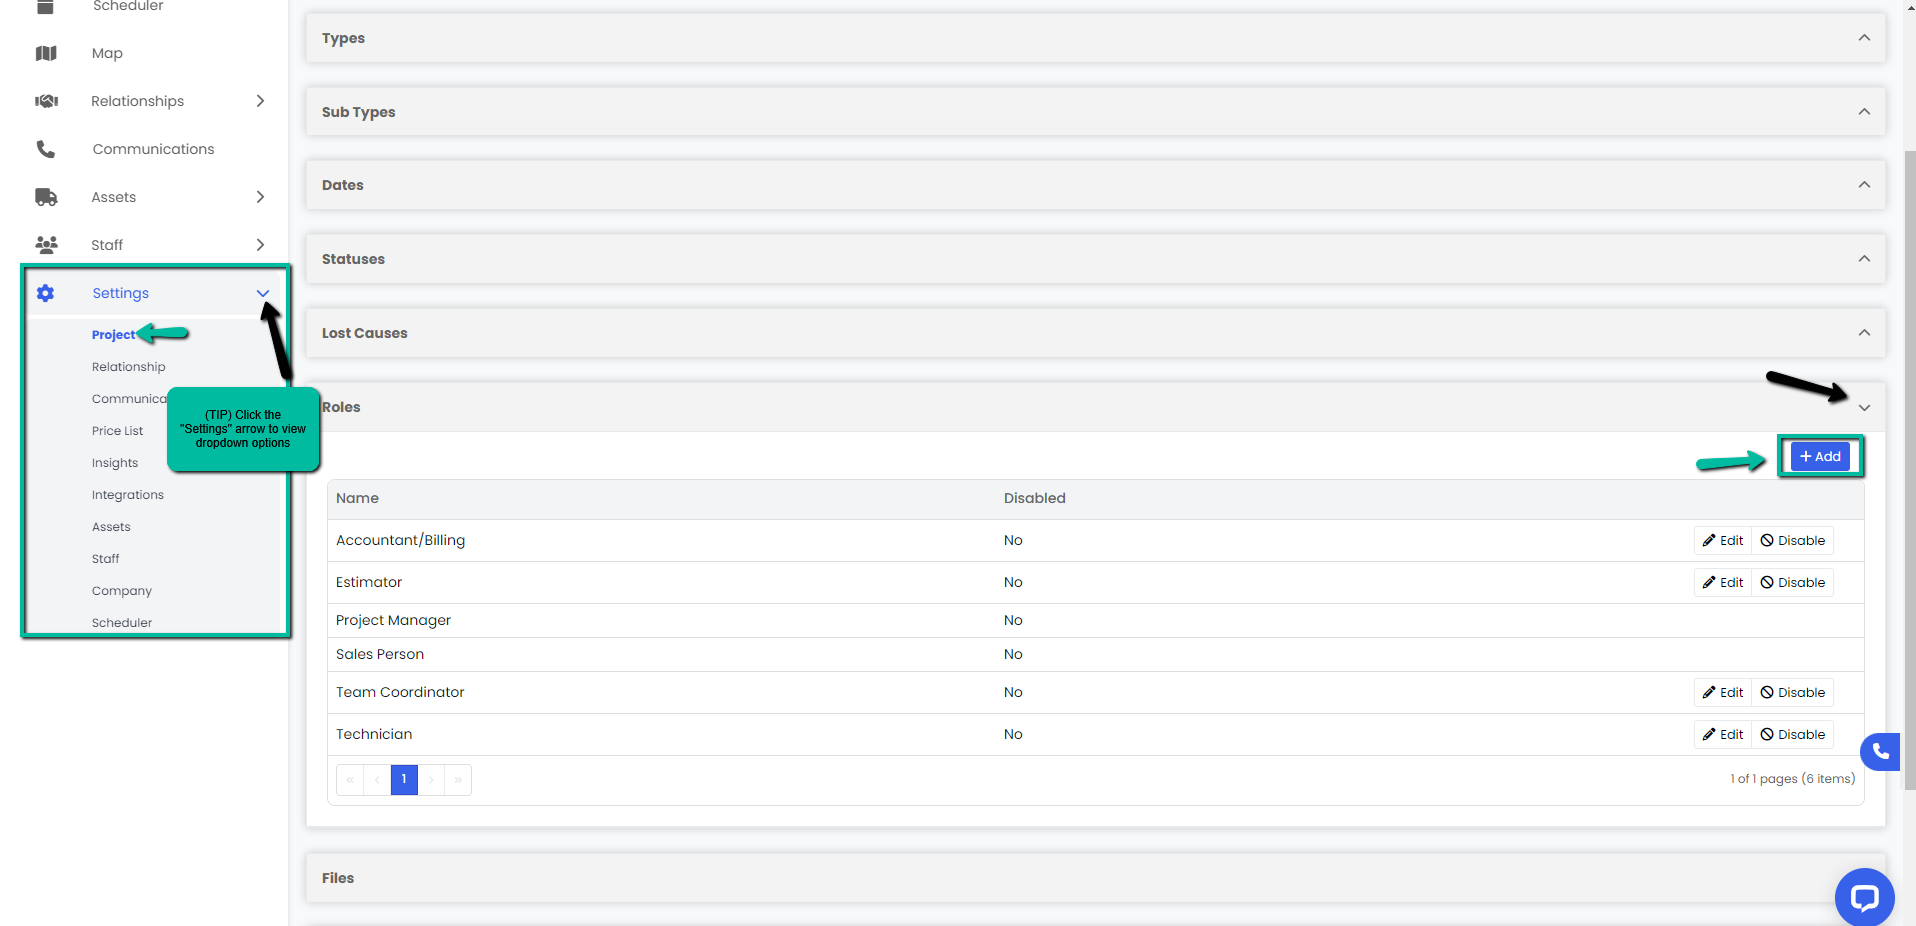
- Navigate to the Settings module and go to the Project page. Select Roles and click the Add button on the right hand side of the tab.
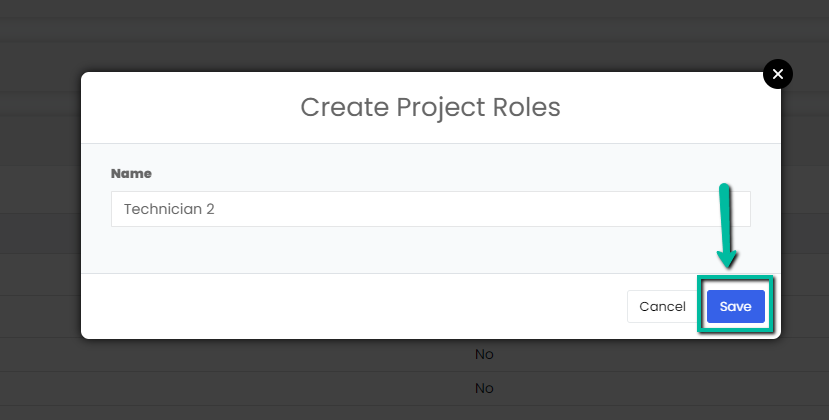
2. A Create Project Role modal will appear, type in the name for your new project role and click the blue Save button.
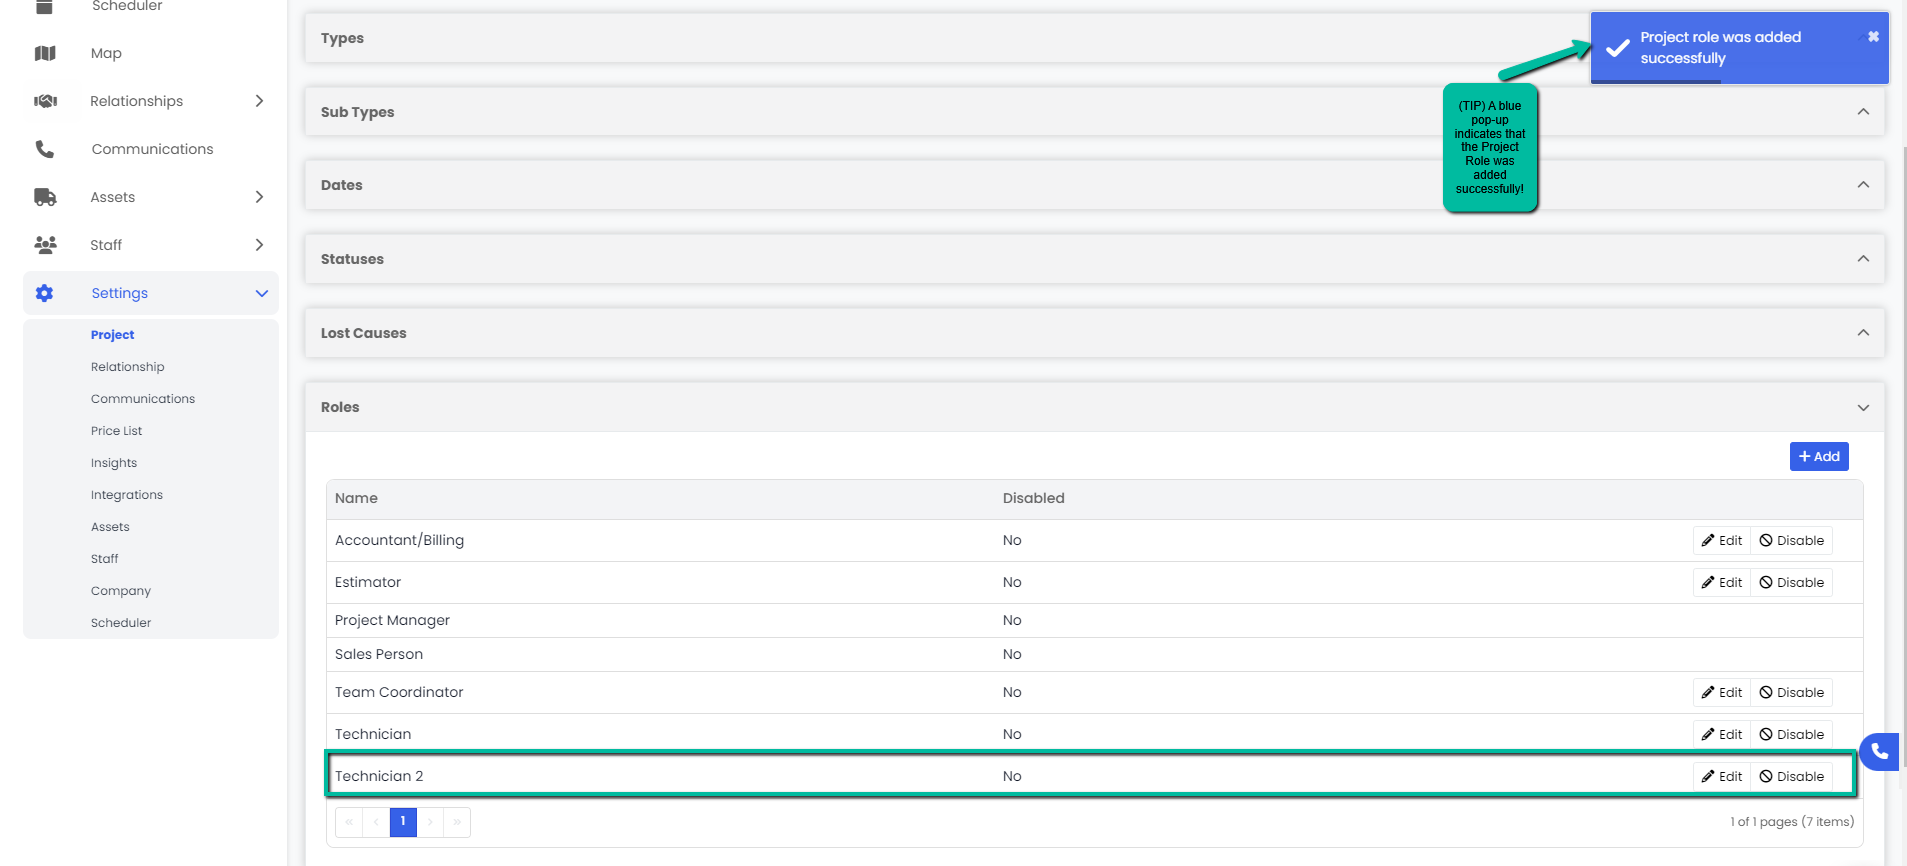
3. A blue pop-up notification will appear on the upper right corner indicating that you have successfully added a new project role. Your changes will immediately appear on the Roles tab.
Editing a Role
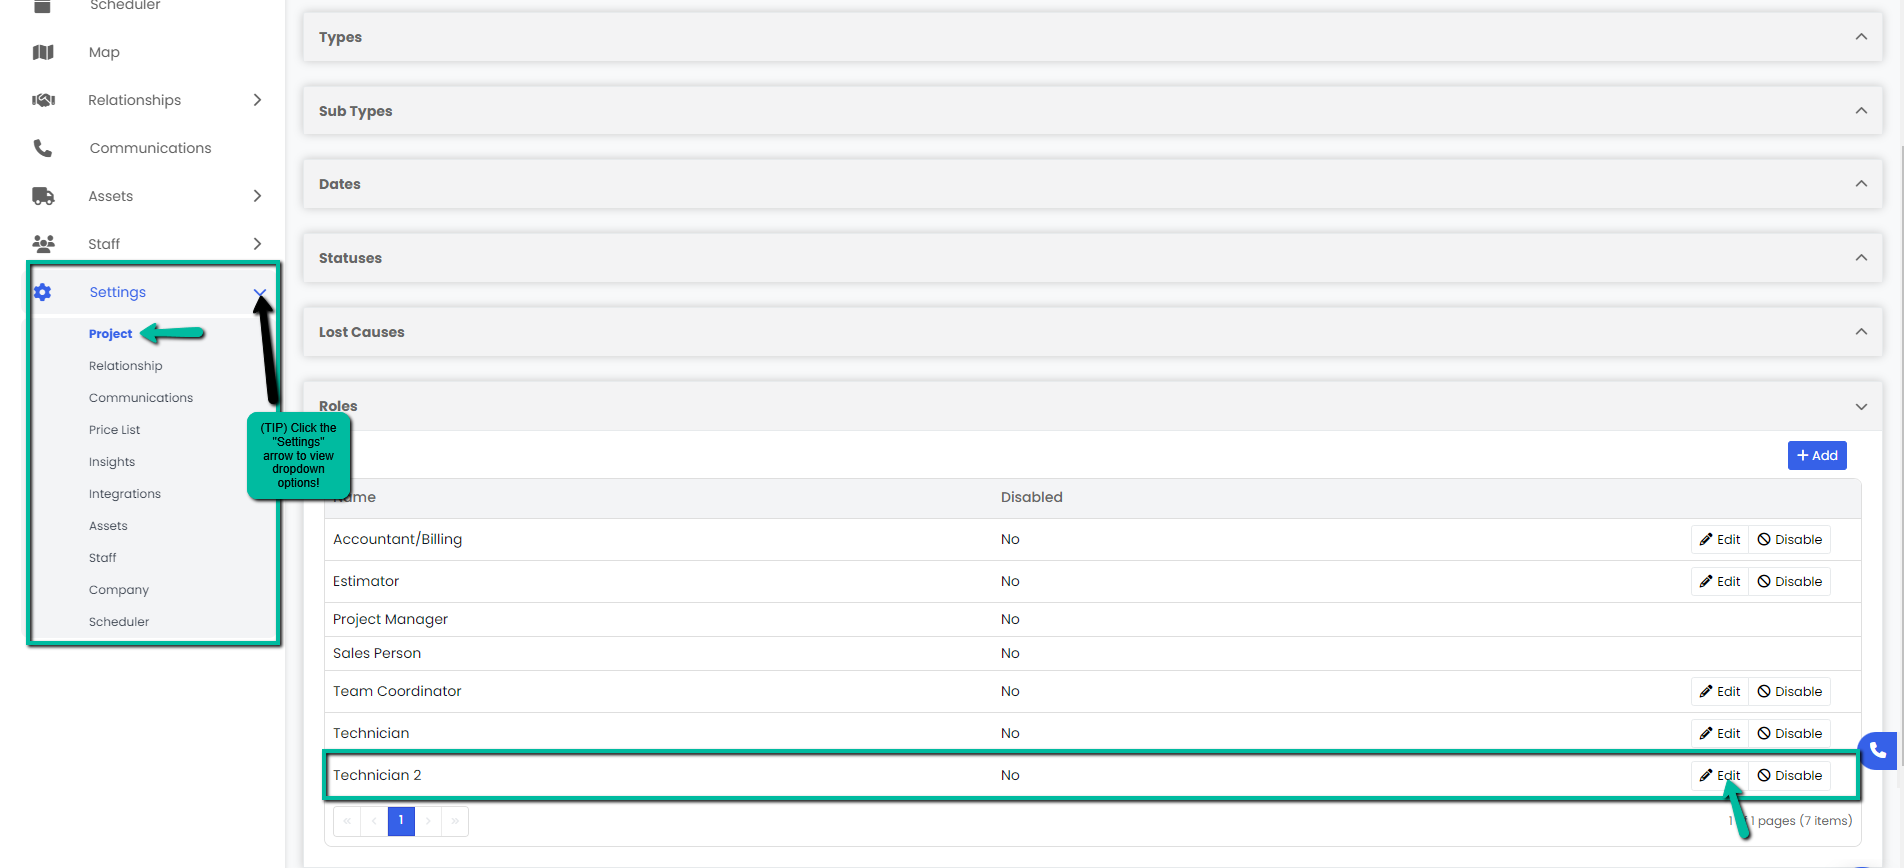
- Navigate to the Settings module and go to the Project page. Select Roles and click the Edit button on the right hand side of the row you would like to edit.
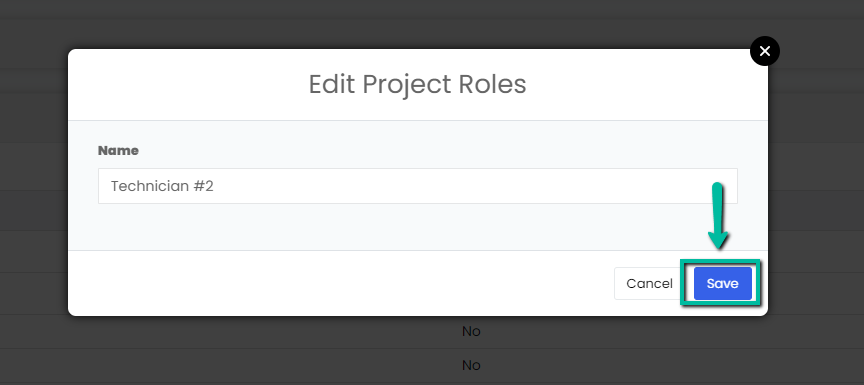
2. An Edit Project Role modal will appear, make necessary changes and click the blue Save button to continue.
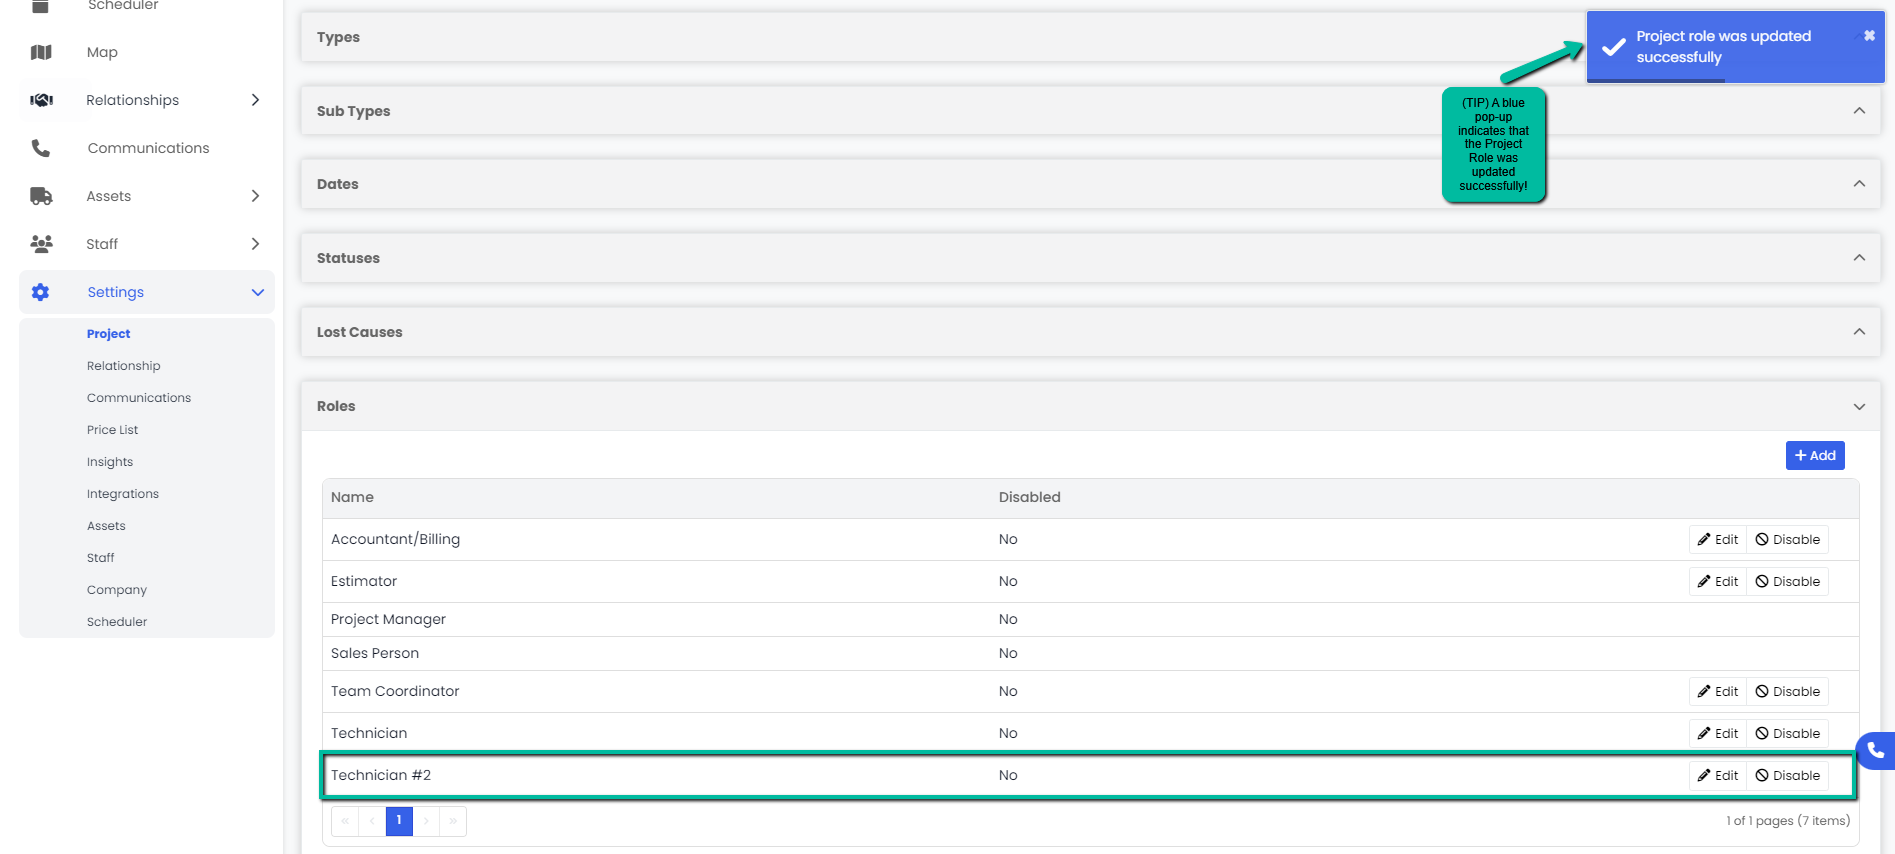
3. A blue pop-up notification will appear on the upper right corner of the screen indicating you have successfully updated the project role. Your changes will immediately appear on the Roles tab.
Disabling/Enabling a Role
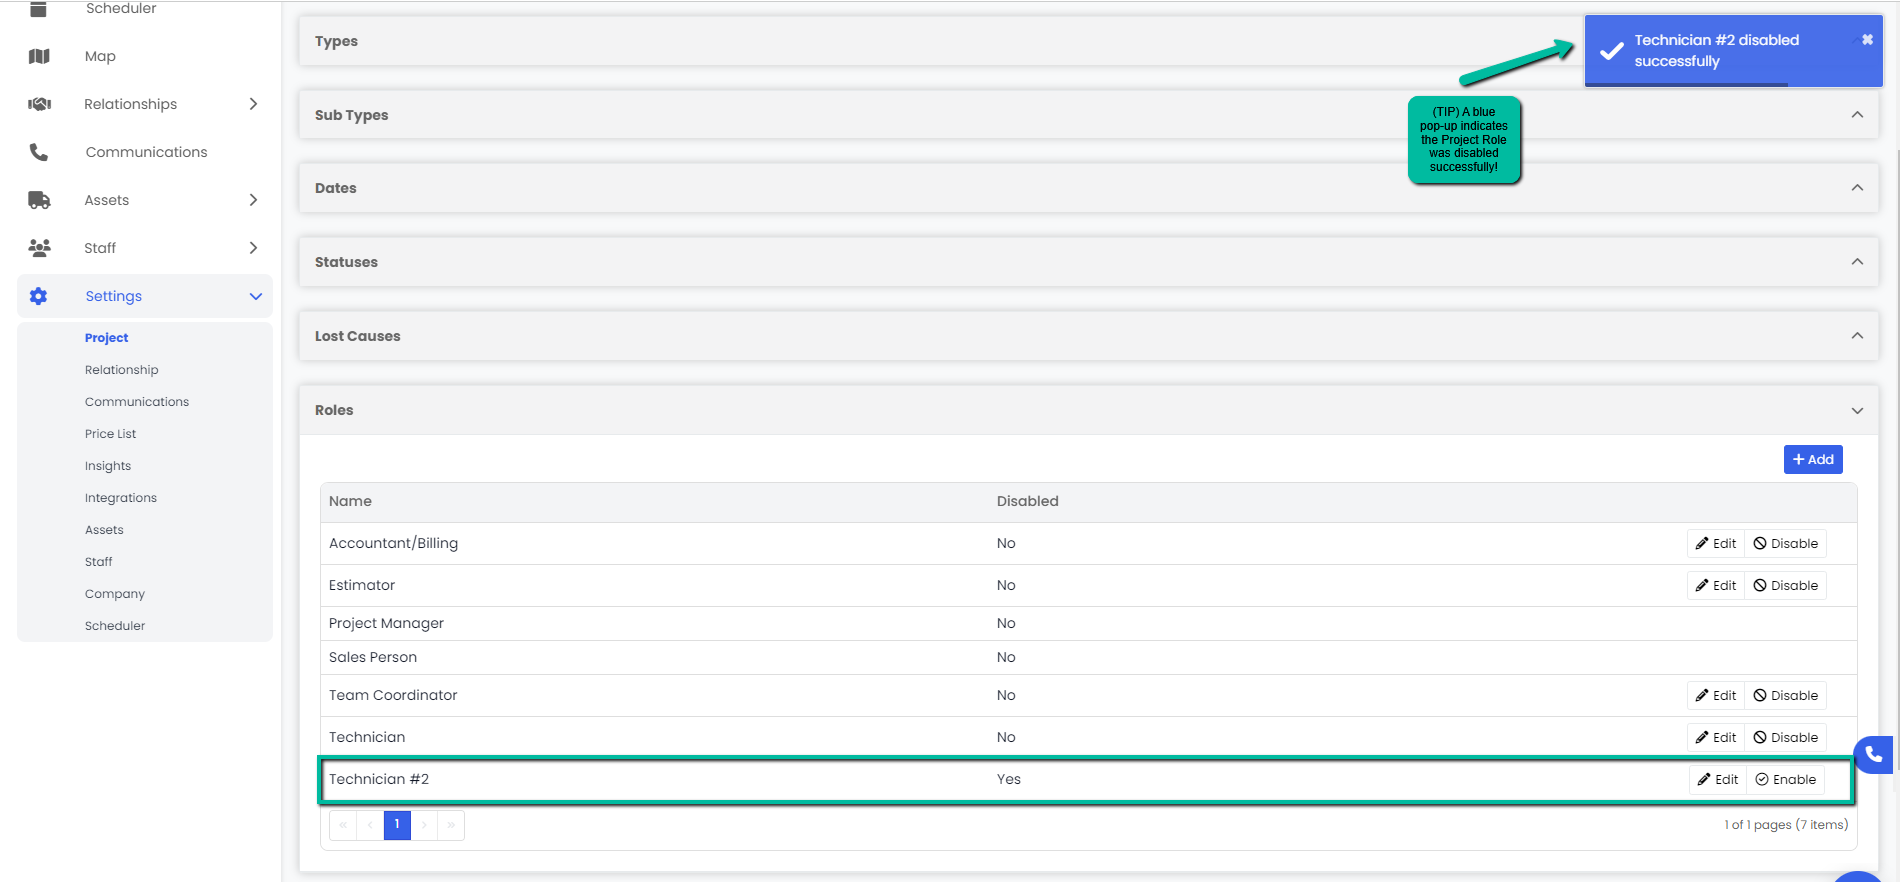
- Navigate to the Settings module and go to the Project page. Select Roles and click the Disable/Enable button on the right hand side of the row you want to edit.
2. A blue pop-up notification will appear on the upper right corner indicating that you have successfully enabled/disabled the project role. Your changes will immediately appear on the Roles tab.