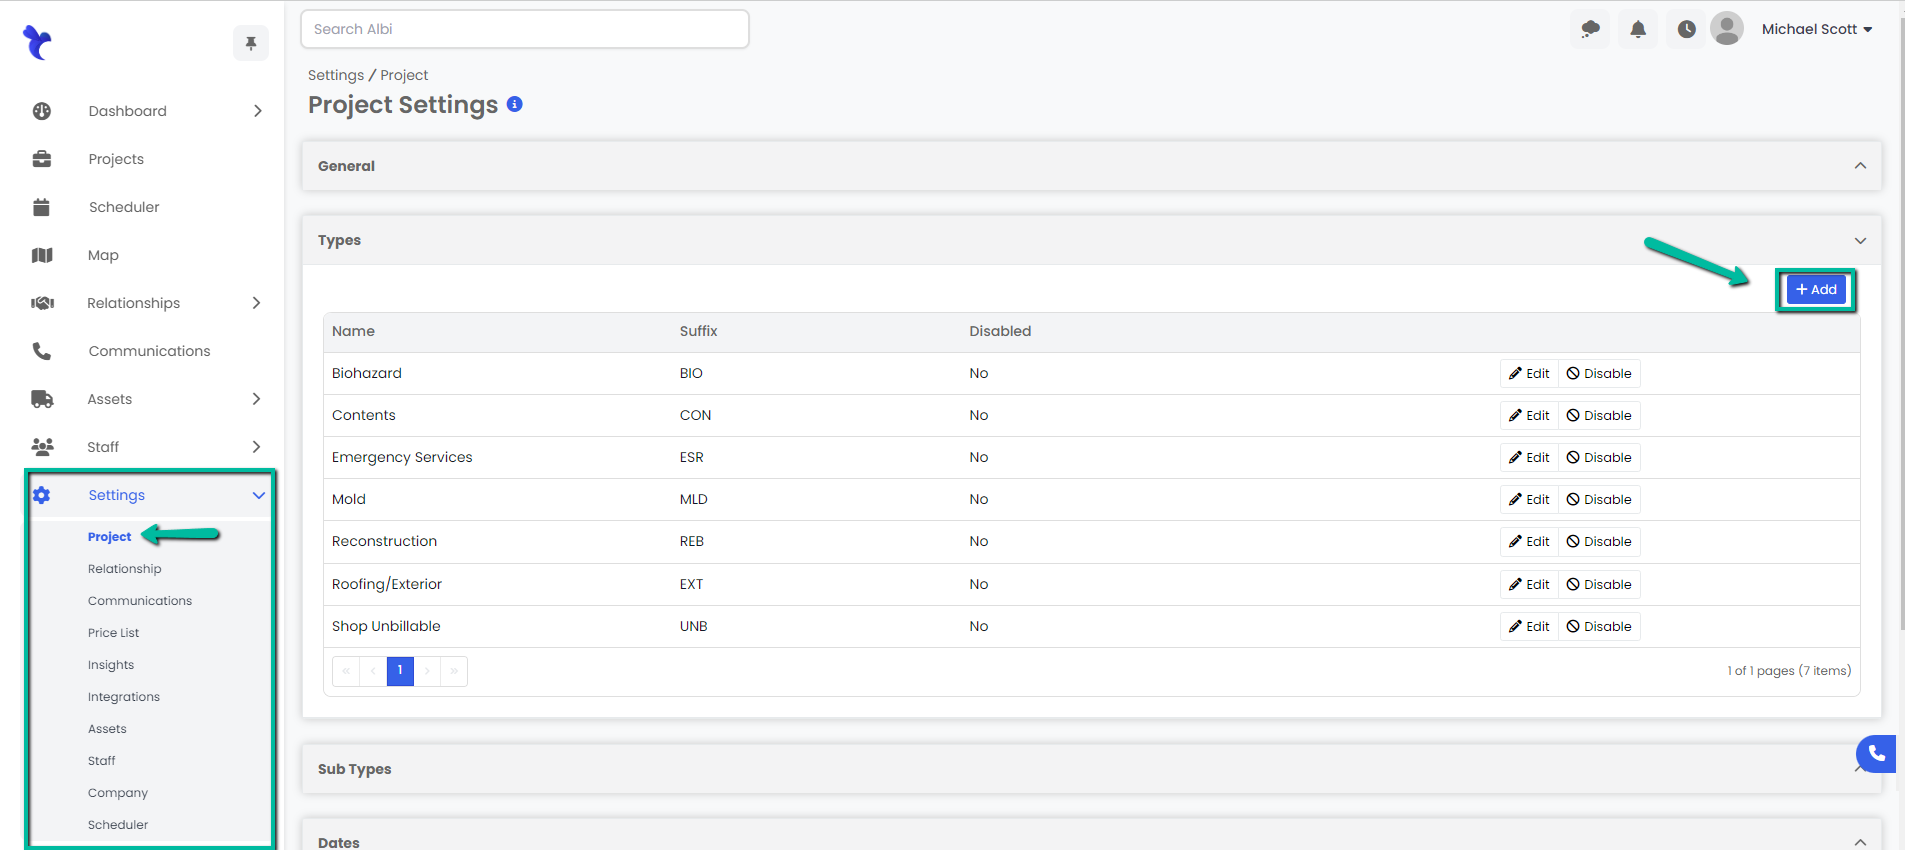
Adding a Project Type
- Navigate to the Settings module and go to the Projects page. Select the Types tab and click the blue Add button.
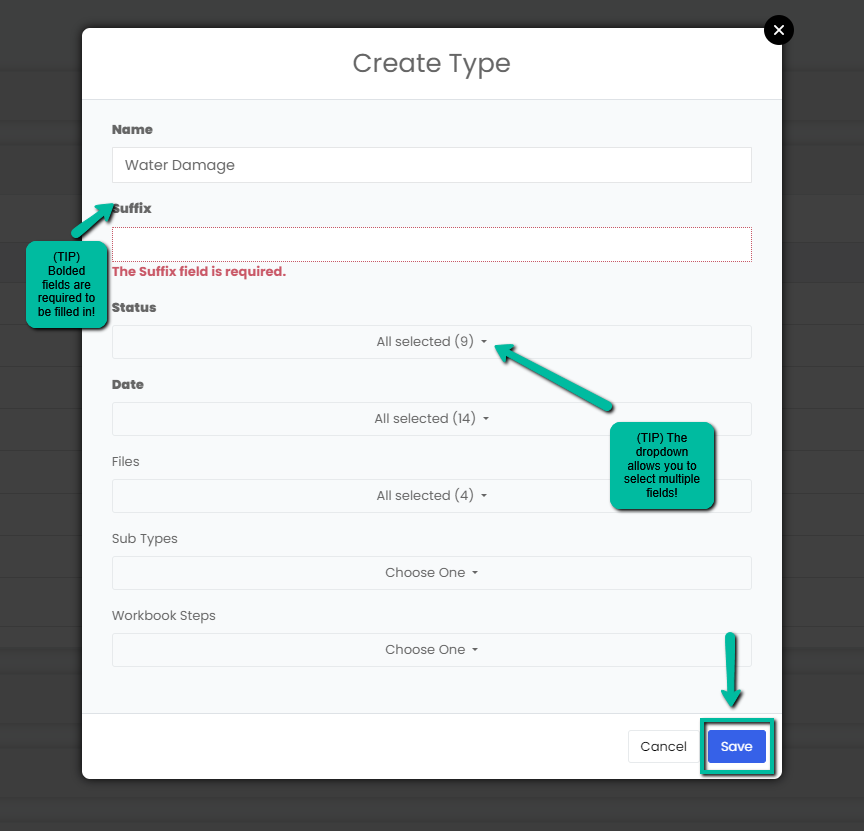
TIPS
a. Keep the Suffix for your Job Type short.
b. There can be multiple statuses selected for each project type.
Example: For Job123-MLD it starts as New --> Sales --> Receivables --> Ready for Production --> In Production --> Completed Not Invoiced--> Final File Review--> Receivables --> Closed --> Lost
c. Select the Dates that apply to the job type in particular.
d. Select the files required for that job type to appear in the file manager such as a COC or Work Authorization.
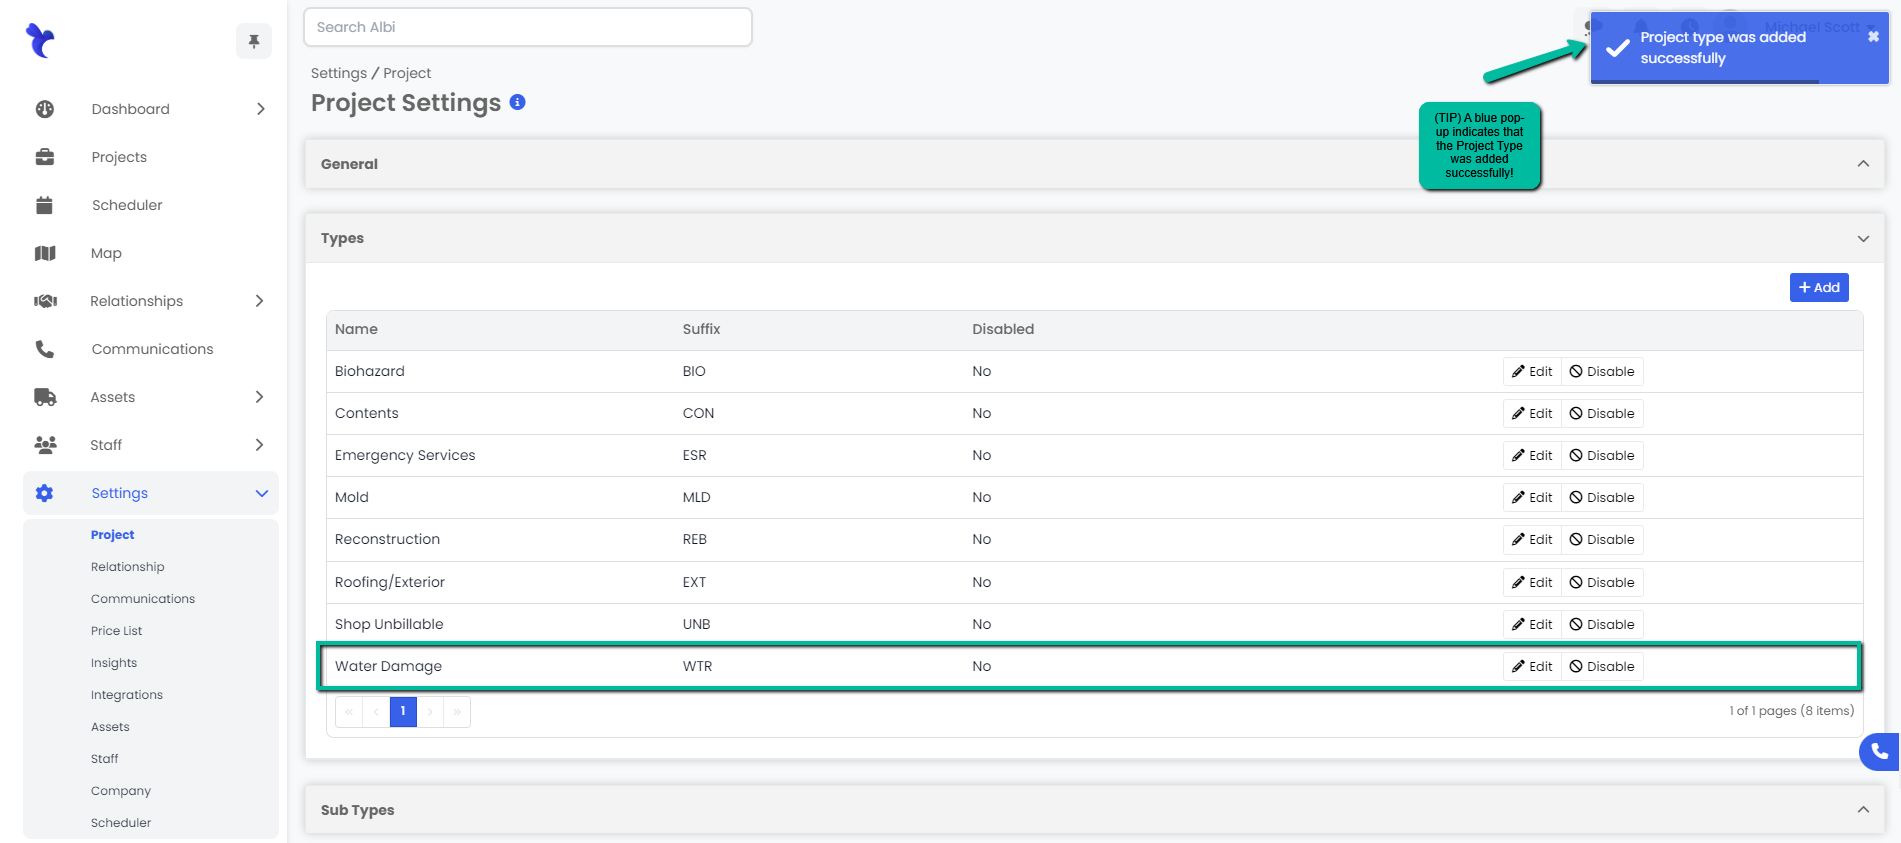
3. A blue pop-up notification will appear on the upper right corner of the screen indicating you have successfully created a project type. Your changes will immediately appear on the Projects Types tab.
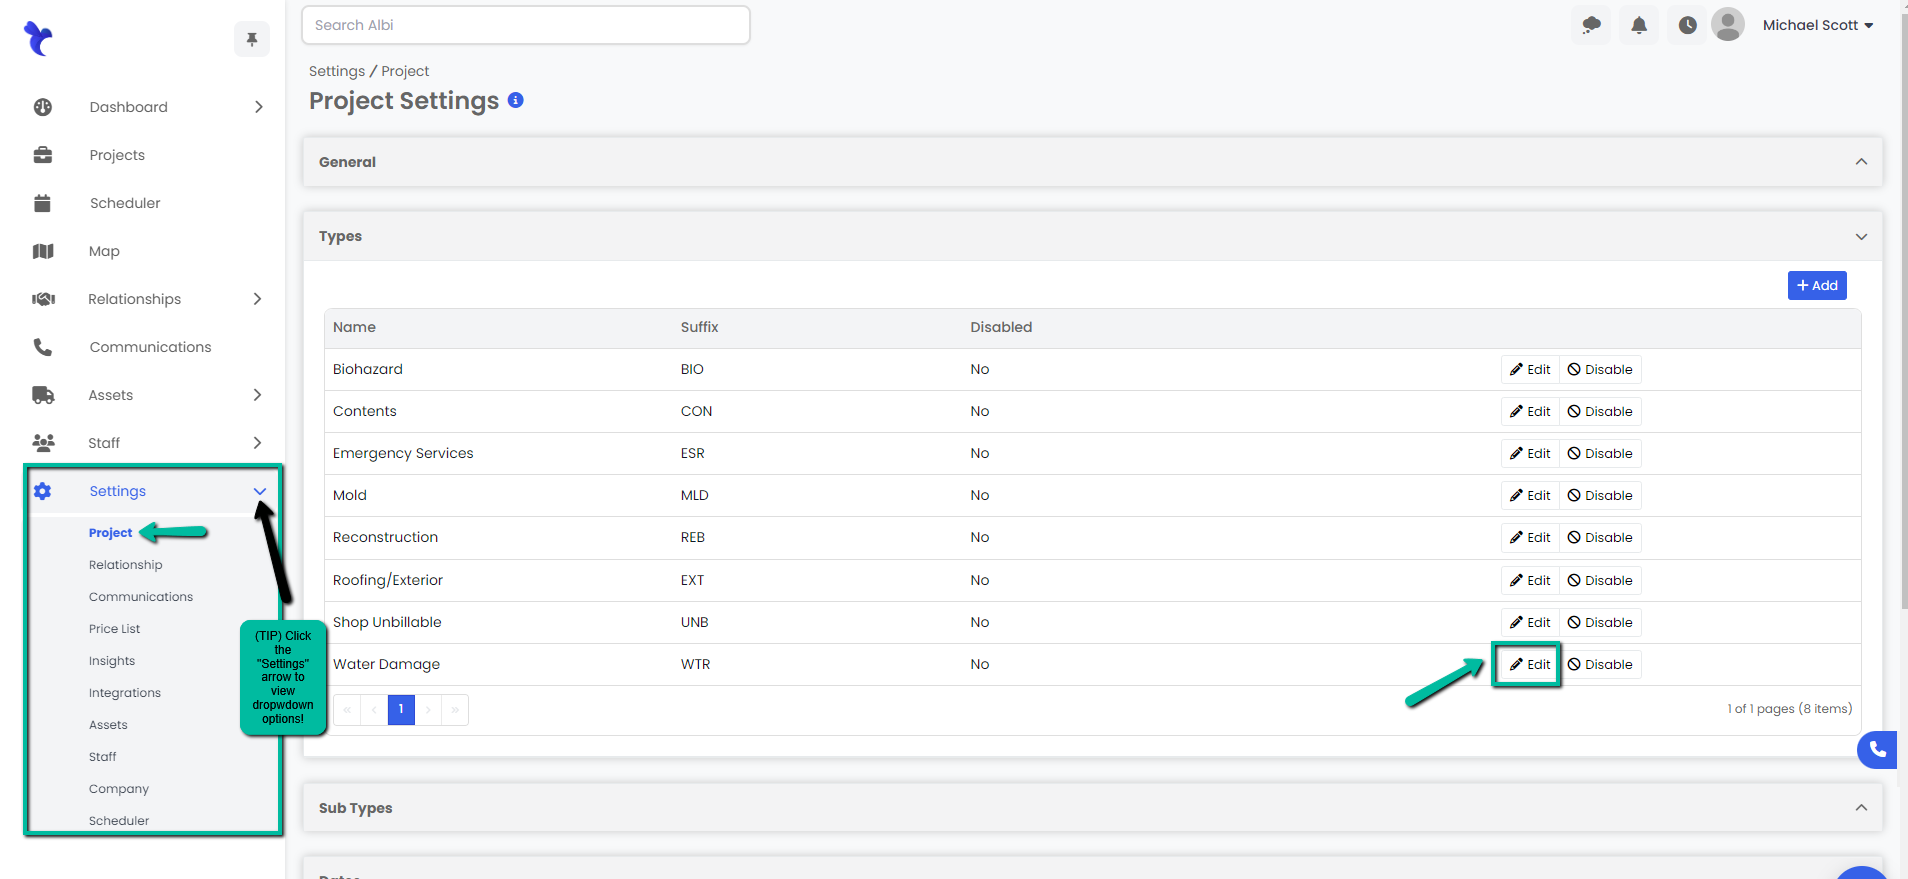
Editing a Project Type
- Navigate to the Settings module and go to the Projects page. Select Project Types and click the Edit button on the right hand side of the project type you would like to edit.
2. An Edit Type modal will appear. Make necessary changes and click the blue Save button to continue. 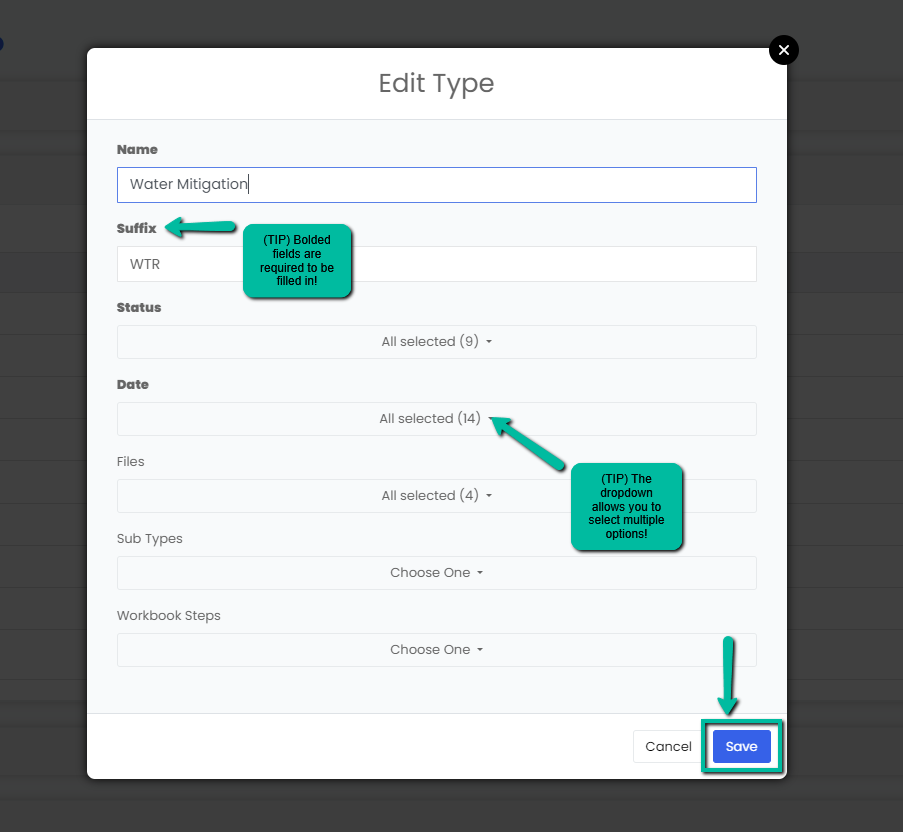
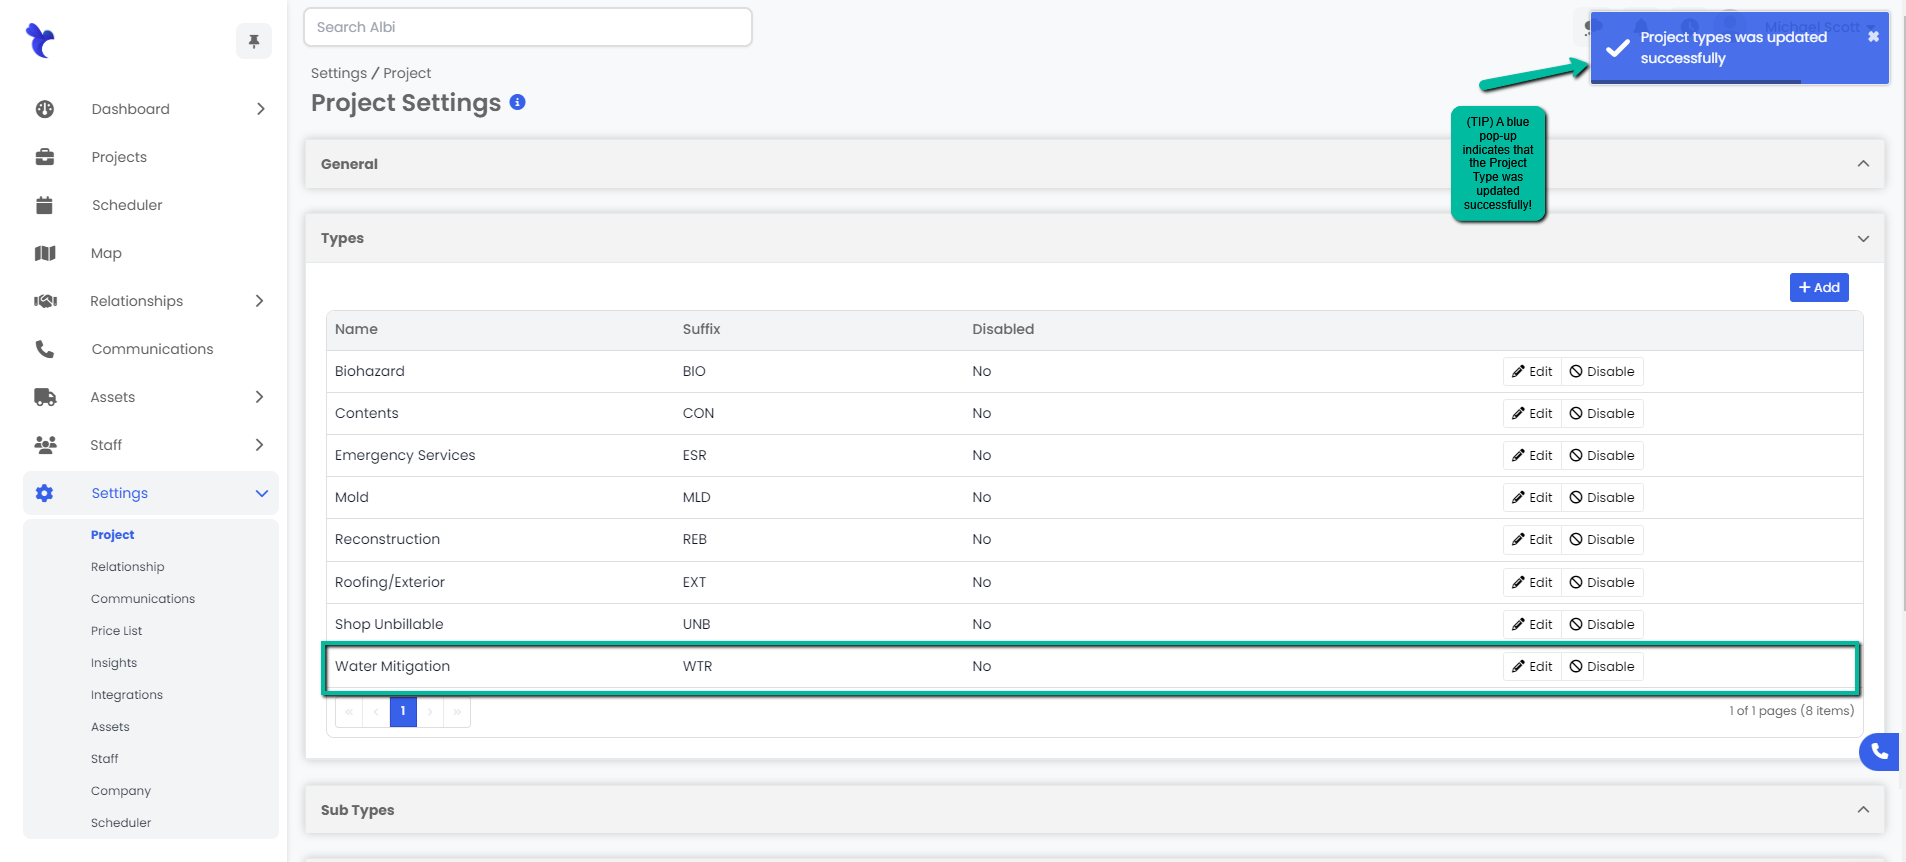
3. A blue pop-up notification will appear on the upper right corner of the screen indicating you have successfully updated a project type. Your changes will immediately appear on the Types tab.
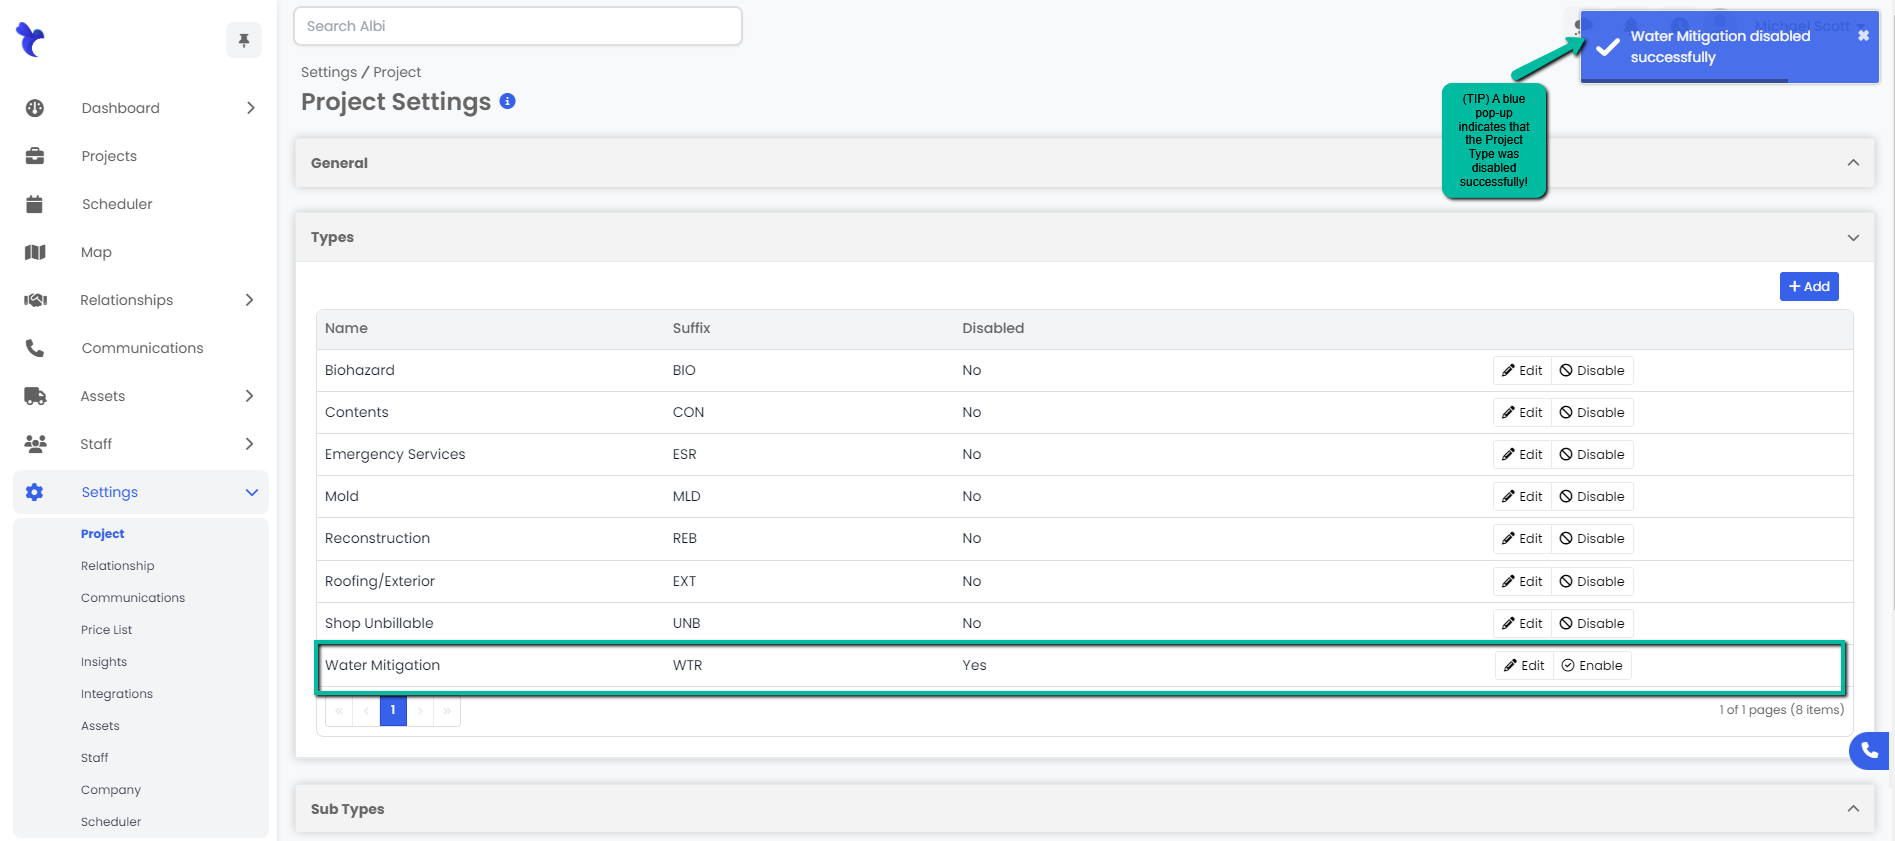
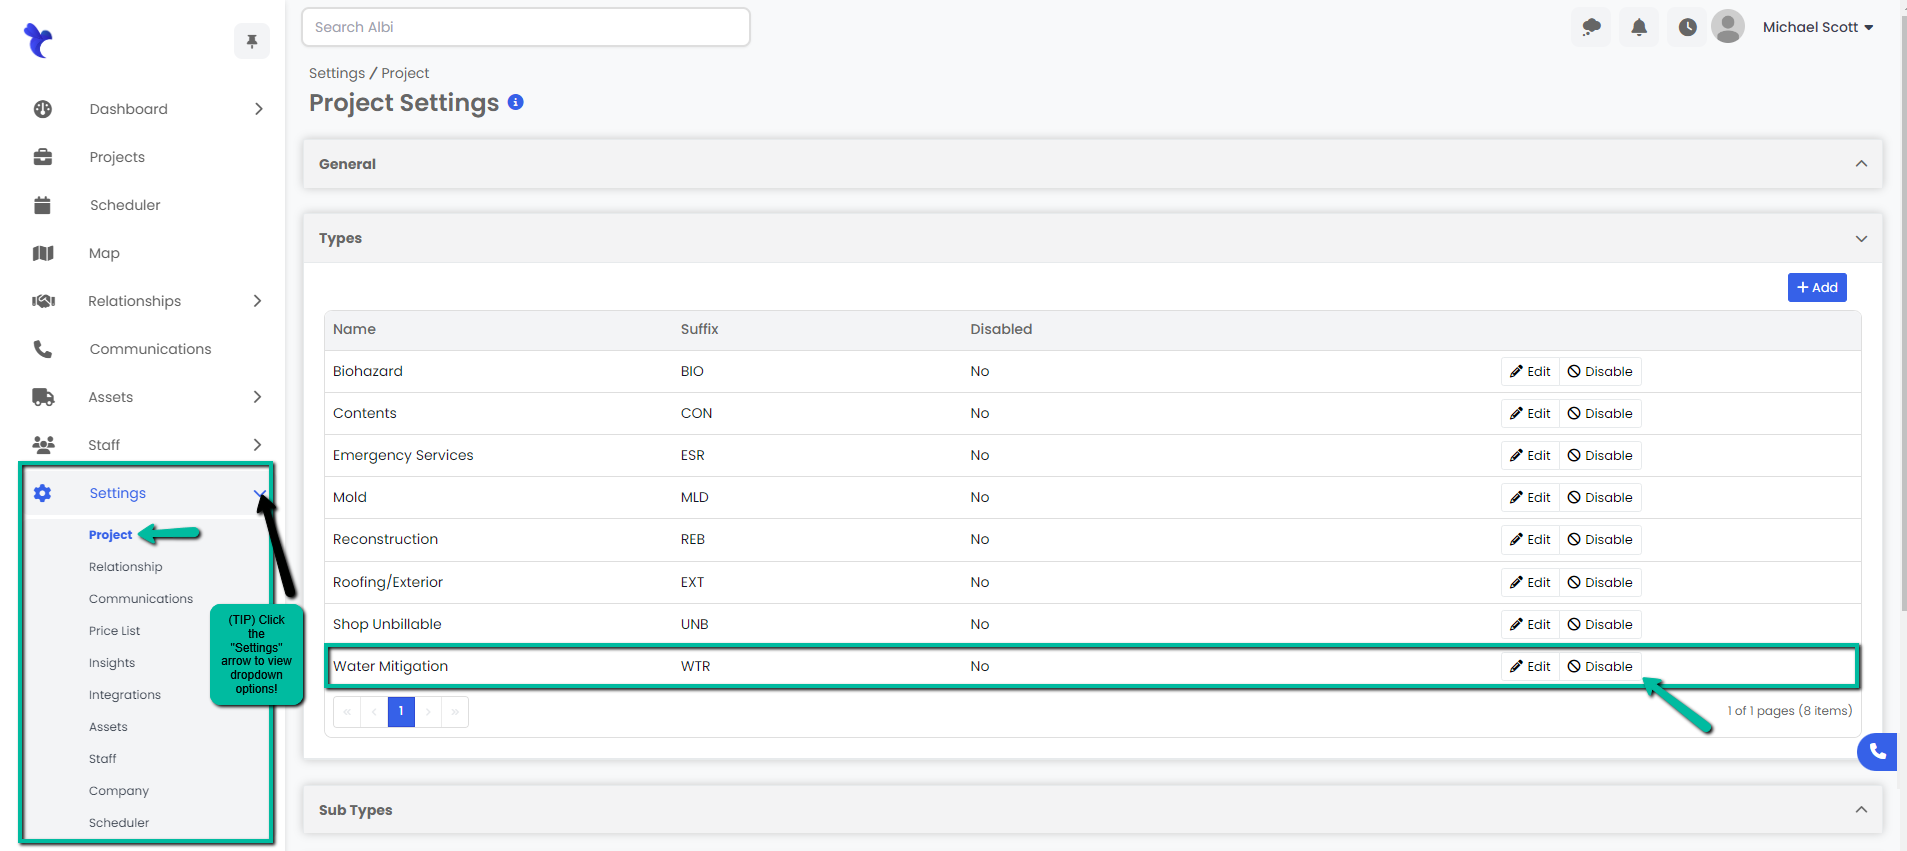
Disabling/Enabling a Project Type
- Navigate to the Settings module and go to the Project page. Select Types and click the Enable/Disable button on the right hand side of the project type you would like to edit.
2. A blue pop-up notification will appear on the upper right corner indicating that you have successfully enabled/disabled that project type. Your changes will immediately appear on the Types tab.