Chambers: Rooms that you will dry
Readings: Moisture readings added daily/continuously
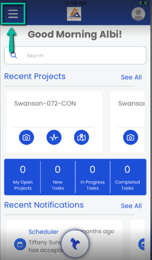
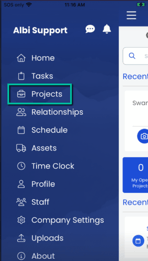
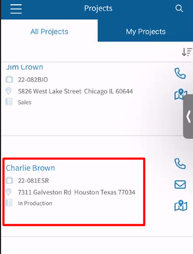
In your Home screen, lets begin by selecting Projects and opening the project you will be working on.
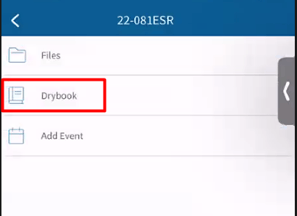
Select More on the bottom right, then Drybook.

You can add a new chamber by selecting the blue + icon on the bottom right hand corner.
Start by selecting Sketch Chamber.

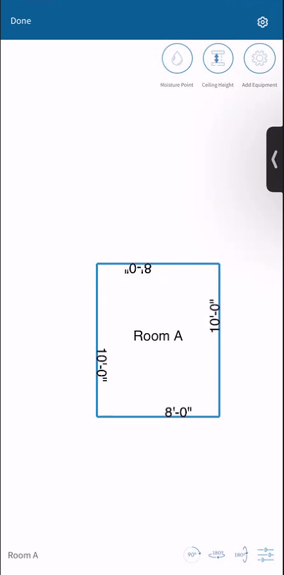
In each sketch, you will be able to create a representation of the chamber you are working in, and document where your moisture points and equipment are at. To add each of these, you can select the Moisture Point icon and Add Equipment found in the upper right corner. You will also see the option to enter Ceiling Height.
Tip: If you select each line, on the upper right corner you will see the option to make a break on the wall. Also, on the bottom right corner you will see a ruler icon, which will allow you to enter the dimensions.
When adding a moisture point, these are the properties that will need to be filled in.
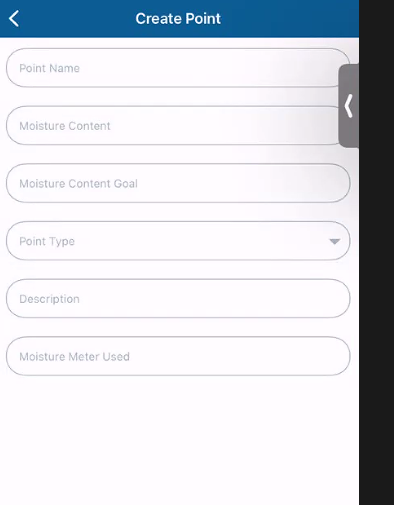
Tip: For Moisture Meter Used, you can enter a default meter that will populate each time you create a moisture point. To do this, please navigate to your main menu, select Profile and under Settings you will find Default Moisture Meter.
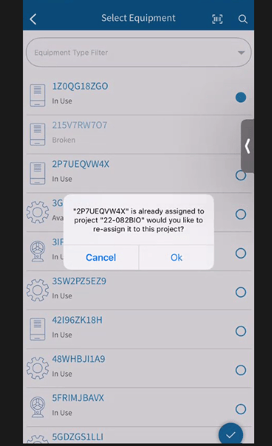
The Add Equipment icon will populate a general list of all the equipment that is in Albi. You will notice each unit includes it's status, indicating if this equipment is already assigned to another project. Simply select the unit that you will be leaving at this site, and select the blue check mark on the bottom right to add.
If a unit's status shows In Use, but you need to reassign it to this project, simply select the equipment, and Albi will ask you to confirm the reassignment of that equipment.
On the upper right corner you will also notice a bar scanner. If you are using bar codes for your equipment, please ensure that this is assigned to each unit when your equipment is added in Albi (if you have questions on how to do this, please contact your Account Manager).
Once your sketch is complete, and you've added all your needed properties, you can select Done on the upper right hand corner and this will save your sketch and take you back to your Chamber Details page.

Under the Chamber Properties tab, you will be able to add Chamber name, class, starting temperature, starting relative humidity, etc.
Note: If you created your sketch prior to adding these properties, you will notice that the app will calculate the AHAM Pints needed for that chamber. Also, once the Chamber Properties are filled in, the Starting GPP will automatically calculate as well.
The next tab over is Moisture Points, where you will easily get a view all the moisture points that were entered for this chamber.
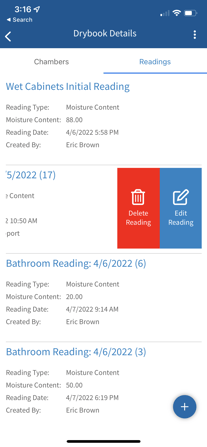
Next, you will see the Readings tab. A list of all your readings for this chamber will display, and by doing a left slide over each reading, you can also Delete or Edit each one. On the bottom right corner you will also find the blue + icon to add a reading from this screen. 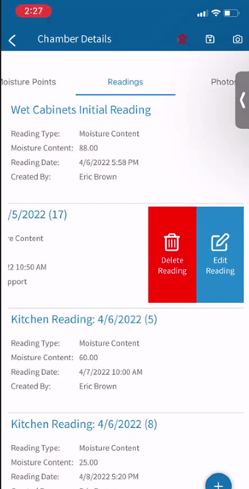
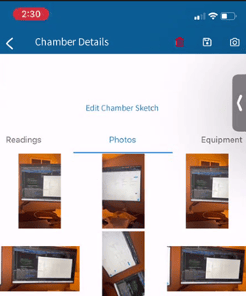
Under the Photos tab, you can take pictures with the camera feature in Albi just like you do for the project in general. By adding pictures under this tab, these pictures will populate in your Dry Book report and also save under your general Images folder in the project.
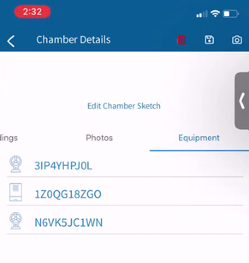
Lastly, you will see the Equipment tab. This is where all the equipment that was adding in the sketch will be listed.
Once all of your chamber details are done, you can select the Save icon on the upper right corner. This action will take you back to the Drybook Details view, where you will now see a list of all your chambers and also a tab where you can locate a list of your readings.
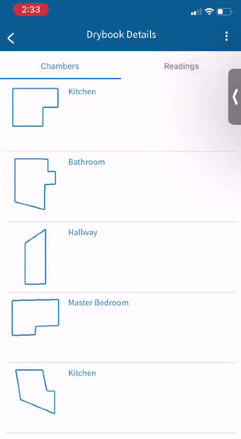
Tip: On the main Drybook Details page, you can swipe left over each chamber to delete a chamber or add a reading.
Under the Readings tab, this same action will prompt the option to delete or edit the reading.

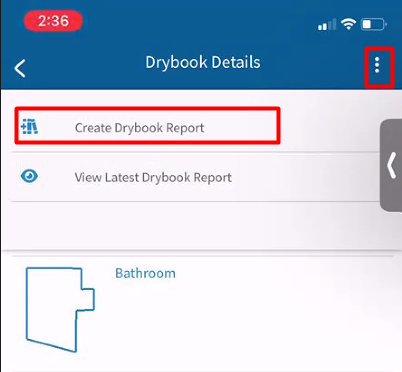
To create a Drybook report, please select the 3 lined dots in the upper right corner and select Create Drybook Report. If there has already been a Drybook report created previously, you will also have the option to View the Latest Drybook Report.
Note: The Drybook report can take a few minutes to generate depending on the amount of data that is being complied. The user logged in will always receive a copy of this report in their email, and a copy will also be saved in the project under the Documents folder.