
You are able to add an activity to an Organization one of two ways: from the general Organizations page, or from a specific organization’s Manage page.
Adding an Activity From a Specific Organization’s Manage Page
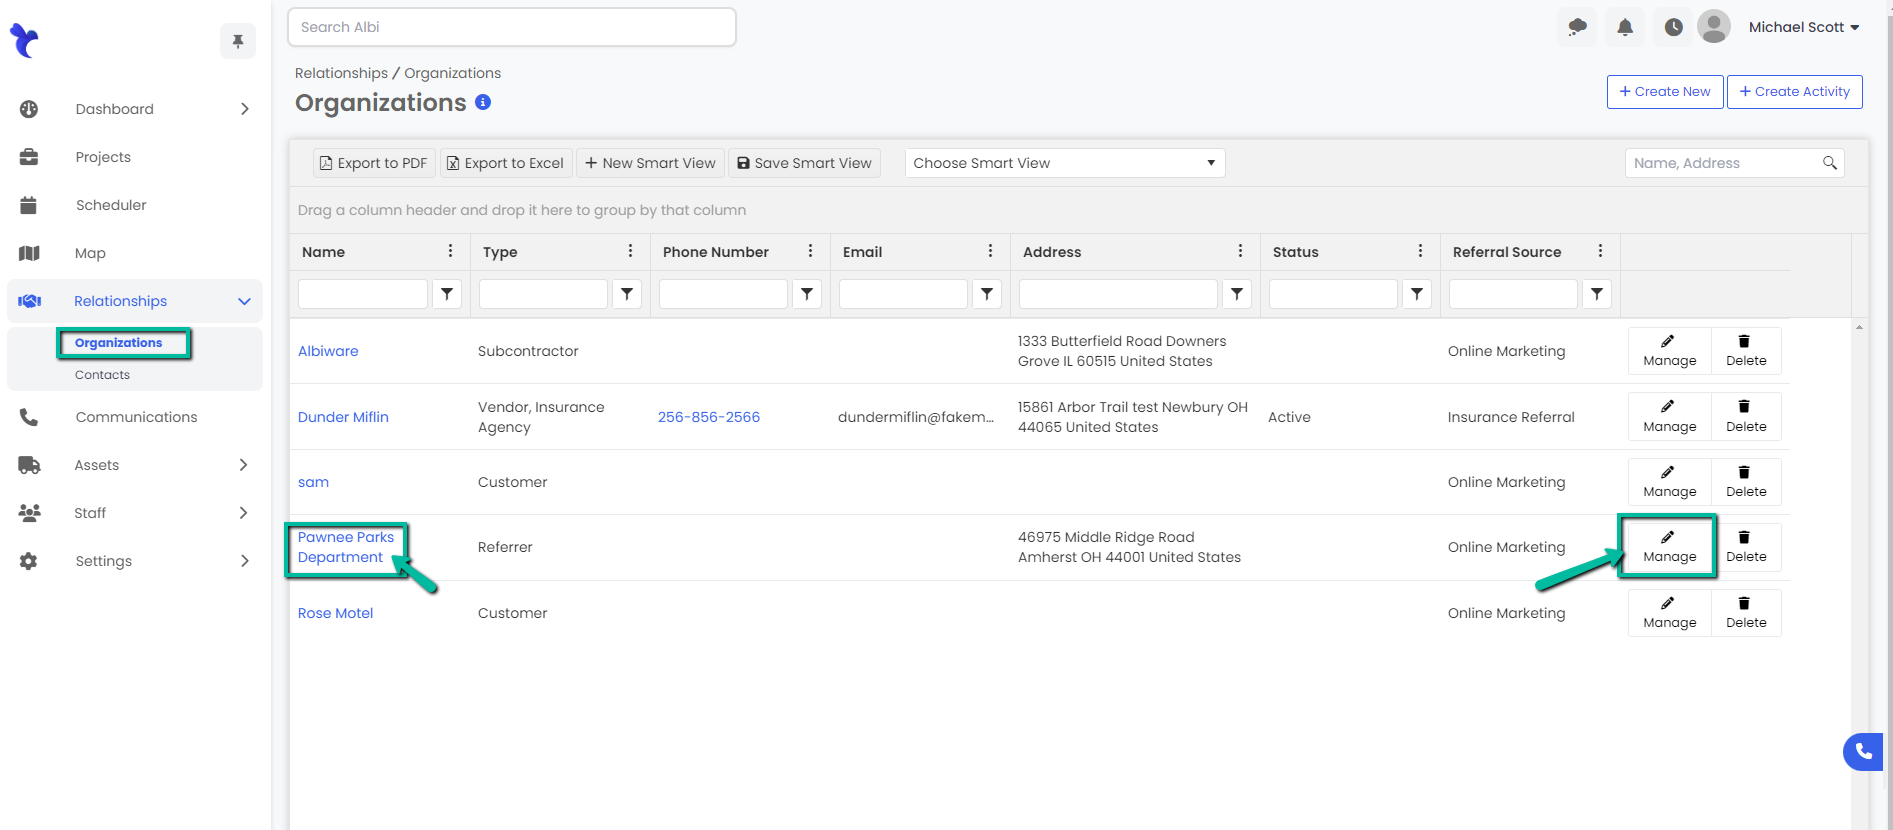
- Navigate to the Organizations module using the sidebar, and find the organization you would like to add an activity to. Click on the Manage button on the right hand side of your Organization’s row or select the Project Name.
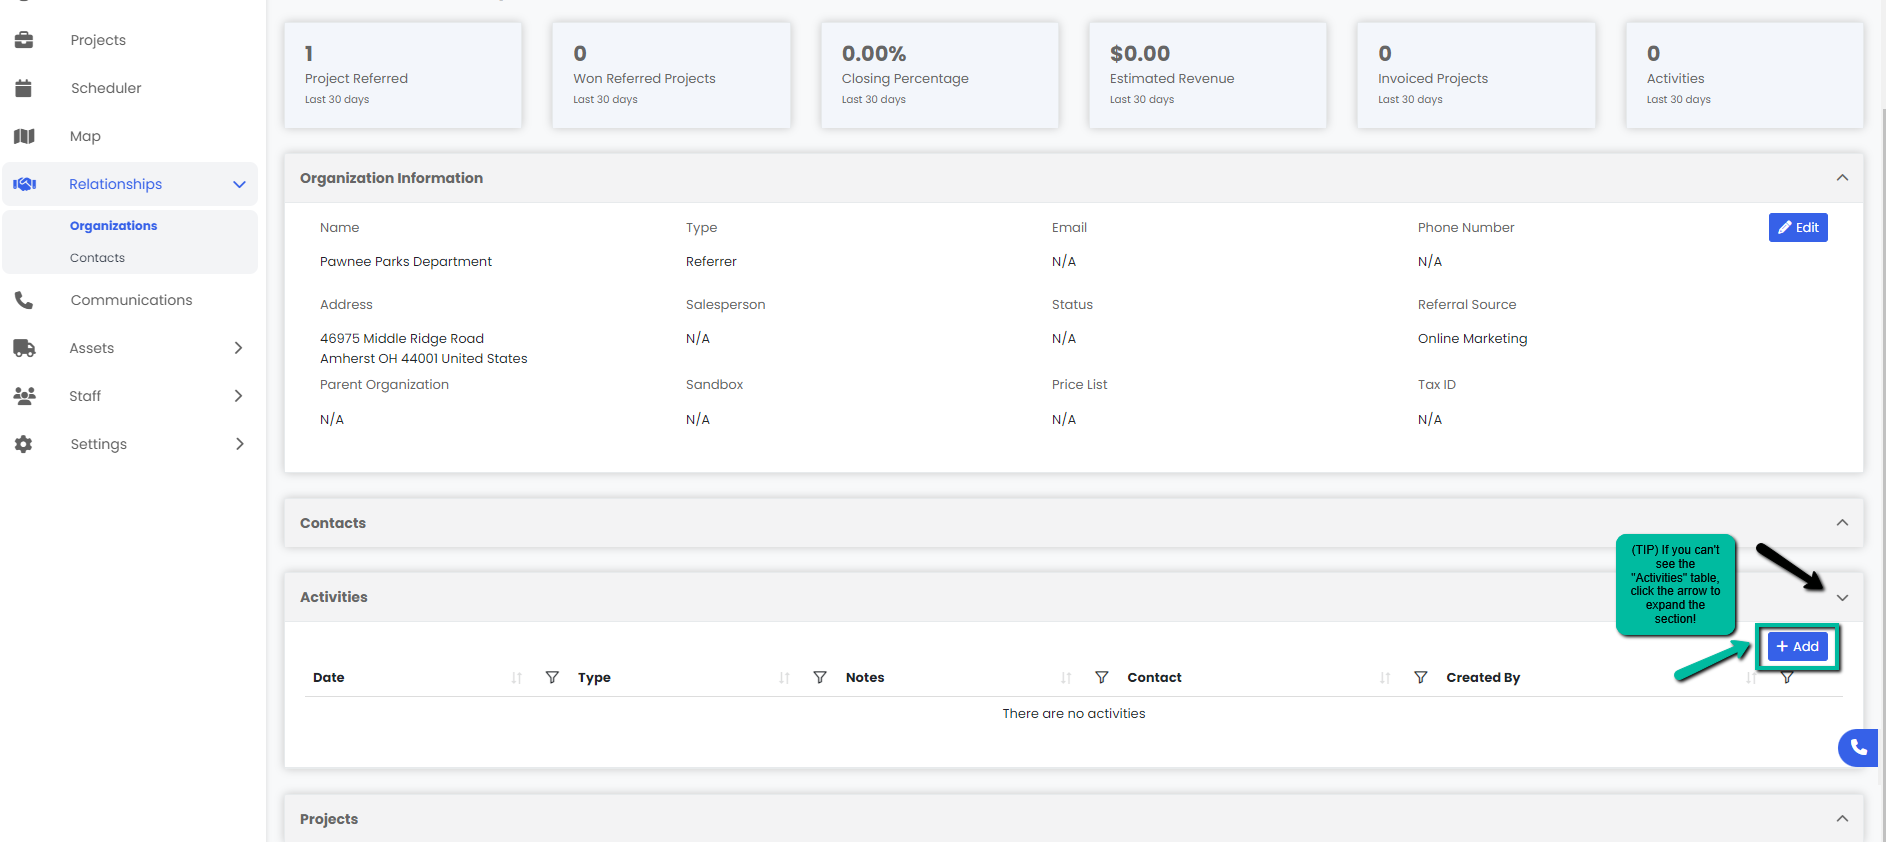
2. Scroll down to the Activity section of the organization’s Manage page and click the Add button.
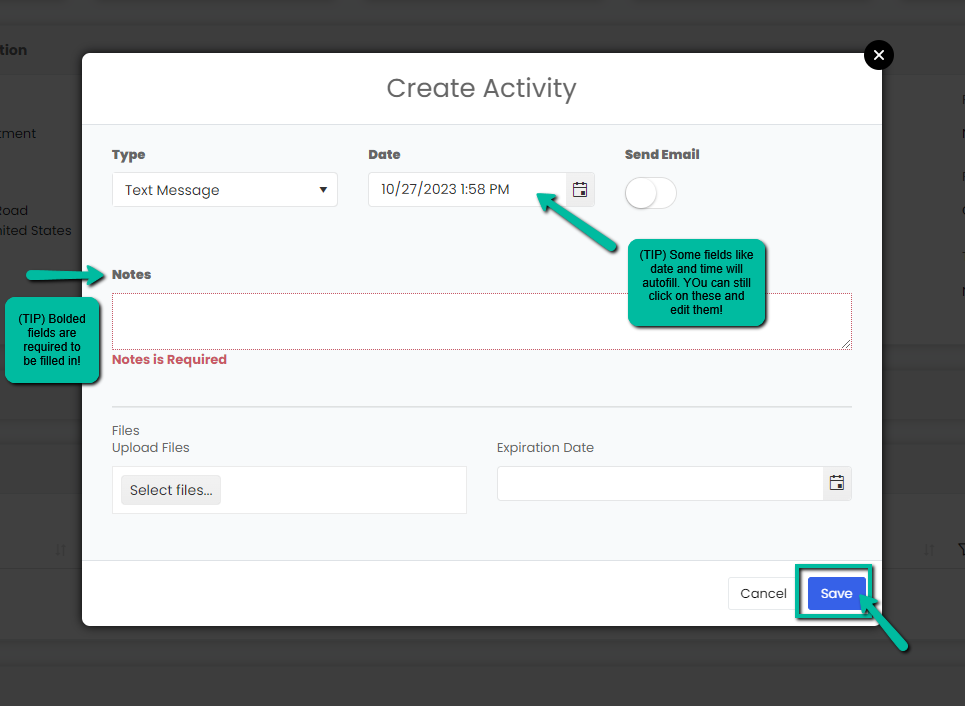
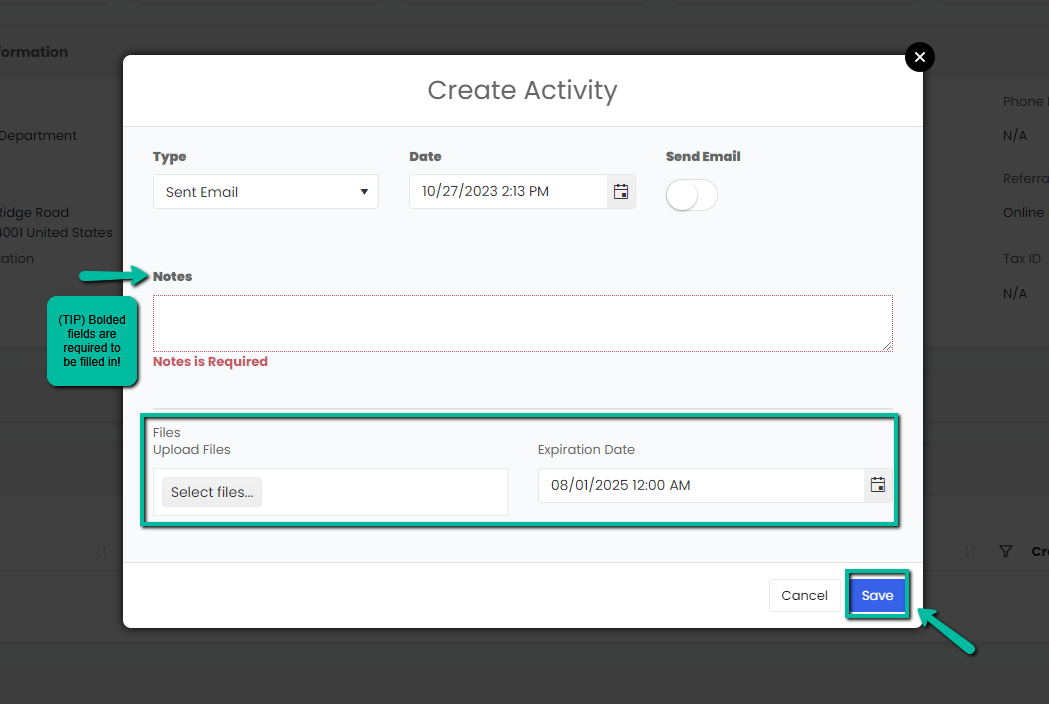
3. A modal called Create Activity will pop up. Enter your activity information here. Keep in mind that bold fields are required in order to submit successfully. The Date and Time fields will automatically fill themselves in, but you can still click and edit them!
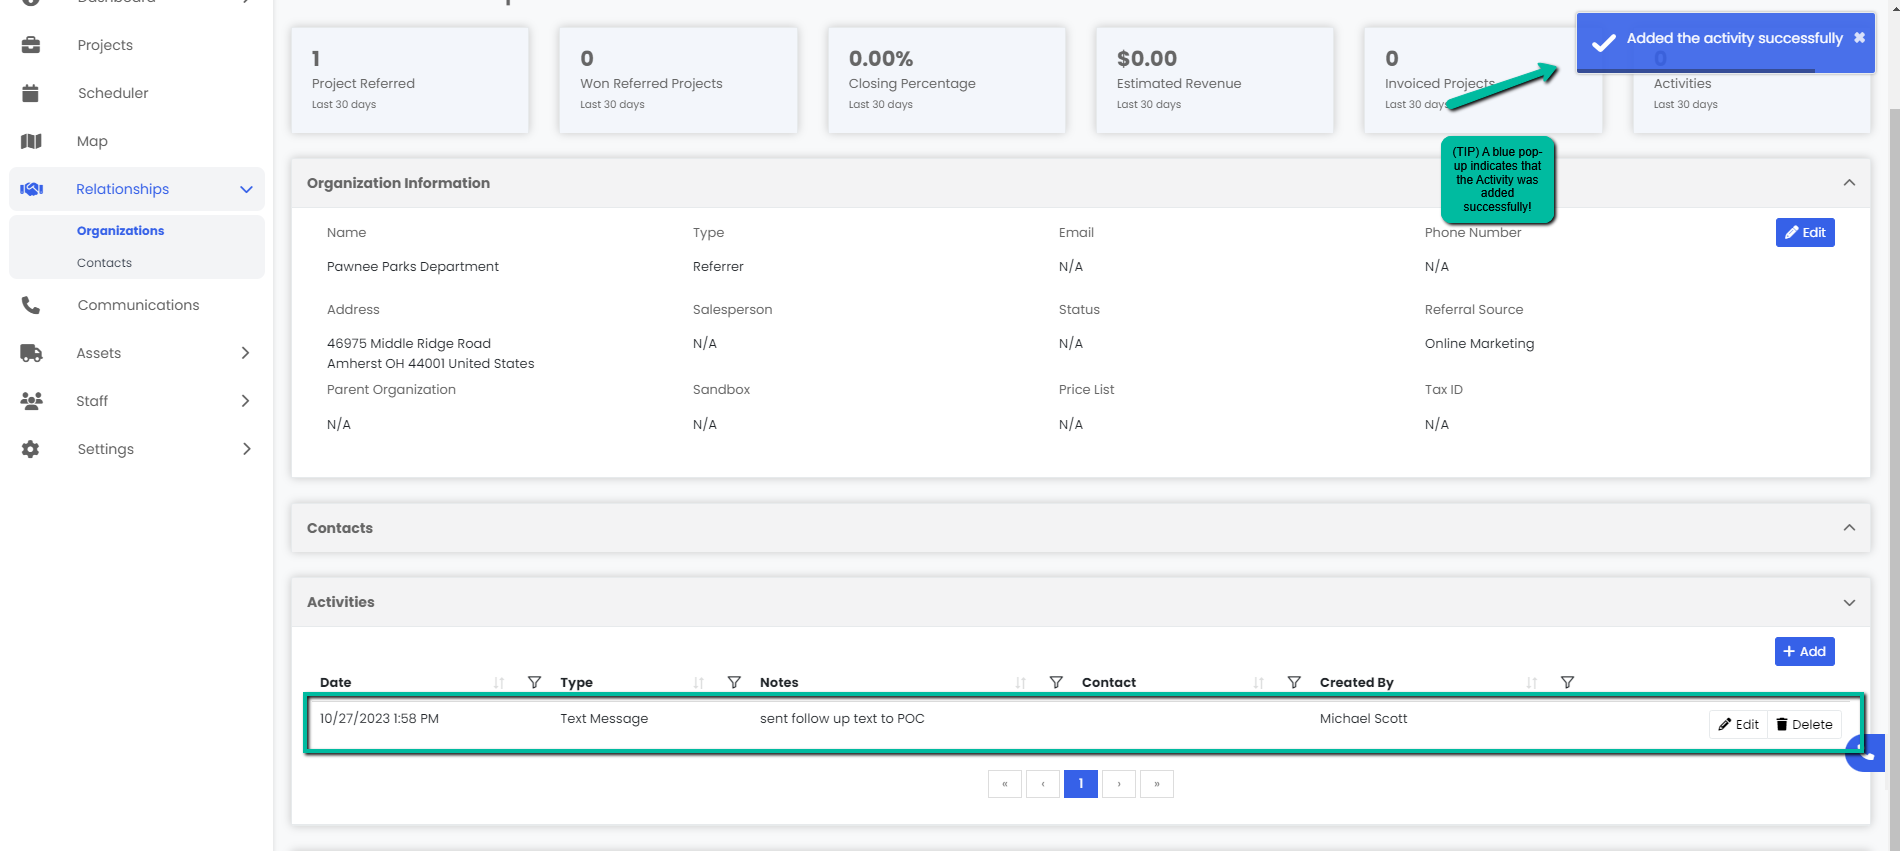
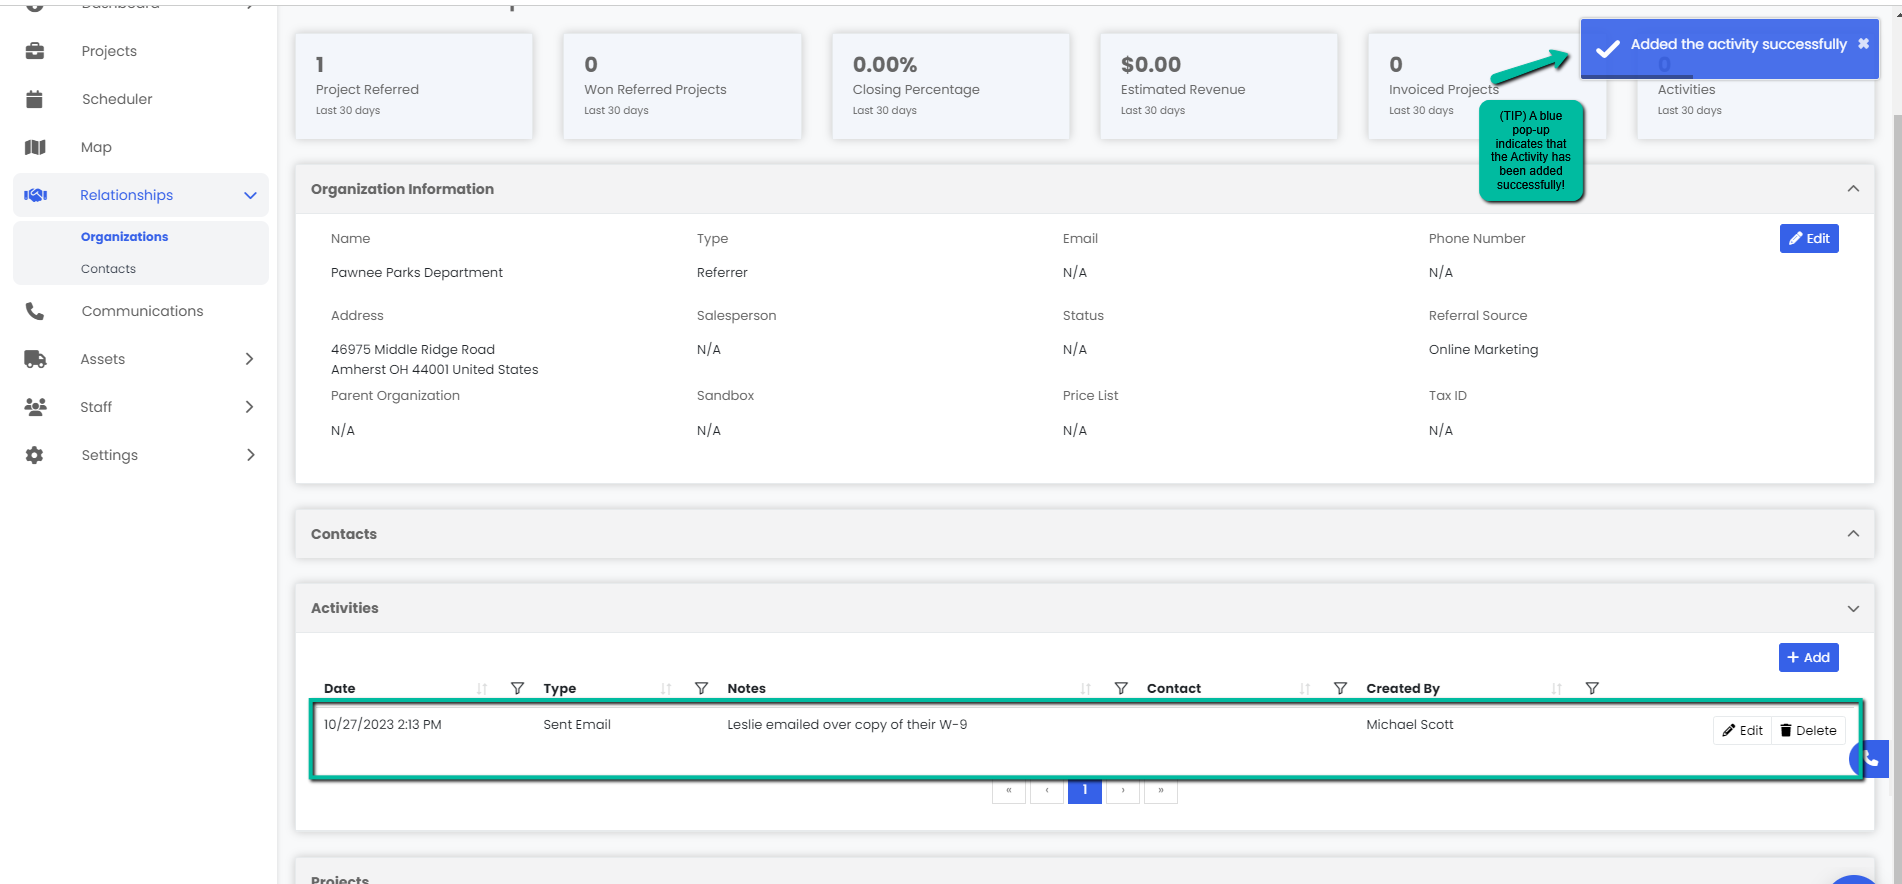
4. Click the blue Save button to save your activity. The page will automatically refresh and you will see your new activity under the Activity section immediately. A blue pop-up notification will also confirm that your activity has been successfully created in the top right corner of the screen.
Editing an Activity
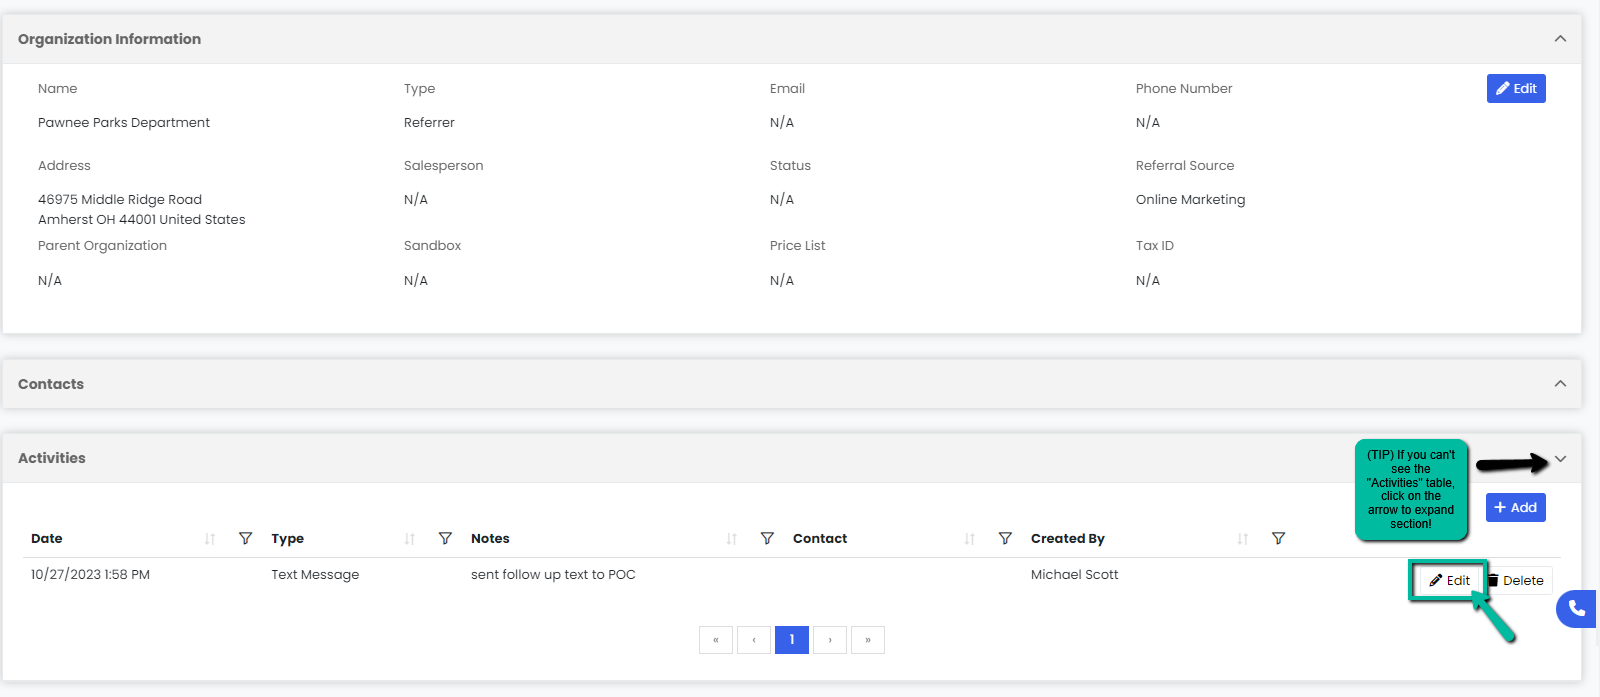
- Scroll down on the Organization’s Manage page and click on the Edit button next to the activity you’d like to edit.
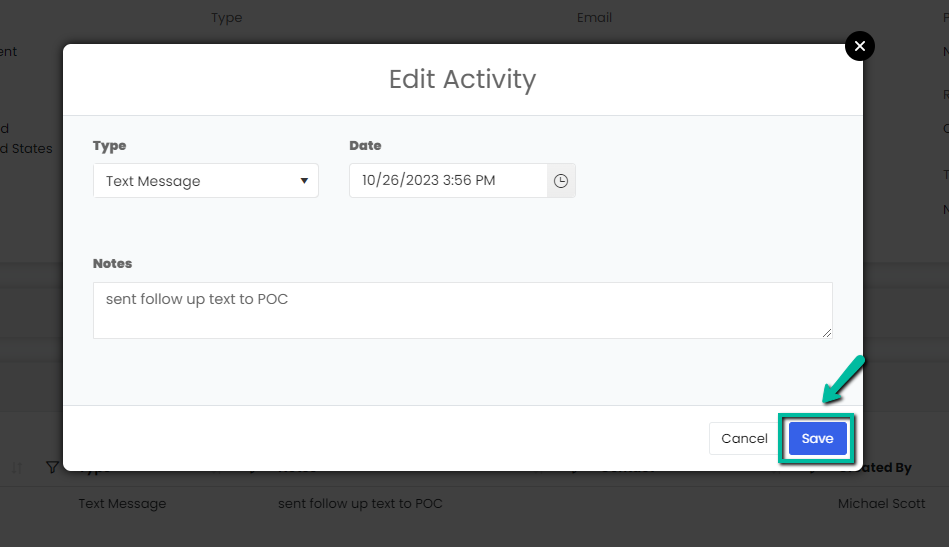
2. Make any changes to the activity and click on the blue Save button.
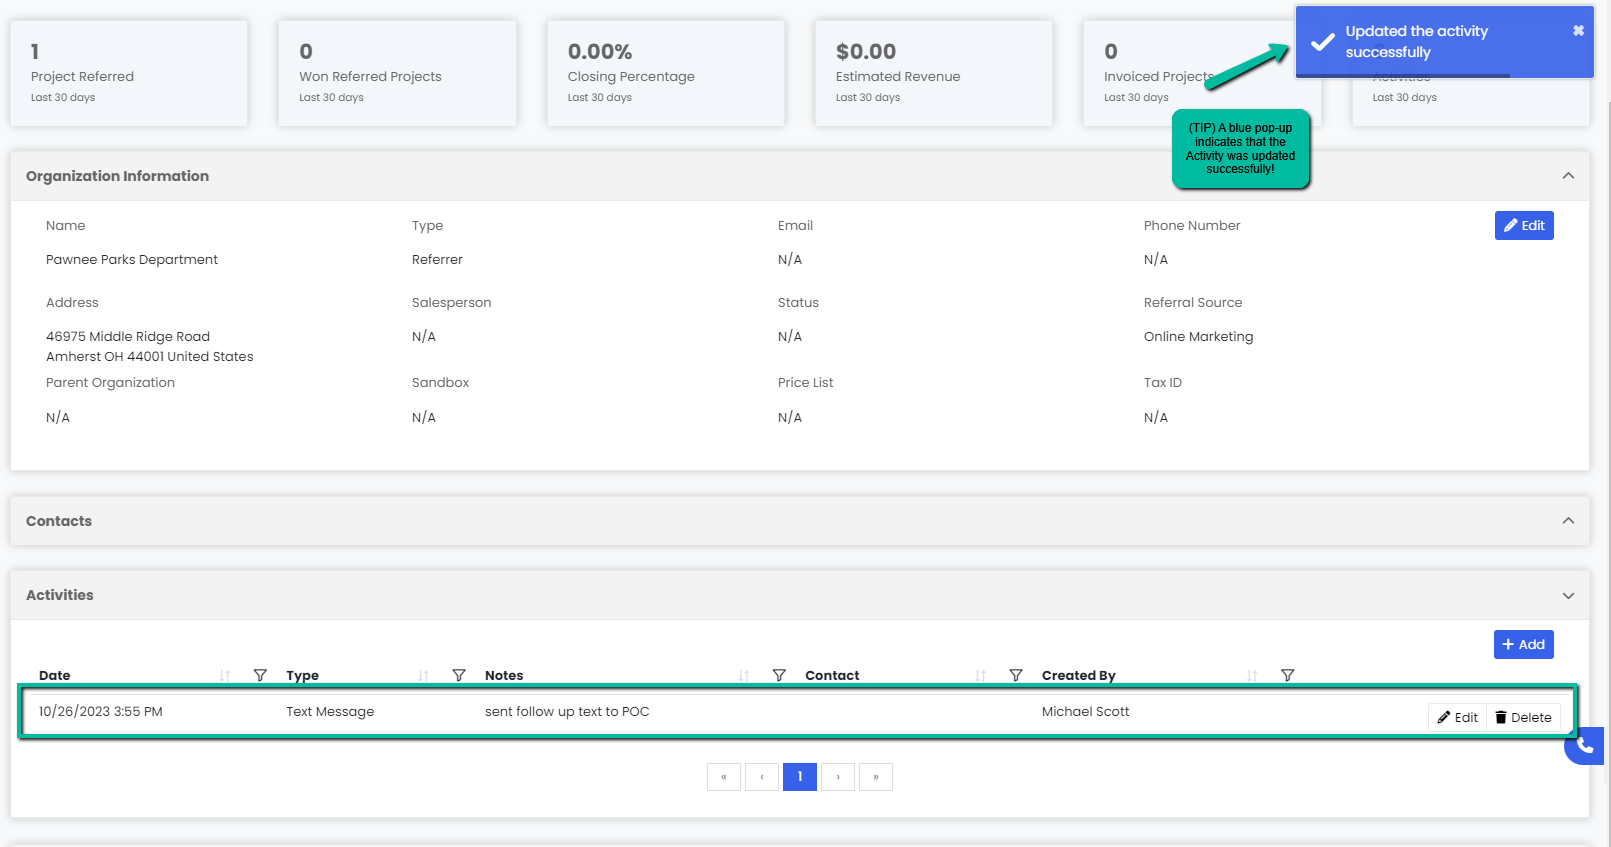
3. The updates to your activity will be immediately visible. A blue pop-up notification in the top right corner of the screen will also confirm that you’ve successfully edited your activity.
Deleting an Activity
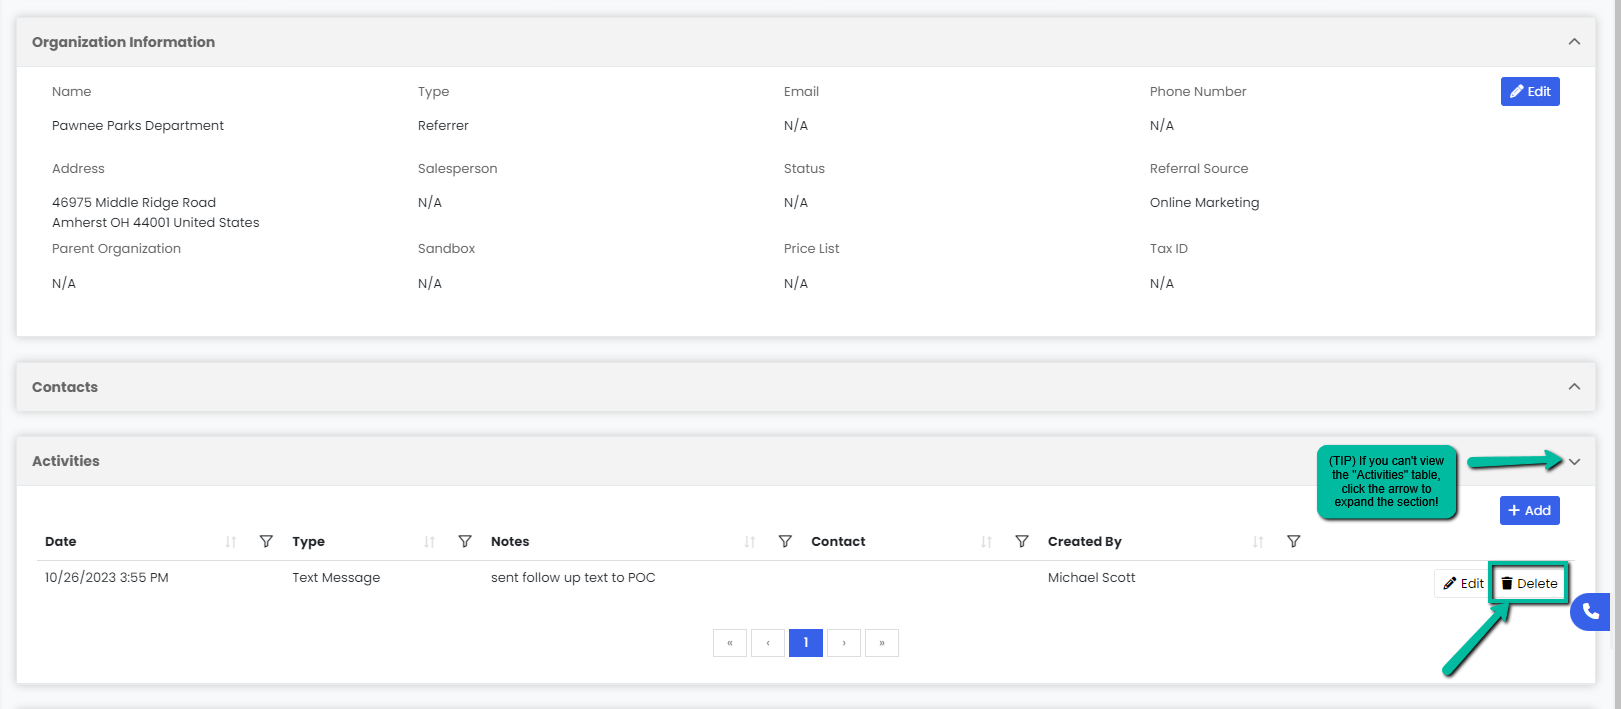
- Scroll down to the Activity section of the Manage Organization page and click on the Delete button next to the activity you would like to delete.
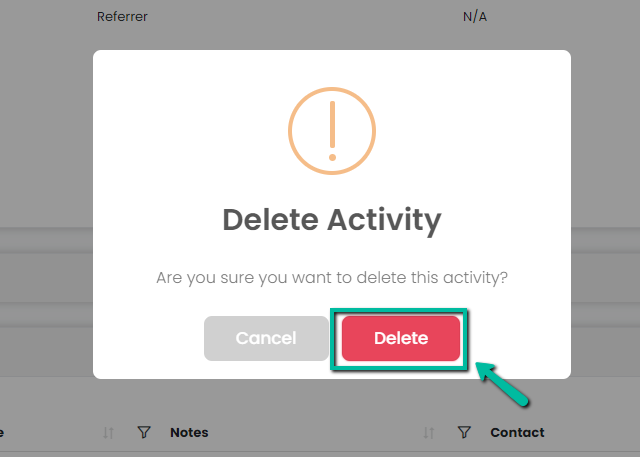
2. A pop-up will appear asking you to confirm the deletion of that activity. Click the red Delete button to confirm and delete the activity.
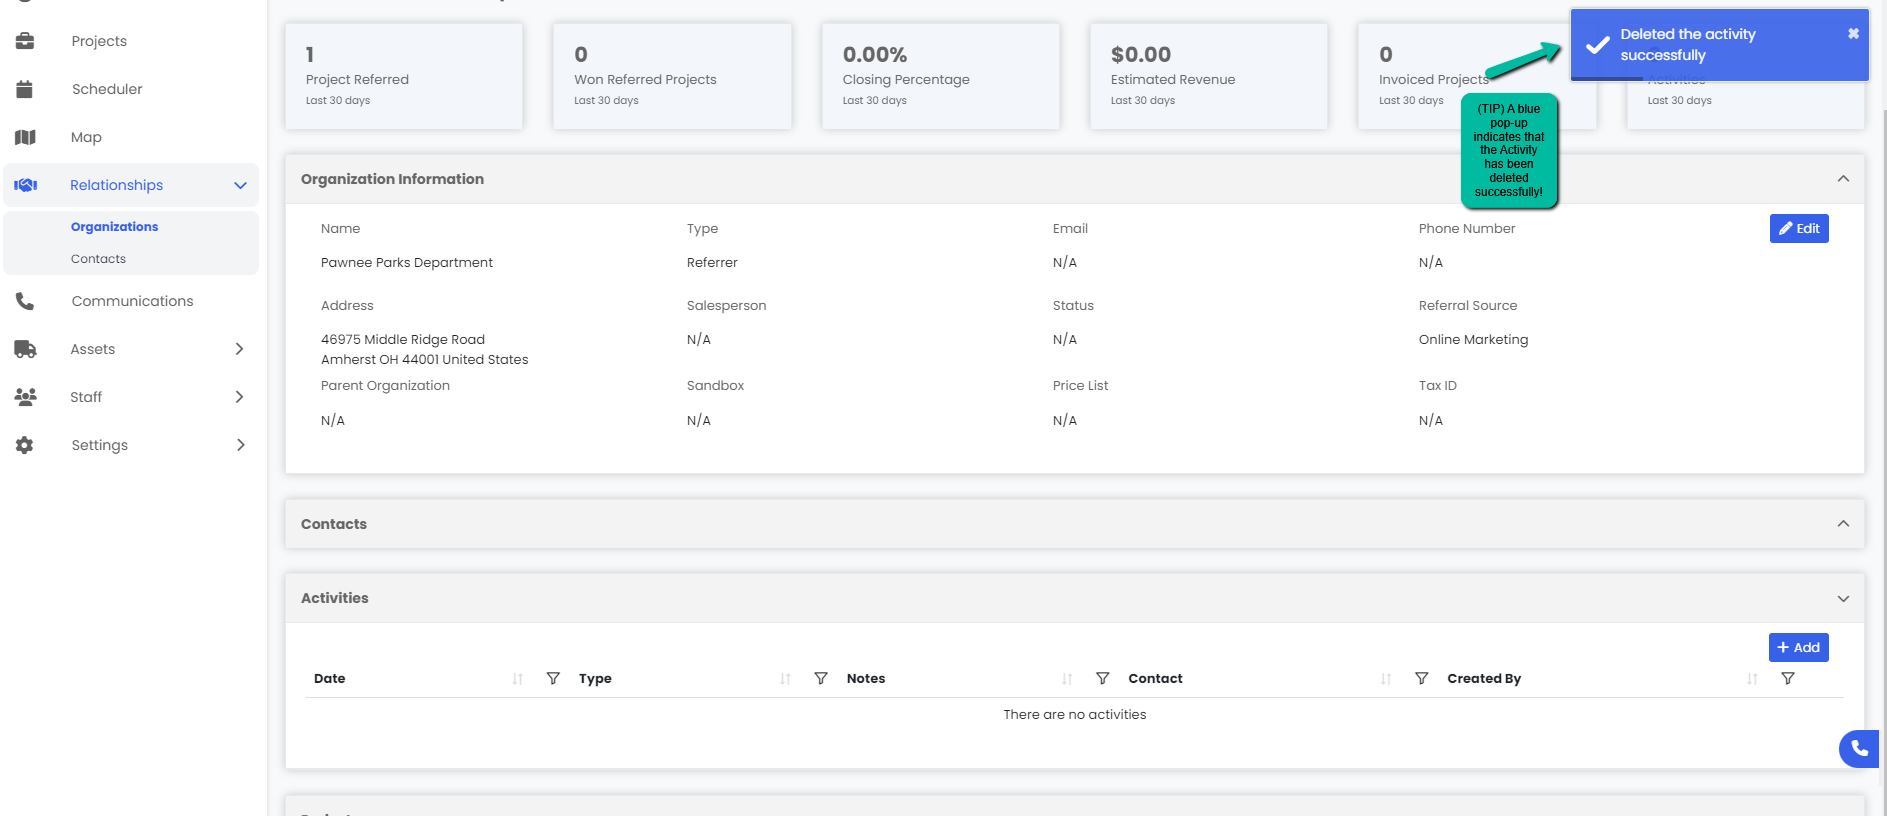
3. Your activity will be removed from that organization immediately. A blue pop-up notification will also appear in the top right corner of the page confirming the successful deletion of that activity.
Adding a File and an Expiration Date
1. Scroll down to the Activity section of the Manage Contact page and click on the Add button under the Activities section.

2. In the Create Activity panel you will have the option to add a file and add an expiration date. Once you have added the desired file and date all you will have to do is click on the Save button.
3. A blue pop-up notification will appear indicating that that Activity has been added successfully. Activity will be reflected automatically under Activity Section.
Tip: This can be used for keeping a track of W-9 or any insurance paperwork that might get expired.