
1) Connect Xactimate
- In Albiware, go to Settings → Integrations.
- Find Xactimate.
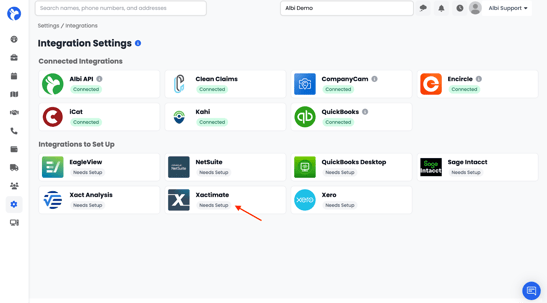
- If it’s not connected, click Connect.
- You’ll be taken to the Xactimate Integration Settings page.
2) Enter your Xactimate Net Address (Required)
What it is
Your Xactimate Net Address is a unique identifier for your Xactimate account. It must include an “@” symbol.
Example format: albi@engineering.albi.com
(Your value will be different.)
You can also configure a different Xactimate Net Address for each company location, allowing each location to use its own credentials.
-png.png?width=609&height=294&name=image%20(1)-png.png)
Where to find it in Xactimate
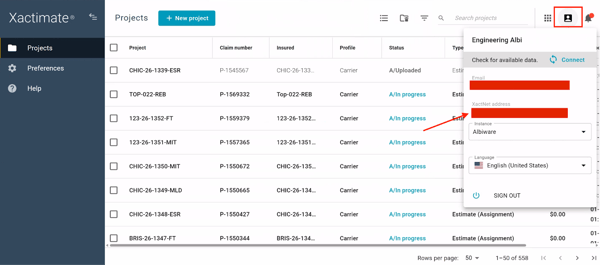
- Log into Xactimate.
- Click your account/profile icon (top-right).
- Look for your Net Address and copy it.
- Paste it into Xactimate Address in Albiware.
You can follow Xactware’s step-by-step guide here: Xactimate NetAddress
Tip: If you paste something without an “@”, it’s probably not the Net Address.
3) Xactimate Project Options
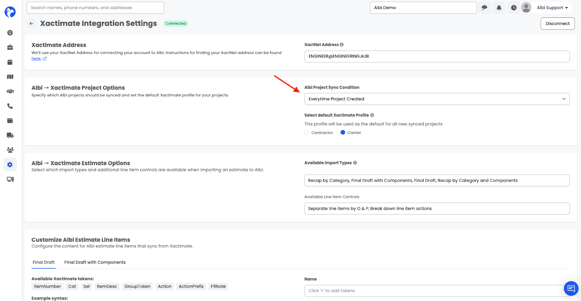
Albi Project Sync Conditions:
This controls when Albiware should create/sync a project into Xactimate.
Common options you may see:
- Every time a project is created
Best if you want Xactimate projects created automatically for every job. - On certain statuses (ex: “In Progress”, “Estimate Started”, “Approved”, etc.)
Best if you only want Xactimate projects created when a job reaches a specific status. - On certain dates
Useful if your workflow depends on milestones (like start dates). - On certain types (ex: mitigation vs rebuild, internal categories, etc.)
Best if only some project types should go to Xactimate.
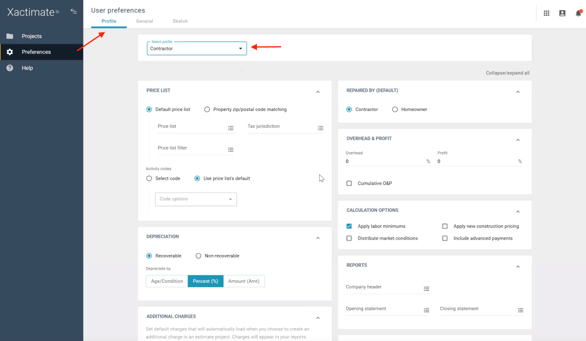
Default Xactimate Profile
This profile is used as the default for any newly synced projects.
You’ll usually choose one of these:
- Carrier profile
- Contractor profile
Carrier vs Contractor (what customers actually notice)
The biggest practical difference is editing behavior:
- Carrier profile: You’re typically able to edit key project/customer/insurance details in the Xactimate project after it’s created.
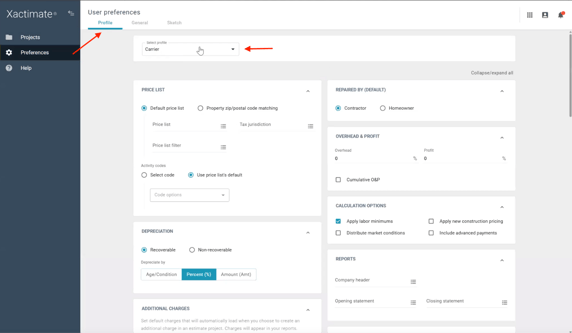
- Contractor profile: Those details are often locked once the project is created.
Why this matters: If your team regularly needs to tweak project name, insurance info, or customer details inside Xactimate, most companies prefer Carrier.
Important note about profiles
Profiles can have their own configuration in Xactimate (preferences like calculation options, overhead & profit behavior, etc.). If you already have a profile configured “the way you estimate,” choose that one here—this setting mainly decides which profile your synced projects start with.
4) Xactimate Estimate Options
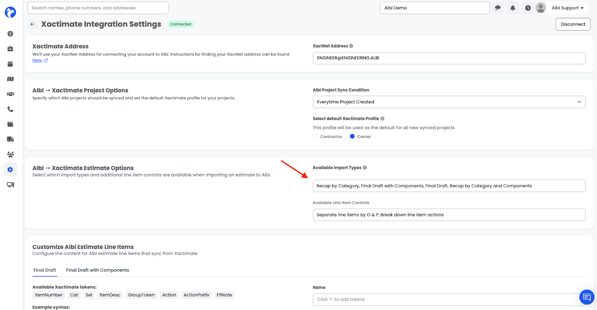
These options control how Xactimate estimate data is brought into Albiware.
You’ll see up to four import types (your admin can enable/disable which ones users are allowed to use):
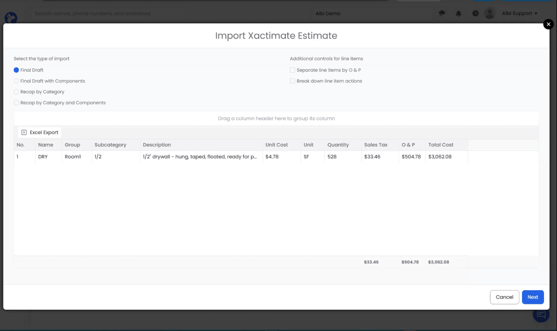
A) Final Draft
Imports line items 1-to-1 exactly as they appear in the Xactimate PDF/export. The Xactimate Final Draft import option allows you to bring a fully completed Xactimate estimate into Albi, including all finalized details—costs, materials, labor, and adjustments.
B) Final Draft with Components
Imports a fully completed Xactimate estimate into Albi with an added layer of detail. In addition to bringing in all finalized information—costs, materials, labor, and adjustments—this option breaks each eligible line item into its individual components.
Component breakdown may include:
- Material
- Labor
- Equipment
- Market Conditions
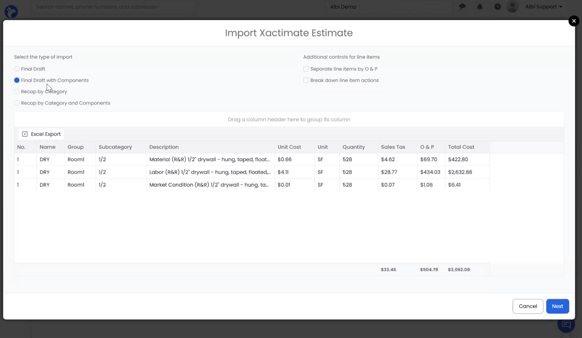
Use it when: You need a more detailed view of costs, such as separating labor from materials for subcontracting, work orders, cost tracking, or margin analysis.
Good to know: Not every Xactimate line item includes all components. Many items only contain material and labor, and available breakdowns depend on the specific line item.
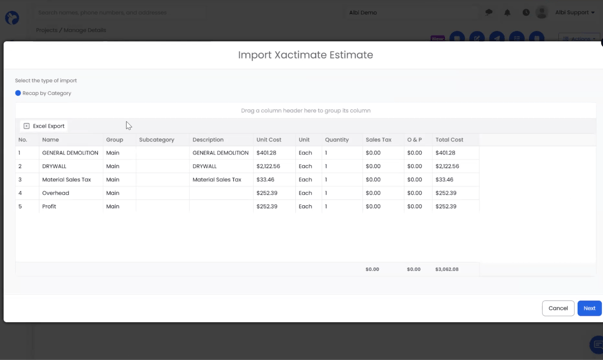
C) Recap by Category
Groups the estimate by Category (CAT) instead of displaying individual line items. The Recap by Category feature in Albi provides a quick, high-level overview of your Xactimate estimate, organized by types of work such as general demolition, appliances, and drywall.
Example:
Instead of 50 drywall-related line items, you get one grouped summary like:
- Drywall total
Paint total - Flooring total
- plus items like tax and overhead/profit as applicable.
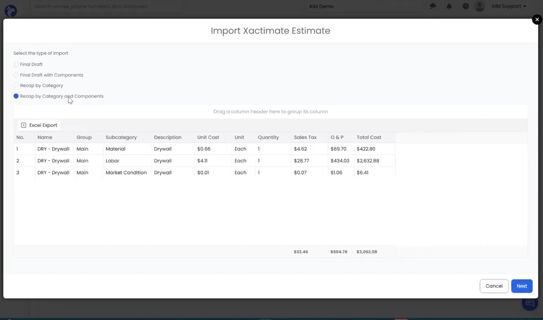
D) Recap by Category and Components
Groups the estimate by Category (CAT) while also splitting category totals by component type. Instead of viewing individual line items, you see summarized totals for each category broken down by components.
Example: For a category like Drywall, you can view separate totals for:
- Drywall Materials
- Drywall Labor
- Drywall Market Conditions
Line Item Controls (Optional, but commonly used)
These controls change how line items appear once imported.
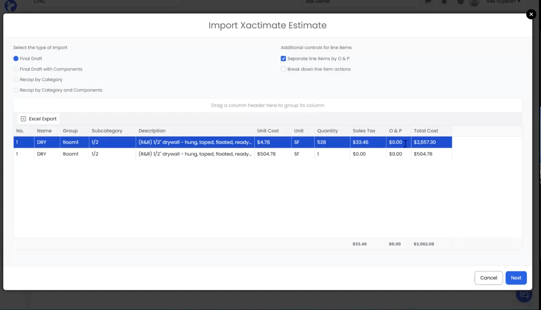
A) Separate Line Items by O&P (Overhead & Profit)
Adds a separate line item for Overhead & Profit (O&P) for each eligible line item, clearly distinguishing base costs from overhead and profit. Instead of being embedded within the item total, O&P can be shown as its own line.
Off: O&P remains included within each line item’s total.
On: The import may create two lines per item:
- The base item amount
- A separate line for Overhead & Profit
Use it when: Your accounting or reporting workflow requires overhead and profit to be clearly separated for review or analysis.
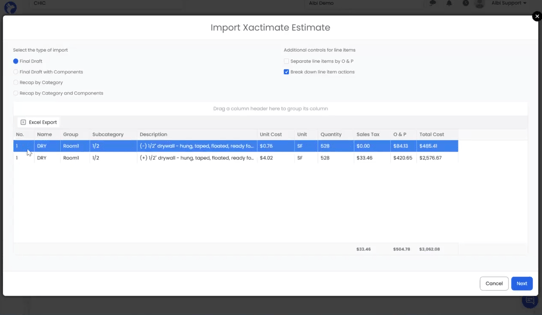
B) Break Down Line Items by Action
Splits Xactimate line items based on their associated actions. When enabled, items that include multiple actions—such as Remove & Replace—can be separated into distinct line items to clearly reflect each task.
Actions may include:
- Remove
- Replace
- Remove & Replace
- Detach & Reset
- Install Only
- Material Only
Example: An item with Remove & Replace may be split into:
- A removal line (often shown as a negative)
- A replacement line (positive)
Use it when: You want a more detailed view of the work being performed, with line items clearly separated by action for reporting, estimating, or job costing.
5) Customize Albiware Line Items (Optional / Advanced)
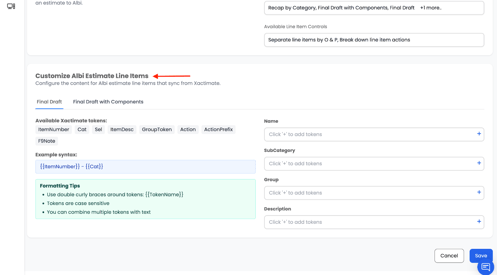
What it does
It lets you decide what Xactimate fields map into Albiware columns, using tokens such as:
- CAT (Category)
- SEL (Selector code)
- Item description
- Group (often the room/area)
- Action (remove/replace/etc.)

Default behavior (typical):
- Name often becomes the Category
- Group often represents the room/area
- Subcategory often becomes the Selector code
- Description combines action + description (ex: “R&R …”)
Important limitation
These customizations apply only when you use:
- Final Draft
- Final Draft with Components