
Most companies now use the new Work Order experience. If your work orders have Budget and Scope tabs, see How Do I Use the New Work Order Experience in Albi? This article covers the original experience, for companies that have switched back to it.
Work Orders define the scope of work assigned to a vendor, subcontractor, or internal team. You create them from approved Workbook items, and you can organize them with sections and budget controls that keep your internal pricing private.
Work Orders live in each project under Workbook → Orders, alongside Purchase Orders.
How to create a work order
- Open the project and go to Workbook → Orders.
- Click Add Work Order.
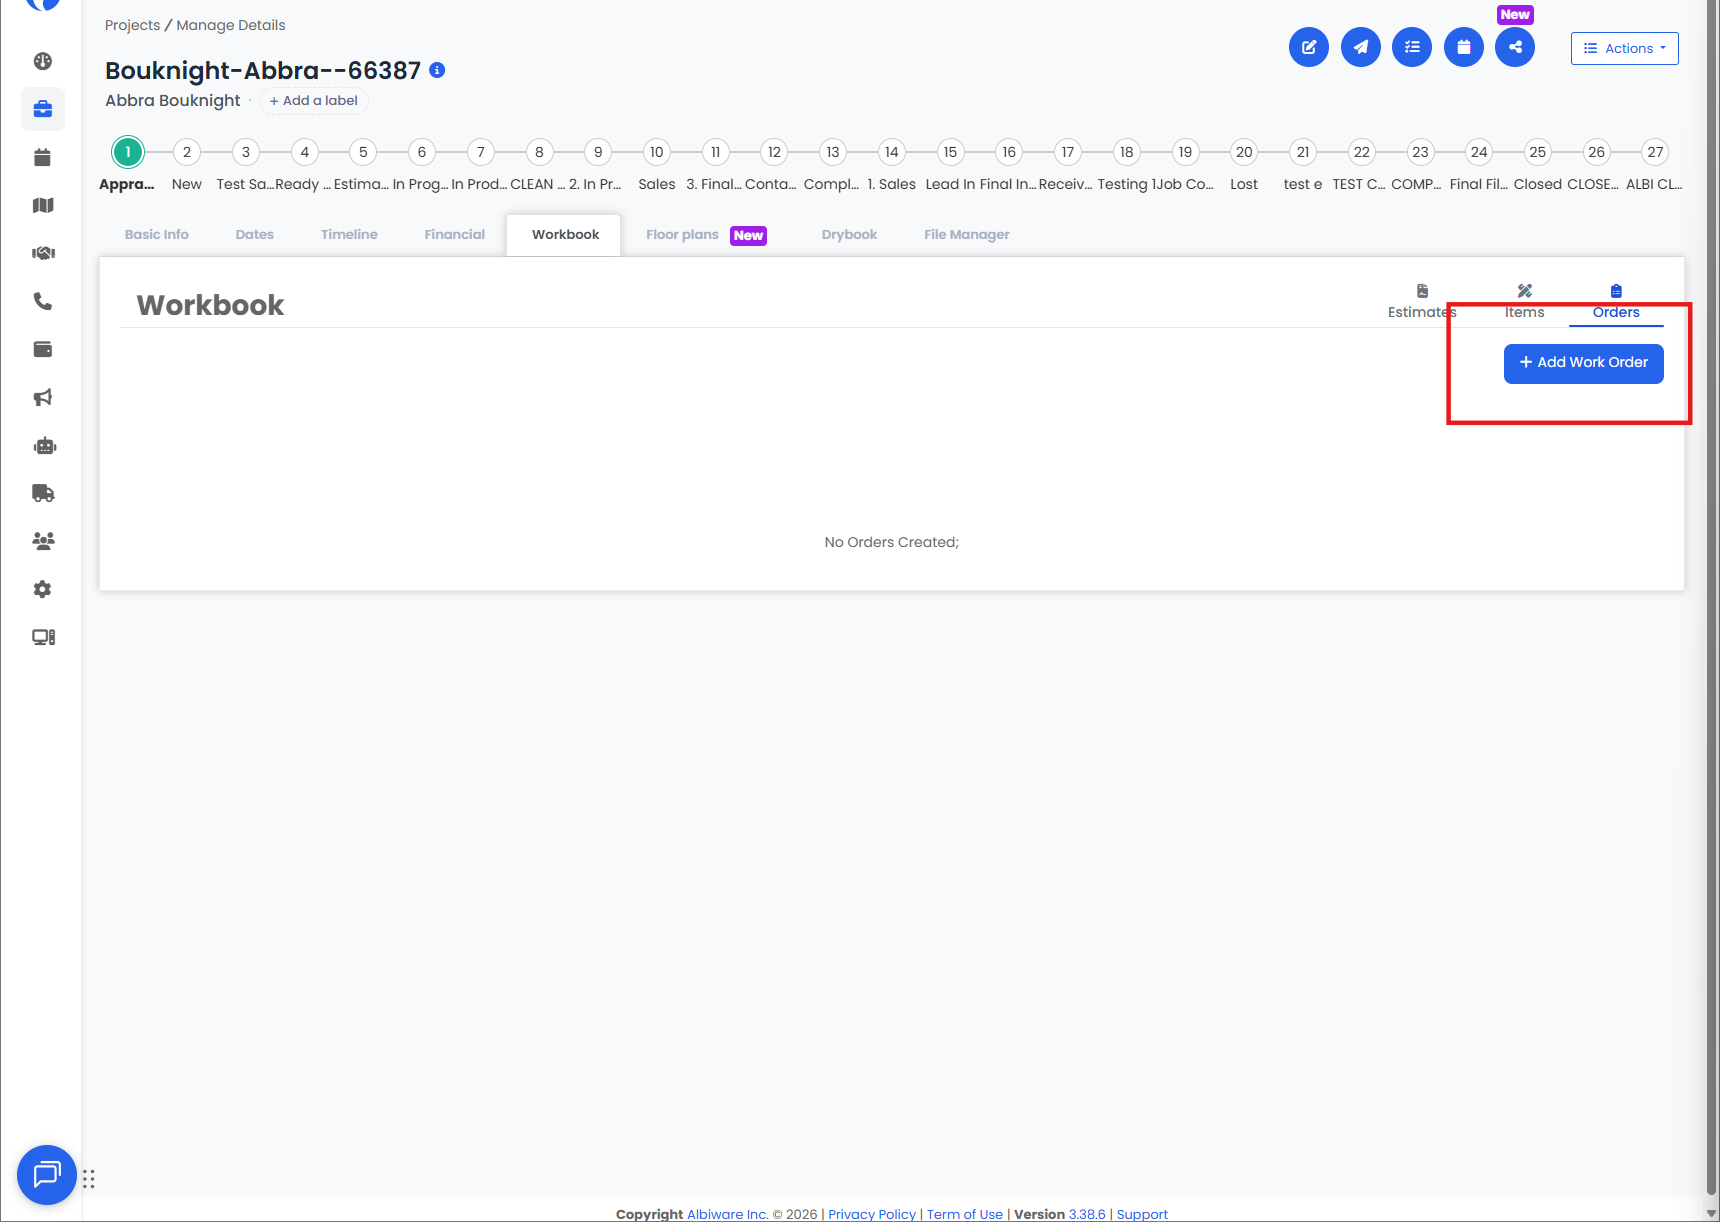
- Complete the required fields: Date, Order Number, Assignee, Staff, and Relationships. For Relationships, you can select a contact or organization already in Albi, or create a new contact or organization right from the order.
- Add Workbook items to the work order. You can add them four ways:
- Add by Group: Include only the items in the groups you select.
- Add All Items: Add every item in the Workbook at once.
- Add by Sub-category: Include only the items in the sub-categories you select.
- Select Individual Items: Pick specific items one at a time.
- Optional: Set a Budgeted Percentage to control the pricing vendors see. See the budget section below.
- Optional: Use the Order note field to add a note that appears on the signature page.
- Click Preview Document to review the work order, then click Save Document to save it to the project.
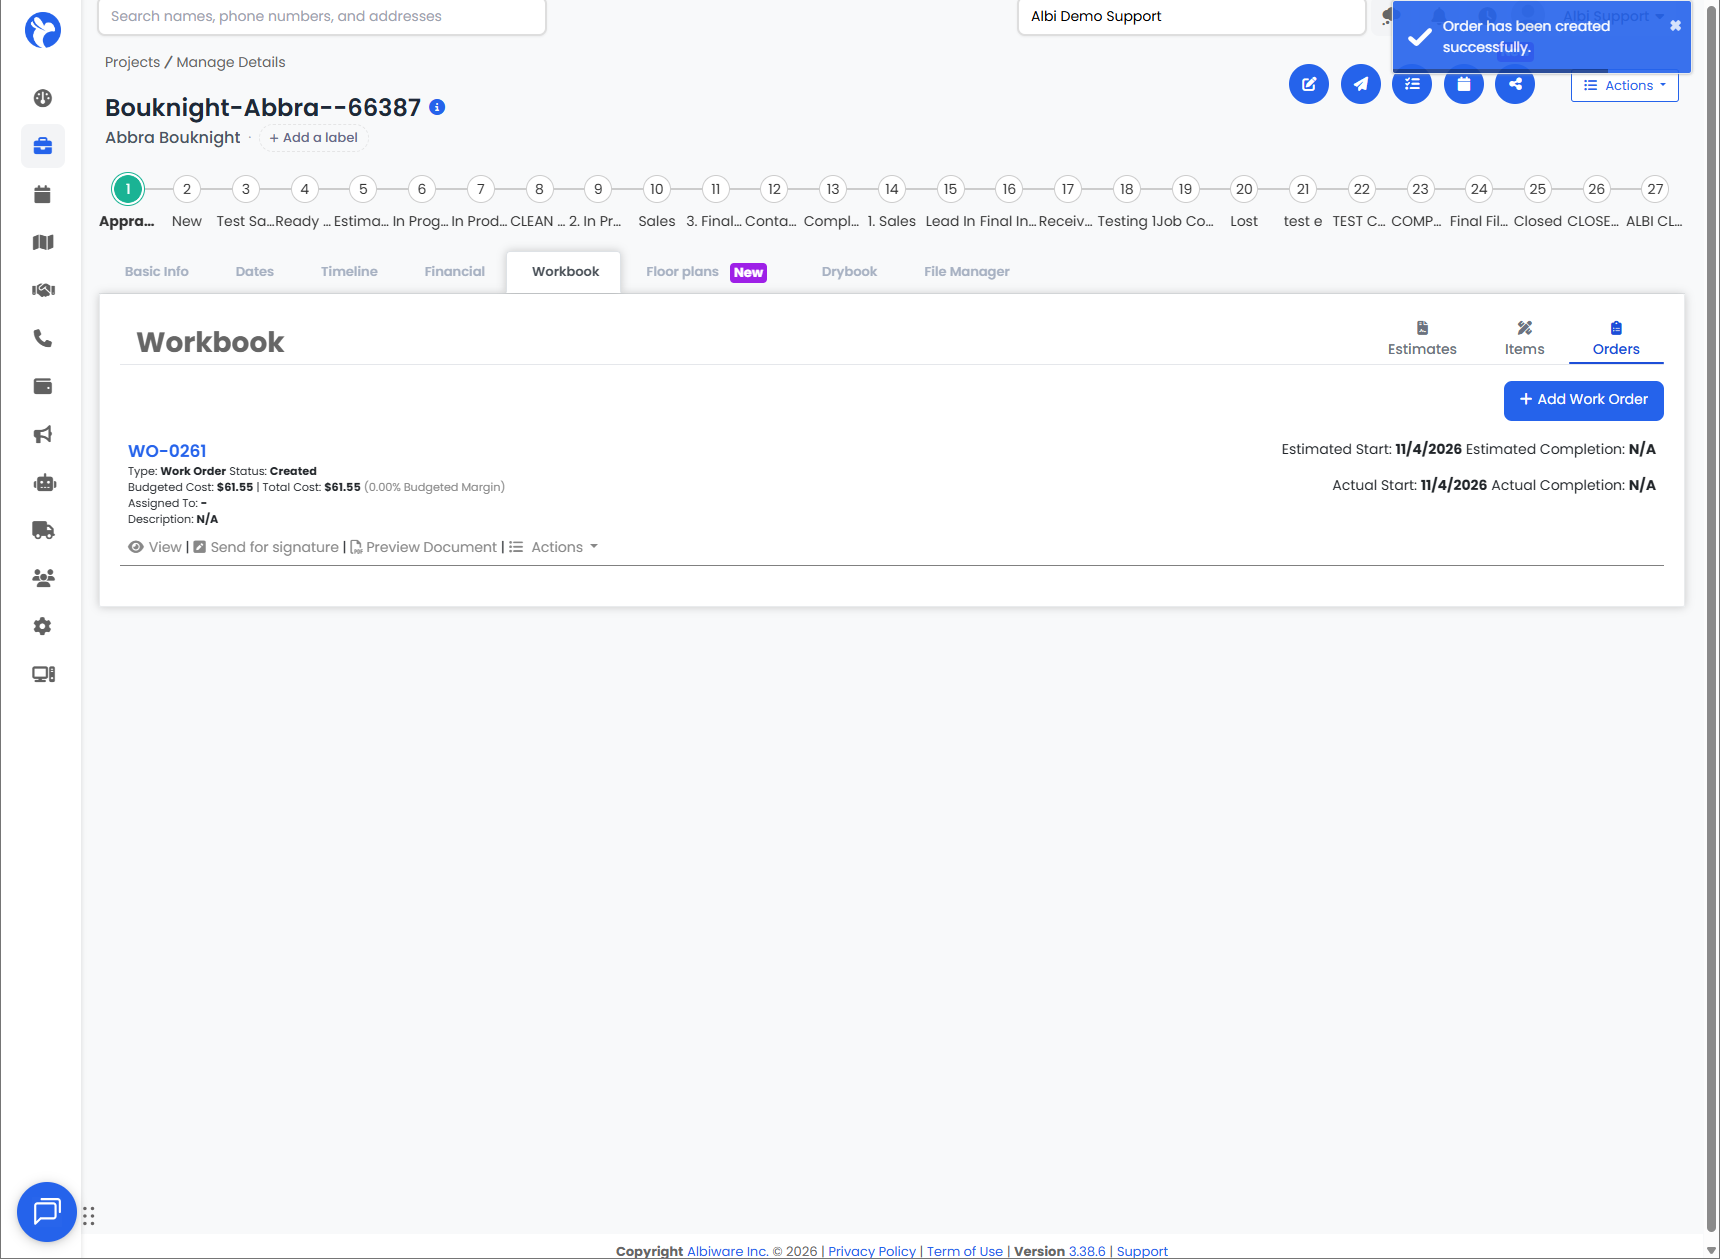
Your new work order appears under Workbook → Orders, where you can open and preview it anytime.
How to organize items with sections
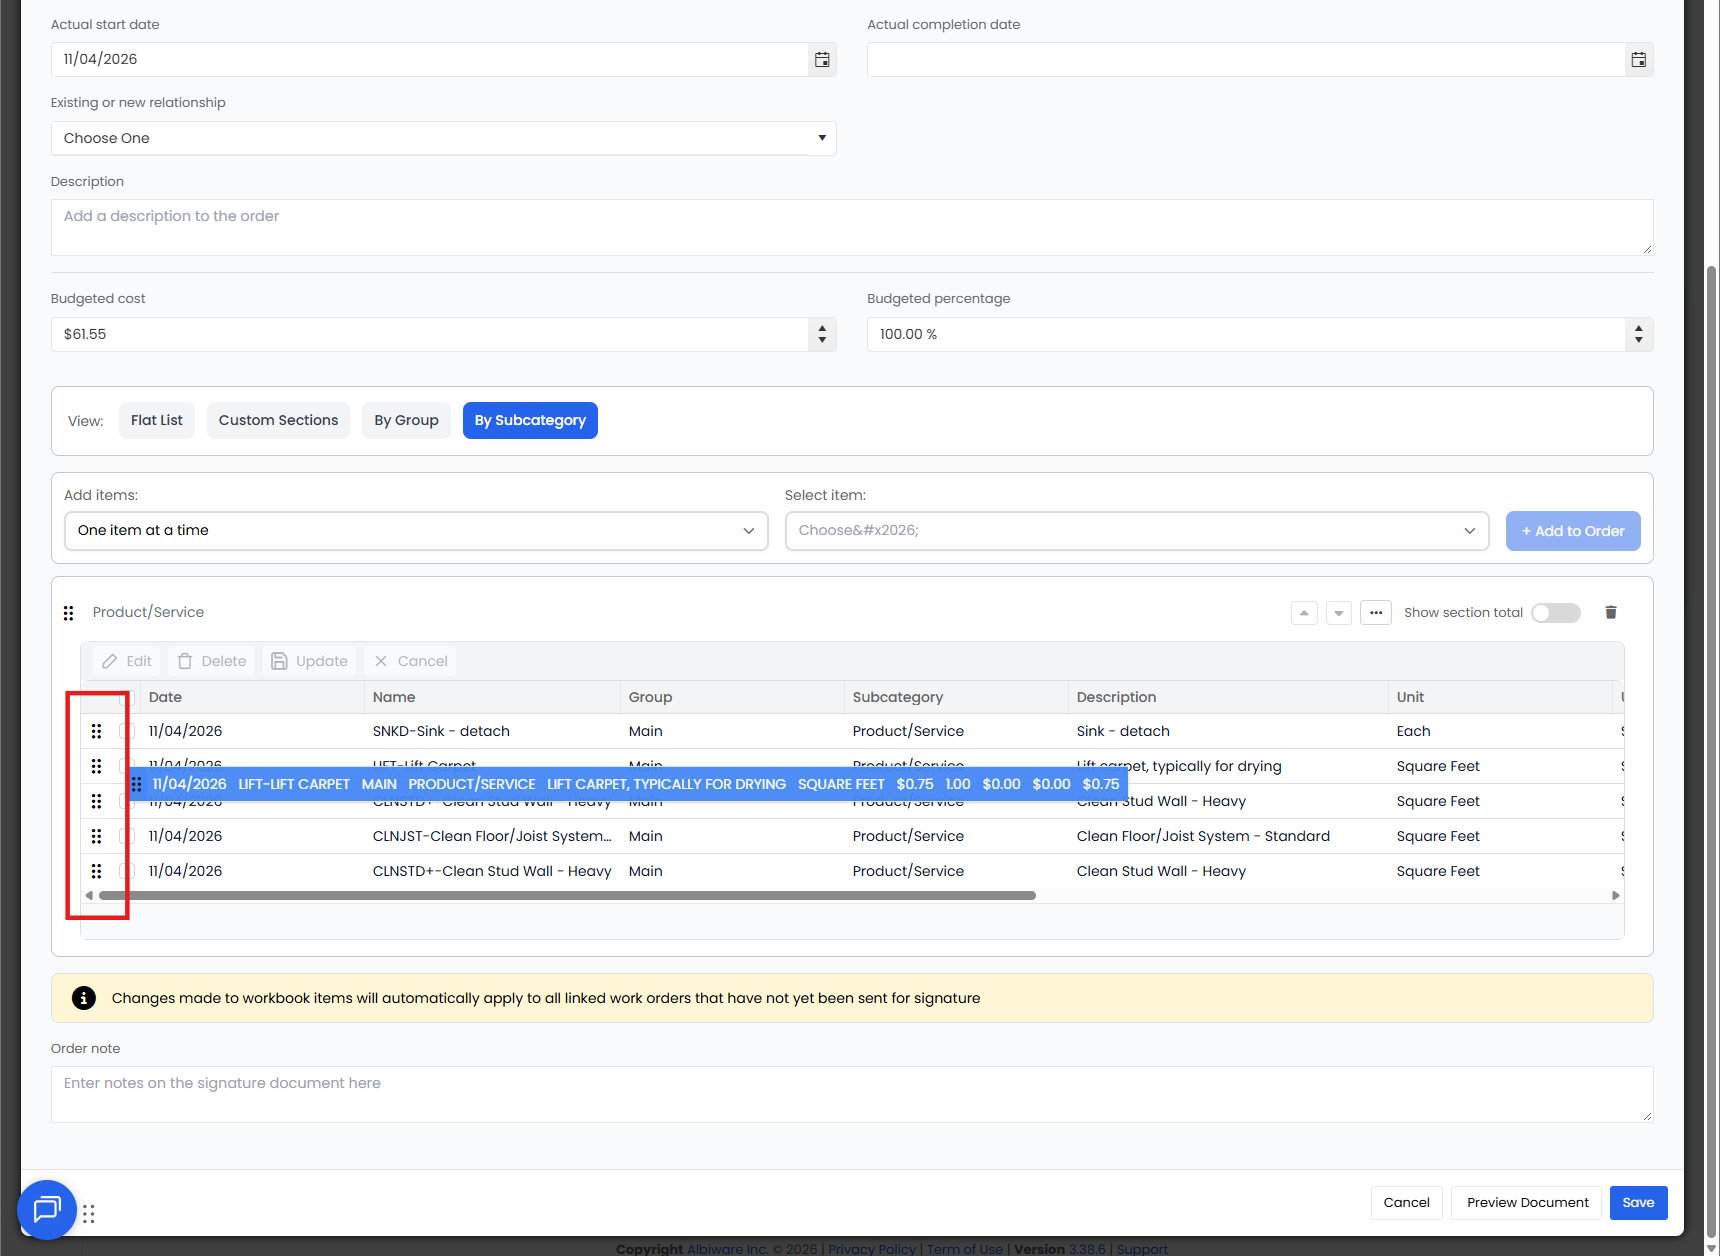
When you create or edit a work order, section toggles control how items are grouped and how you add them. In the new Work Order experience, these same options appear as the Scope views List, By group, By sub-category, and Custom, and they work the same way.
|
Section type |
How items are organized |
Best for |
|---|---|---|
|
Flat List |
One continuous list, no sections |
Orders that don't need sections |
|
Custom Sections |
Sections you name yourself |
Full control over how work is broken down |
|
Group |
One section per Workbook group |
Mirroring your Workbook groups, such as rooms |
|
Sub-category |
One section per sub-category |
Splitting by Labor, Material, Equipment, and so on |
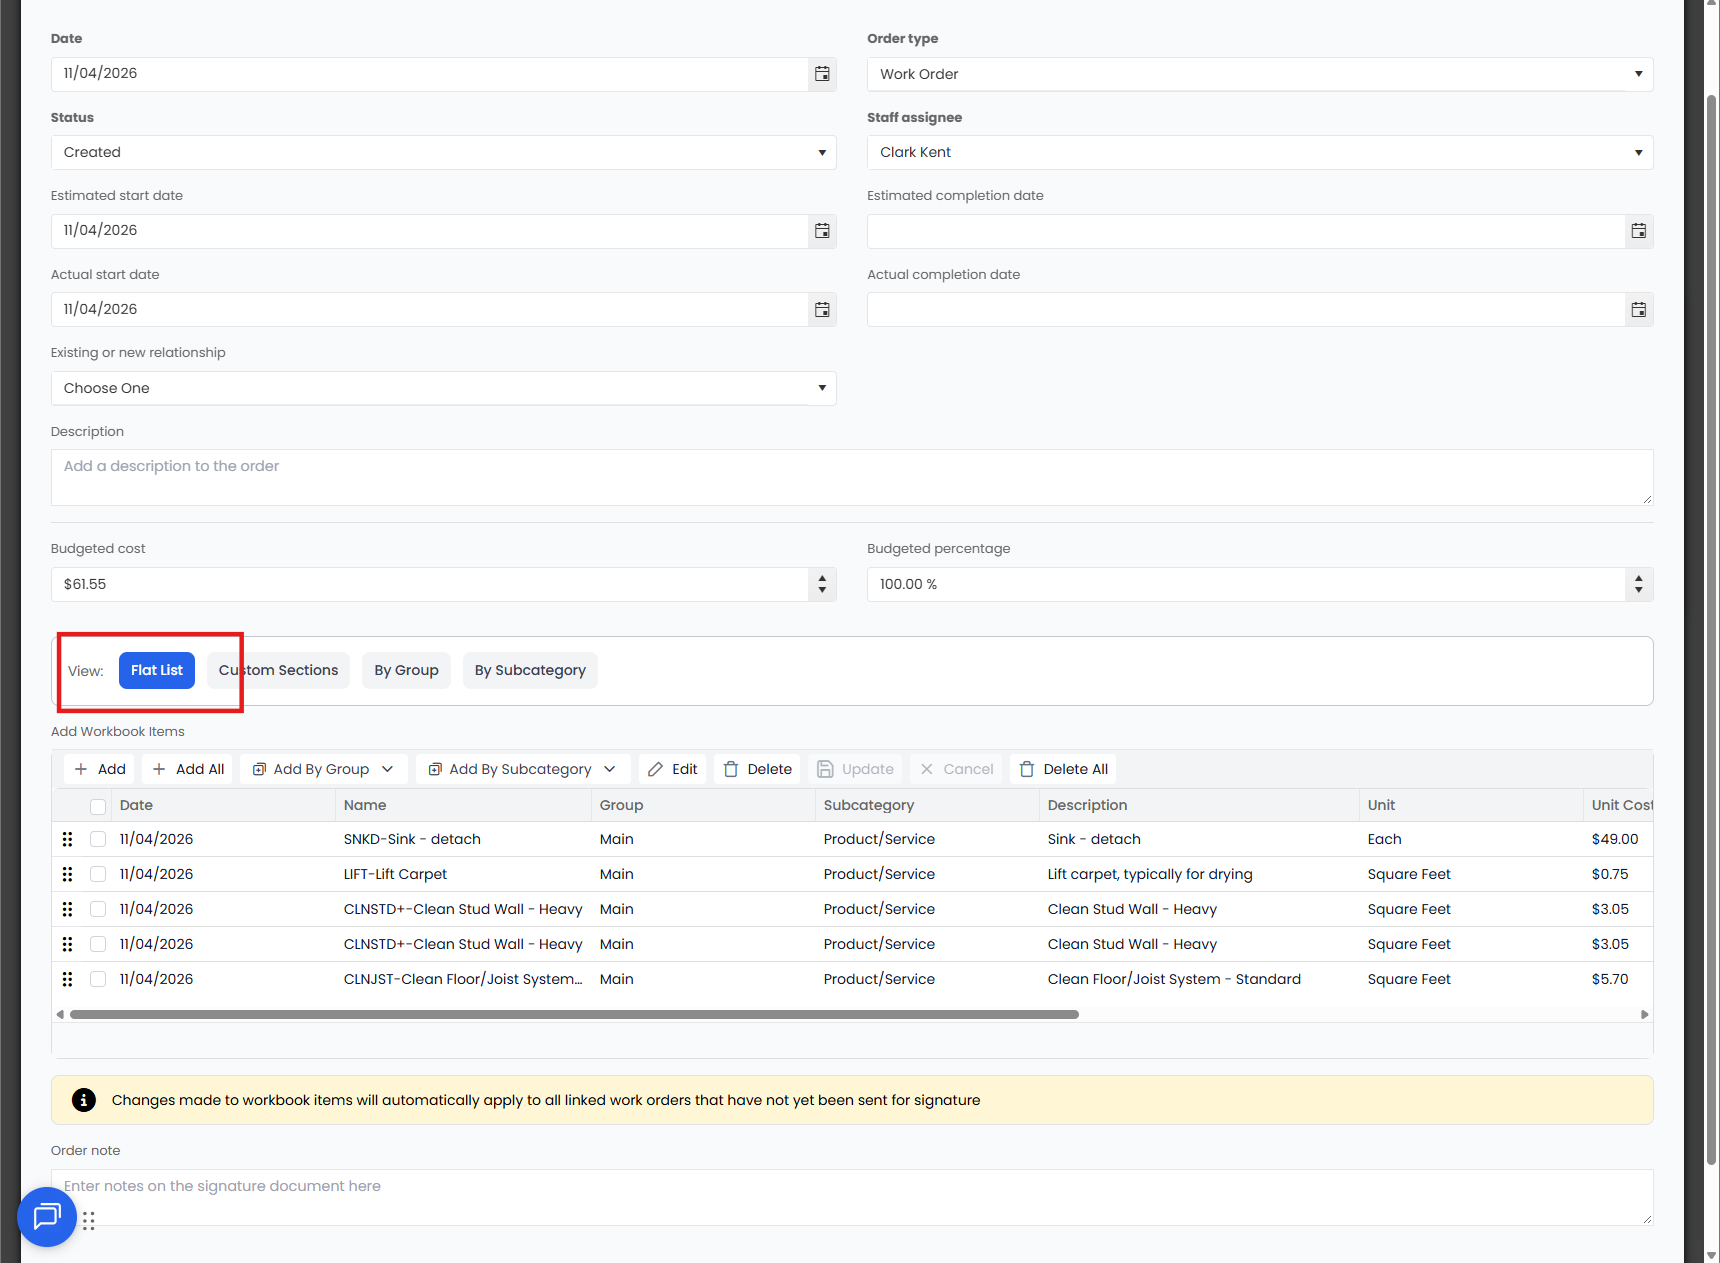
Flat List
Flat List shows every item in a single list with no sections. This matches how work orders worked before sections were added. From a flat list, you can add all items at once, items by group, items by sub-category, or individual items.
Custom Sections
- Click Add Section.
- Enter a section name, such as Demo, Drying, Reconstruction, or Section A.
- Add items to the section one at a time.
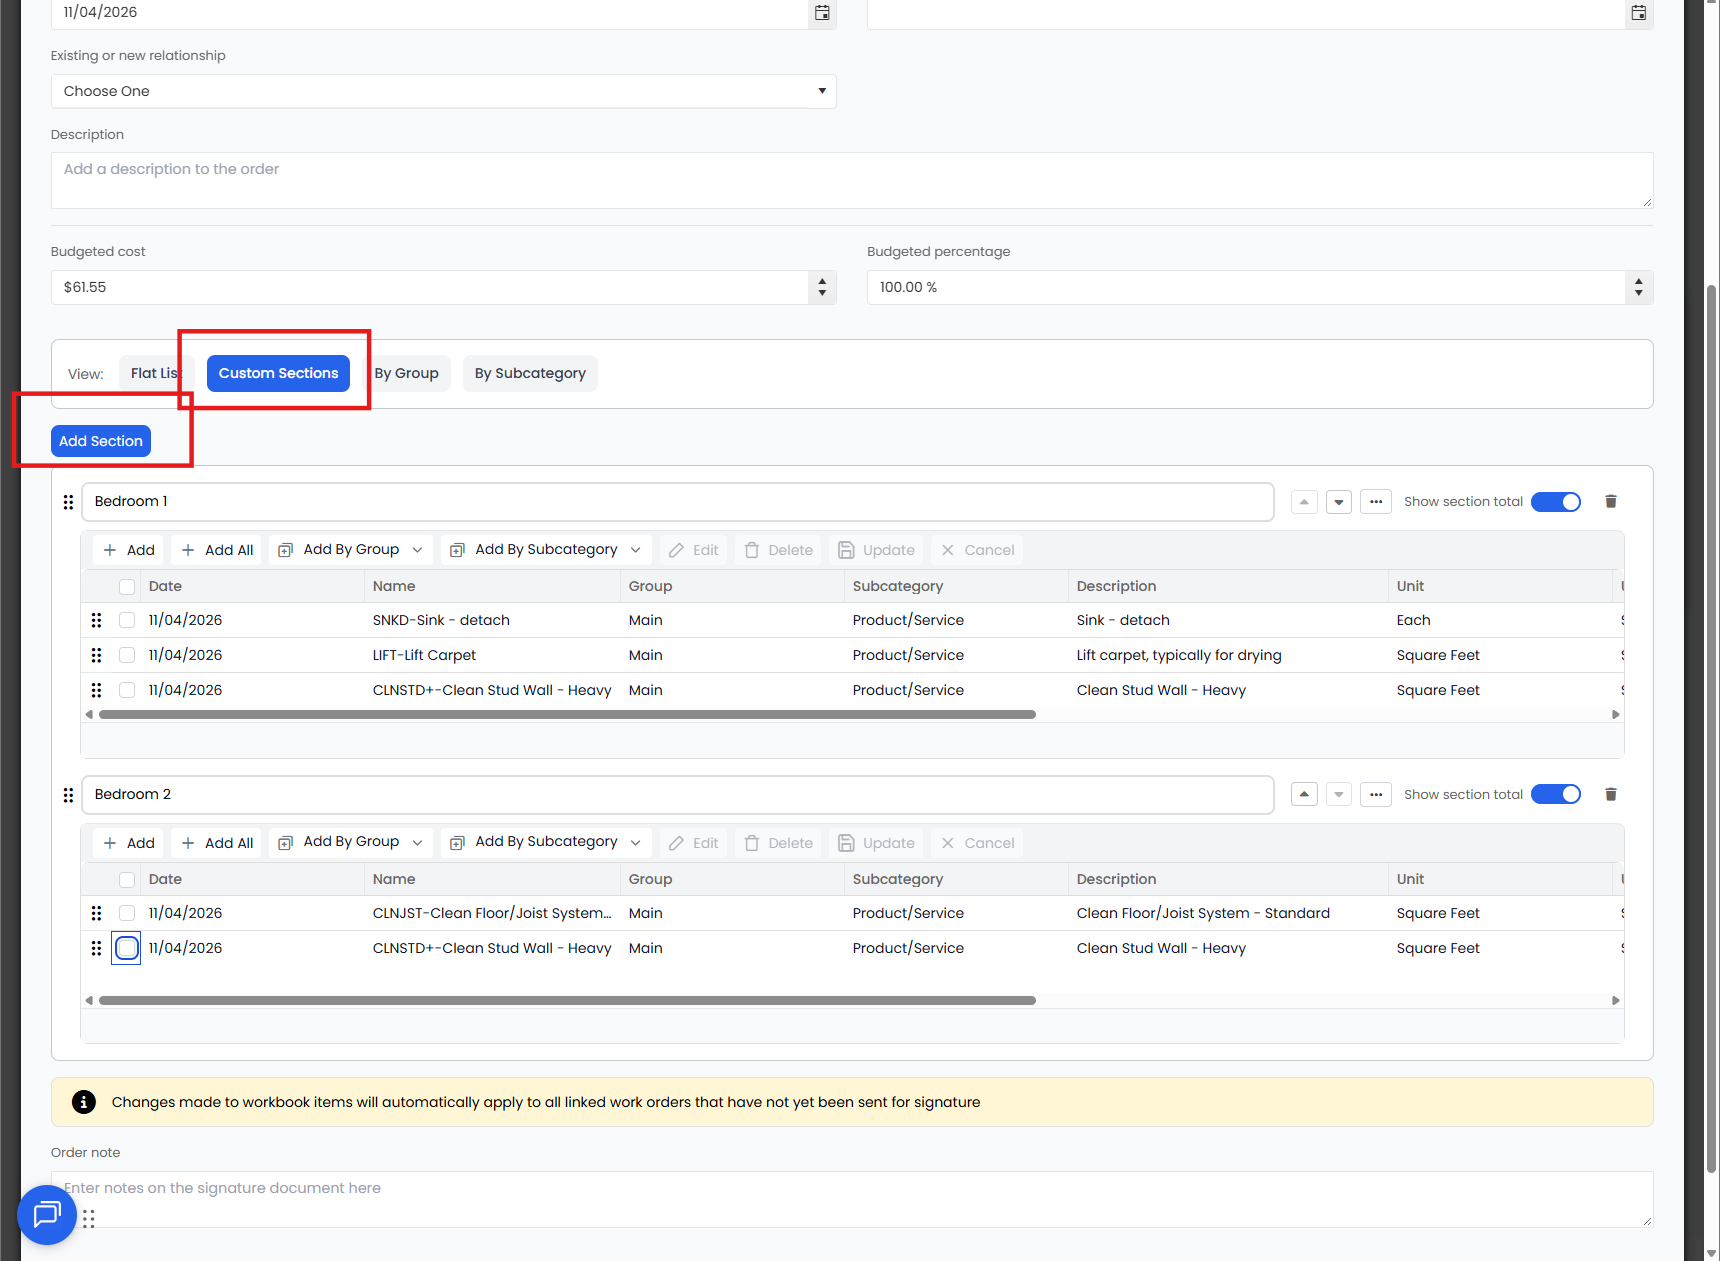
Once your sections are set up, you can:
- Reorder sections with the up and down controls
- Move items from one section to another
- Reorder items within a section
- Show or hide each section's total
- Delete a section you no longer need
Group sections
The Group toggle organizes the work order into one section per Workbook group. Section names match your group names, such as Main, Kitchen, or Basement, and items sort into them automatically.
From Group sections, you can:
- Add all items from a group
- Add one item at a time
- Add all items from a sub-category
Sub-category sections
The Sub-category toggle organizes the work order into one section per sub-category, such as Labor, Material, or Equipment. Items sort into them automatically.
From Sub-category sections, you can add all items from a specific sub-category, add individual items one at a time, or choose only the sub-categories you want to include.
Choosing which items to add
If no items are selected, nothing is added. Select items from a group, a sub-category, or the flat list, and only those items go on the work order. This works the same way in every section type.
Reordering sections and items
In every section type, you can move a section to the top or bottom of the work order and reorder items within a section. This changes how the finished work order looks to recipients without changing any item data.
How Budgeted Cost and Budgeted Percentage protect your pricing
Budgeted Cost and Budgeted Percentage control what pricing vendors, subcontractors, and other recipients see on a work order. Vendors see only the amount you're budgeting for their work, not your total project revenue or profit.
When you enter a Budgeted Percentage, Albi calculates a budgeted cost for each line item based on that percentage. For example, with a 25% budgeted percentage, Albi applies 25% across every item on the order.
On the finished work order:
- Each line shows its Budgeted Cost instead of your internal cost or selling price.
- Vendors see only the approved budgeted amount for their work.
- Your profit margins and internal pricing stay hidden.
This means vendors are paid the right amount, and you can share work orders outside your company without exposing your margins.
How to manage a work order
After you create a work order, you can send it, view it, preview it, or change it from Workbook → Orders. 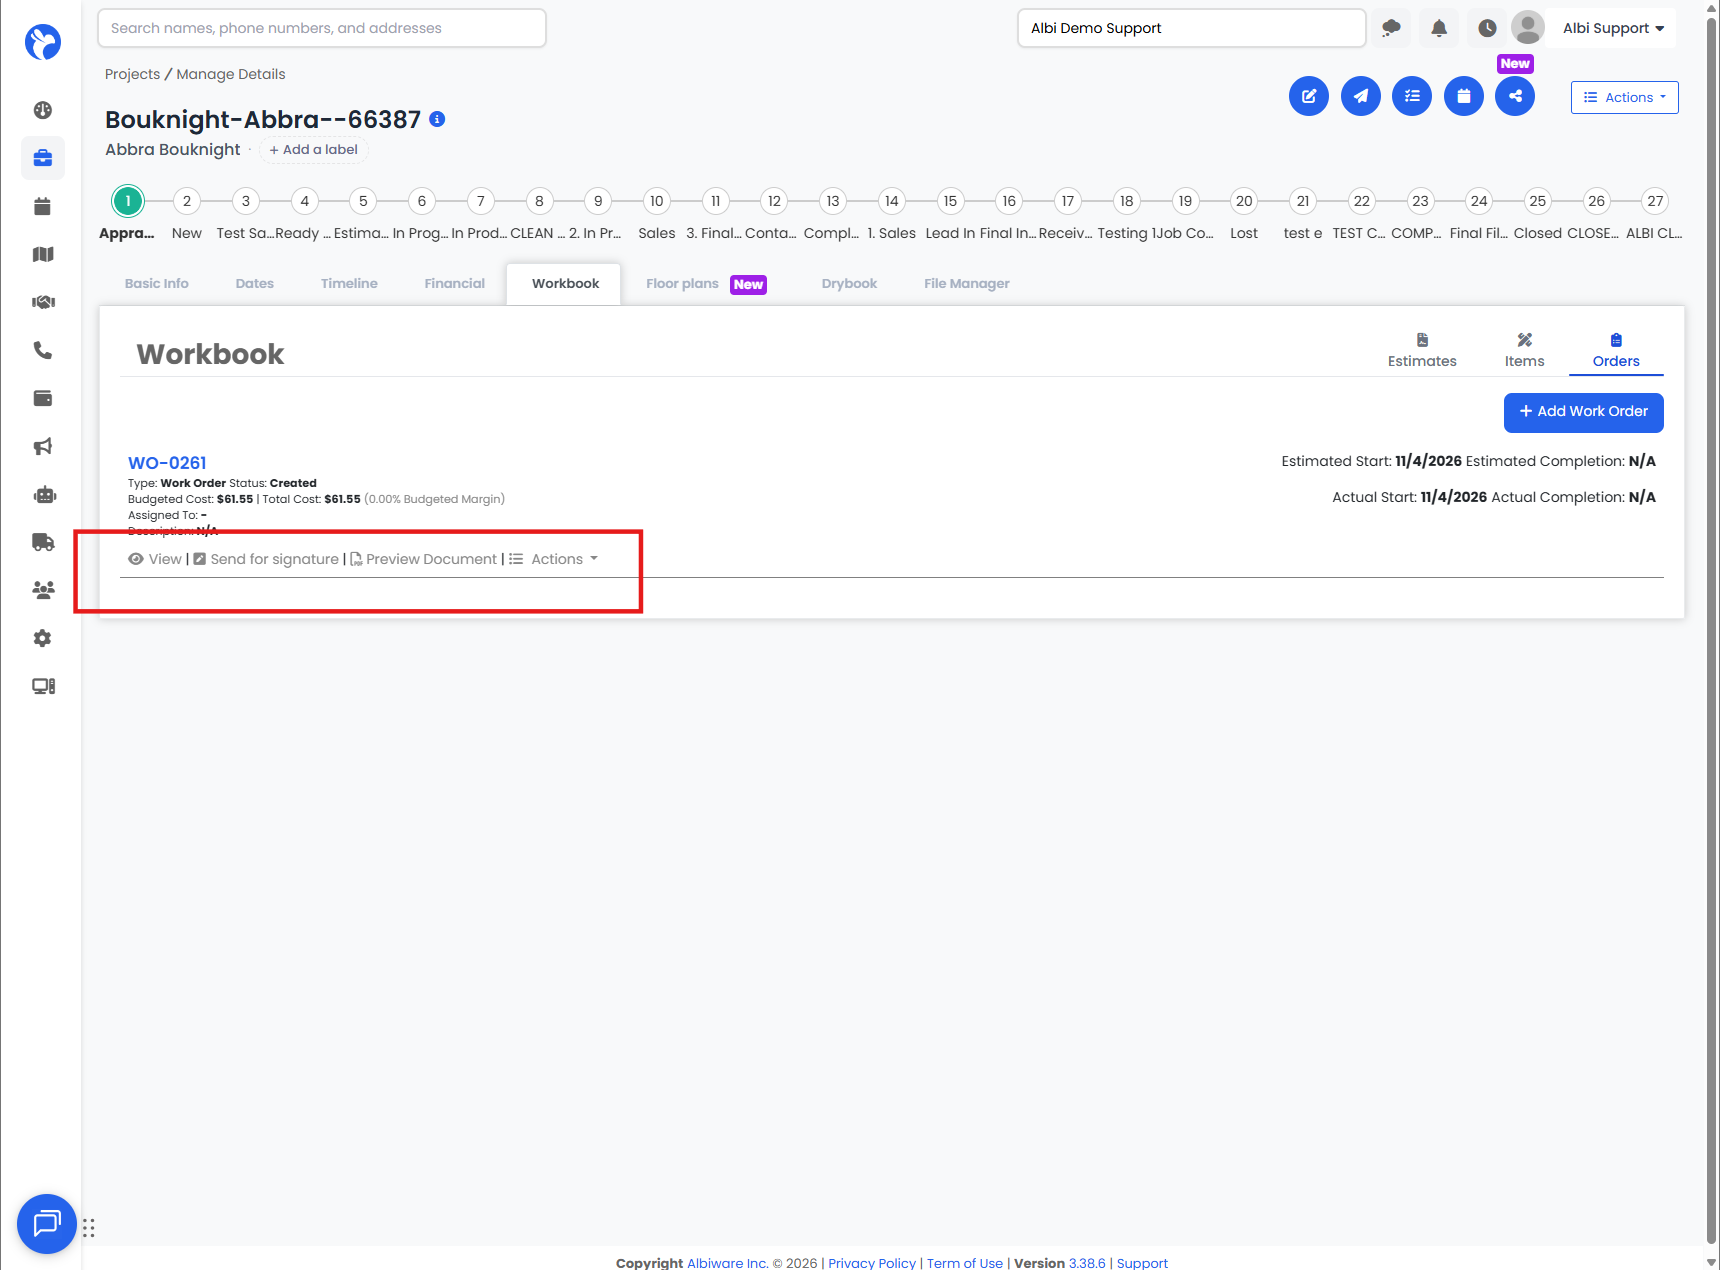
Send a work order for signature
- Find the work order and click Send for Signature.
- Fill in the required fields.
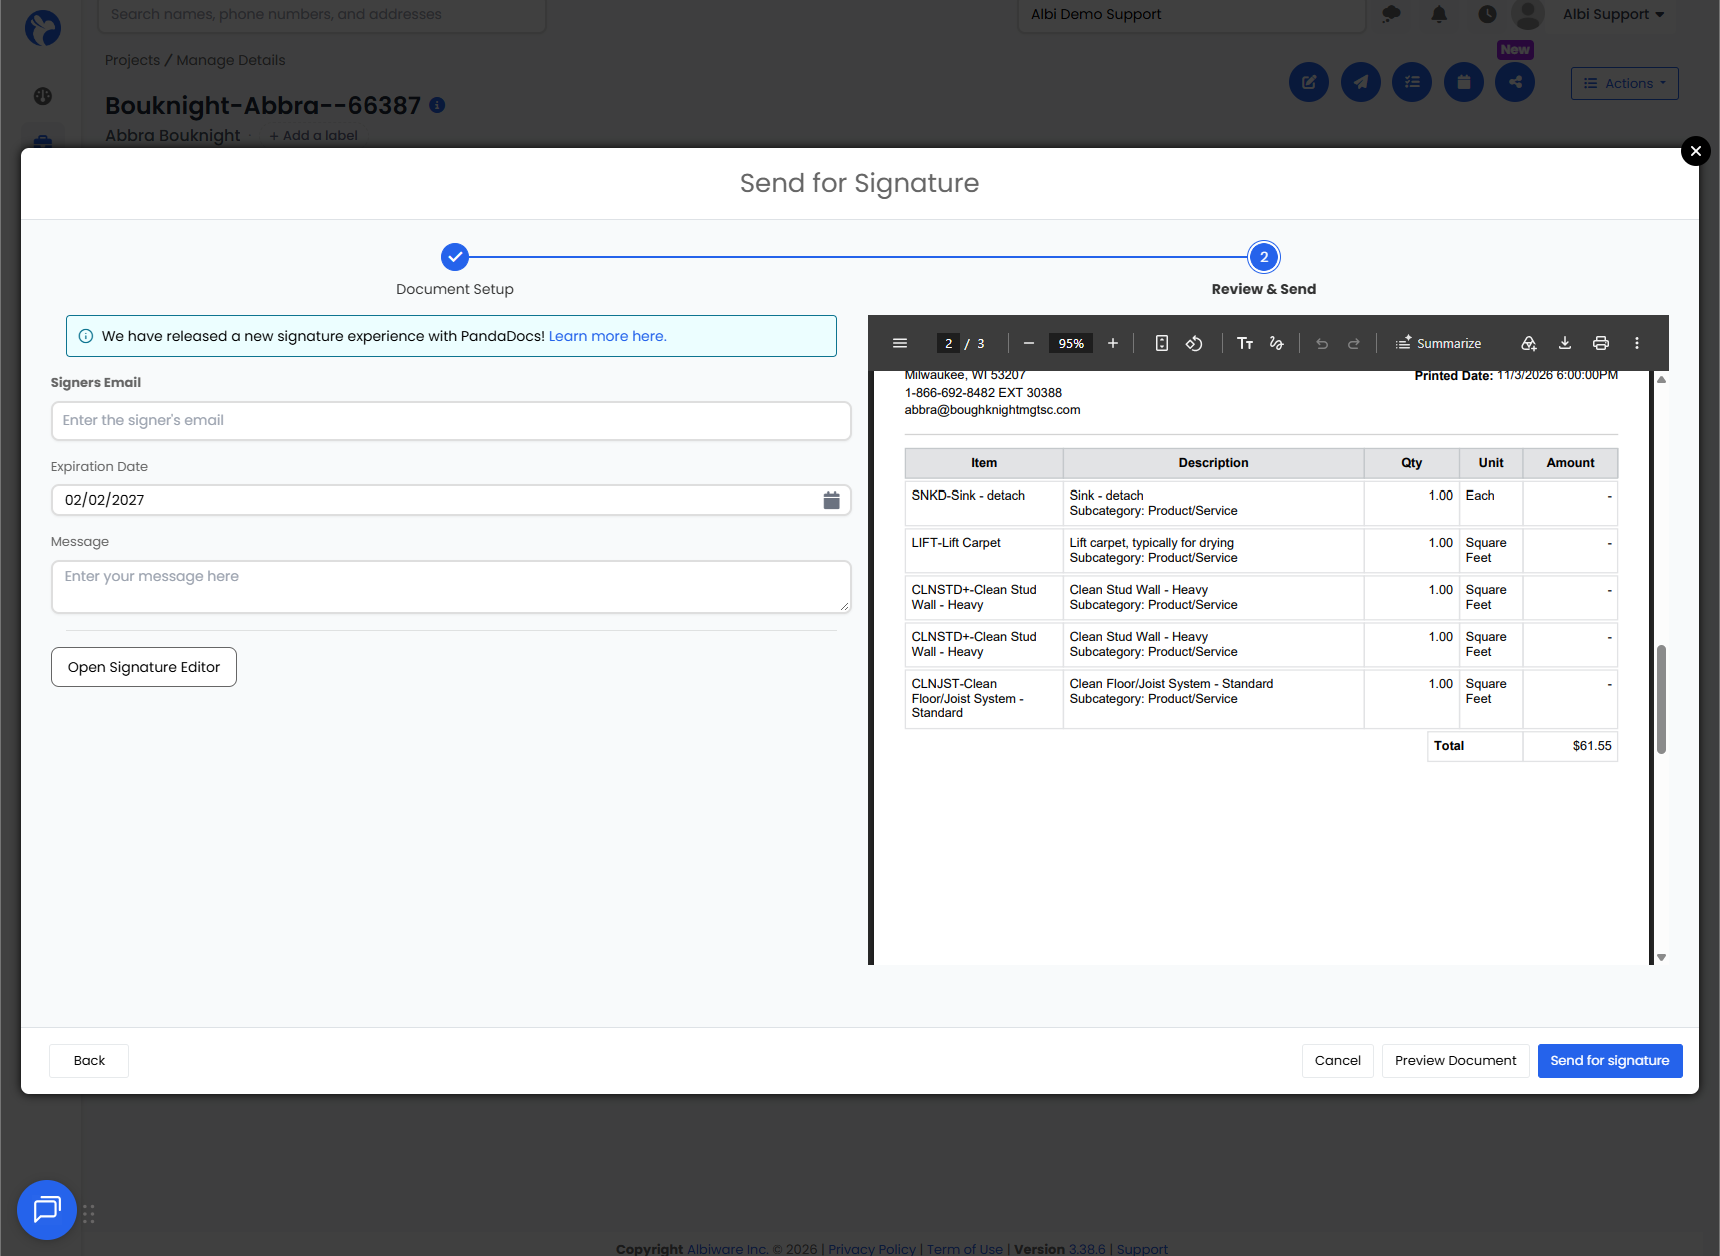
- Send the work order.
To learn how to place signature and other fields on the document, see the "Signature Editor" section of How Does the Open Signature Editor Work?
View or preview a work order
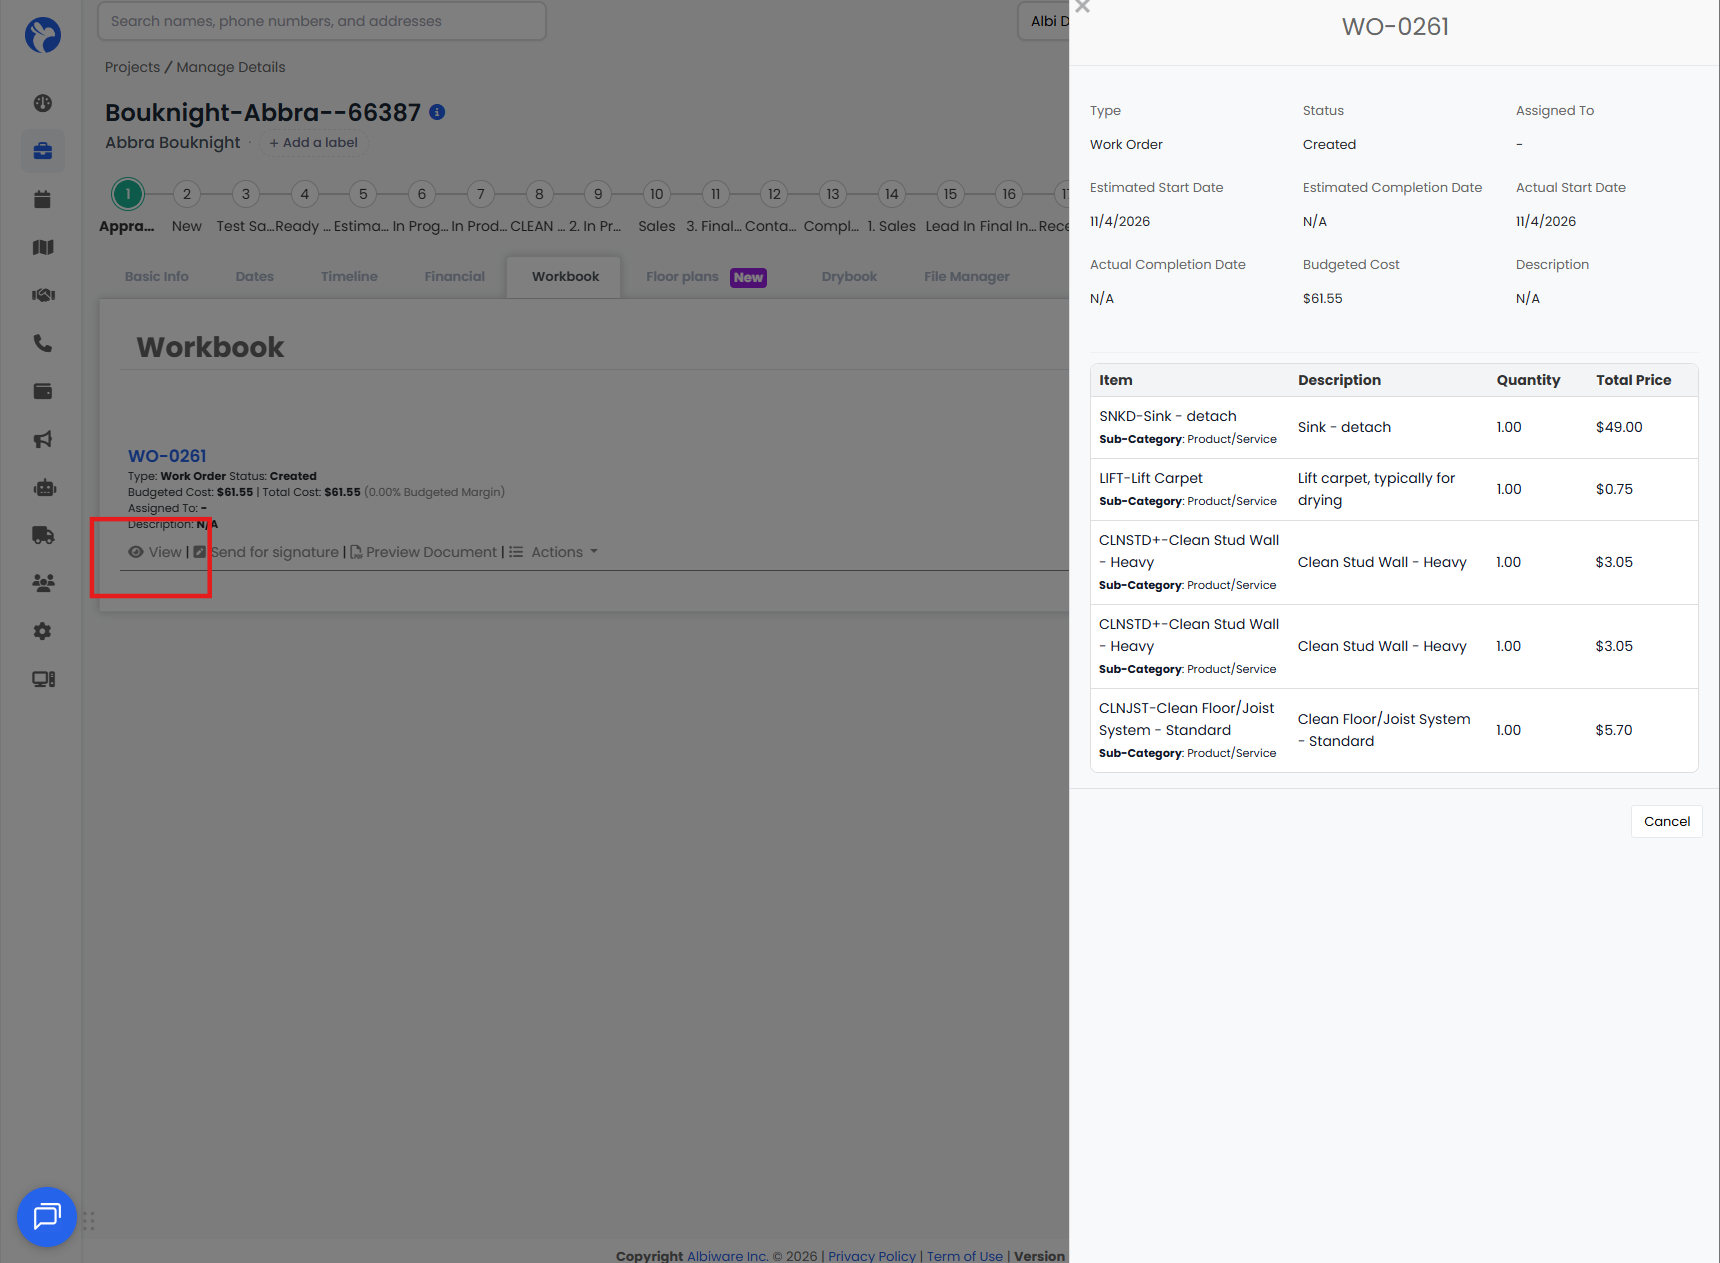
- Click View to open the work order and see its details.
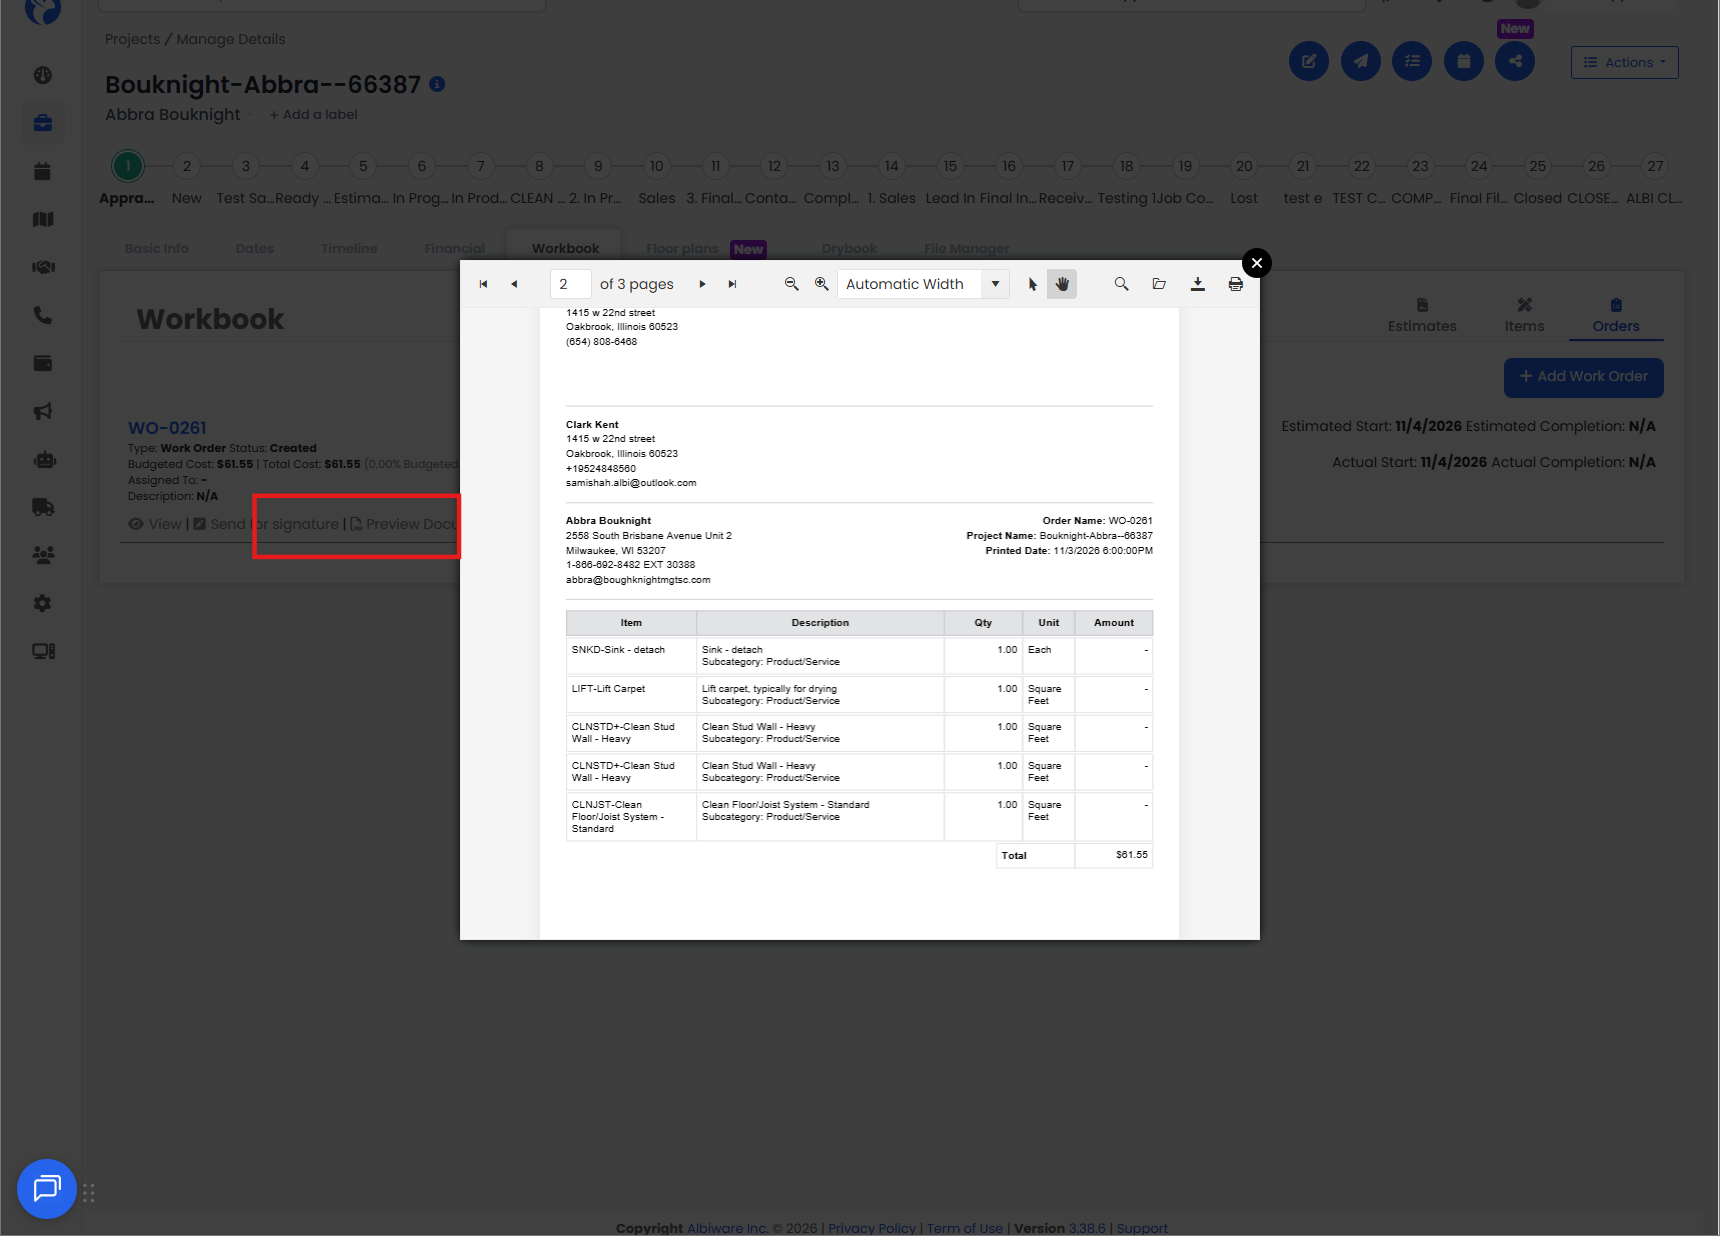
- Click Preview Document to see the work order exactly as recipients will see it.
Edit, delete, or convert a work order
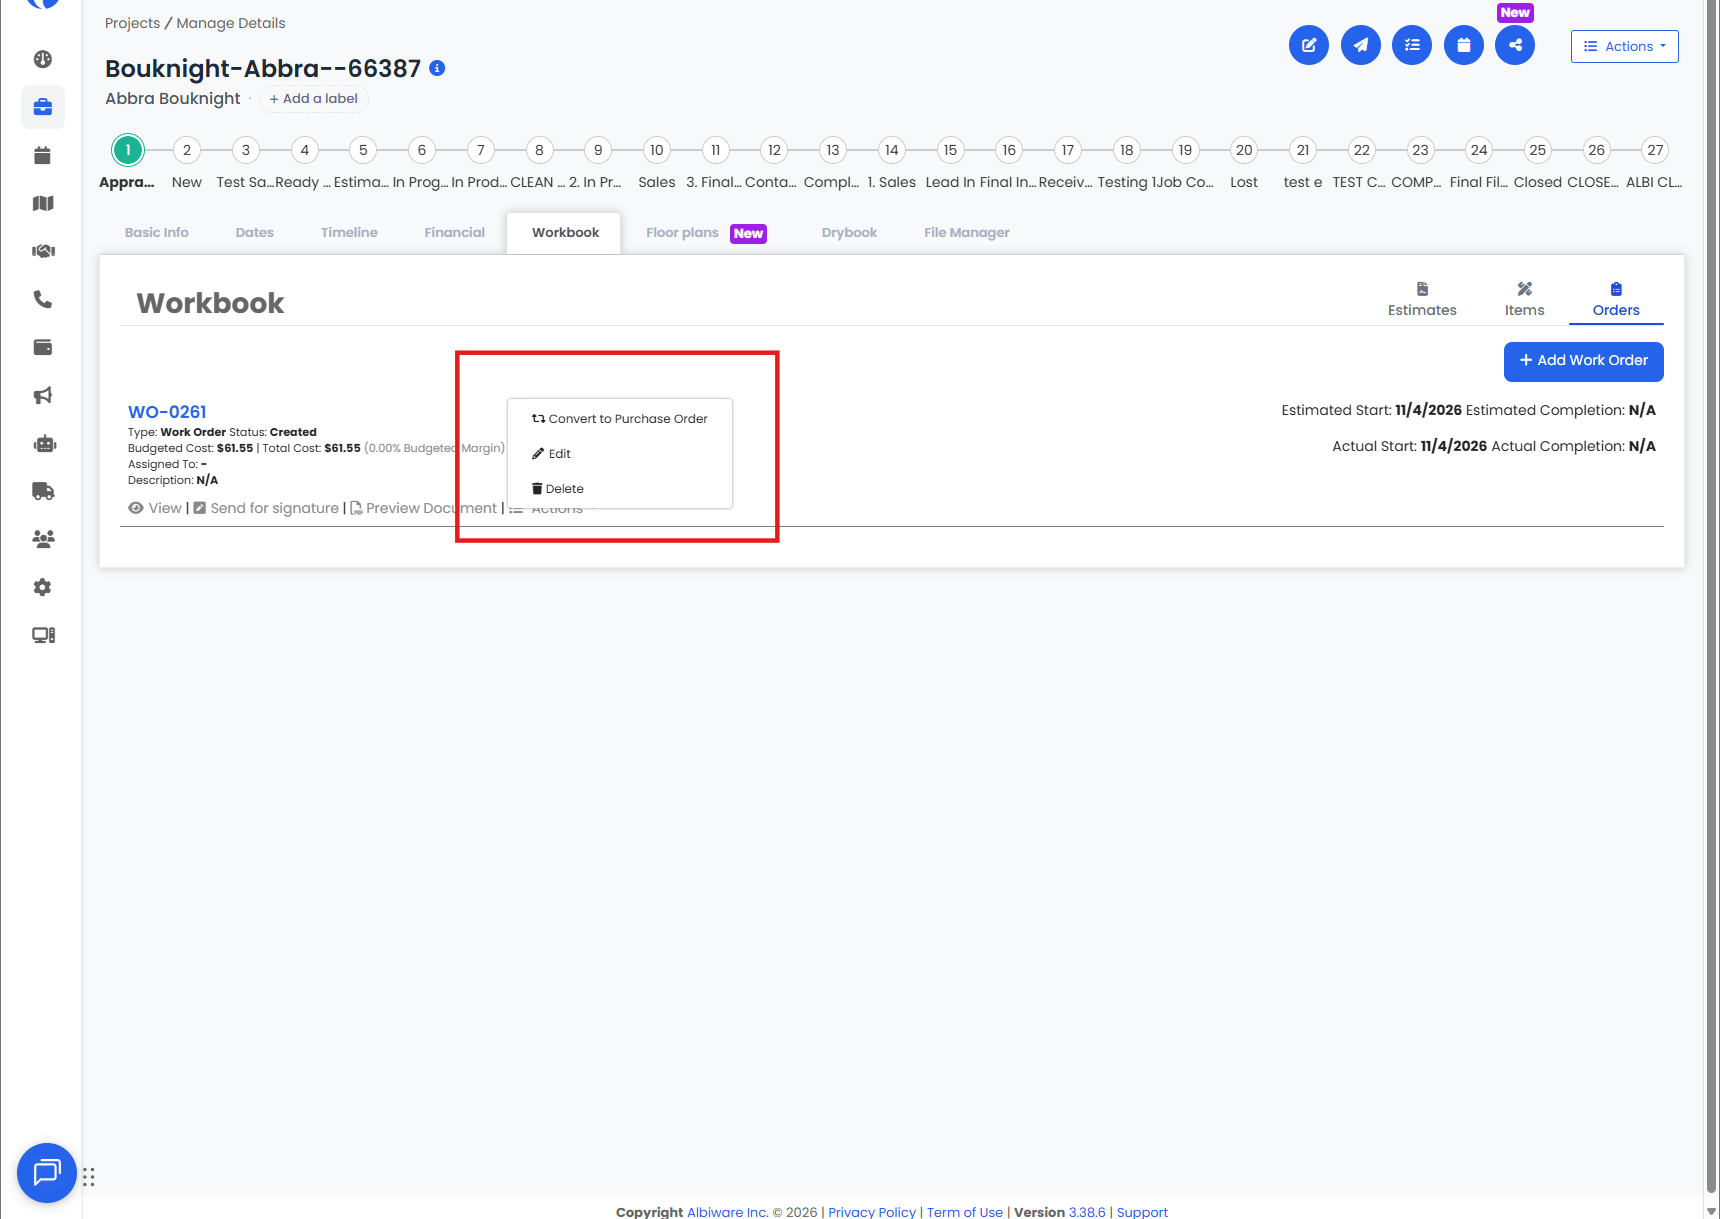
Open the work order and click Actions to see these options:
- Edit: Change the work order's details or items.
- Delete: Remove the work order from the project.
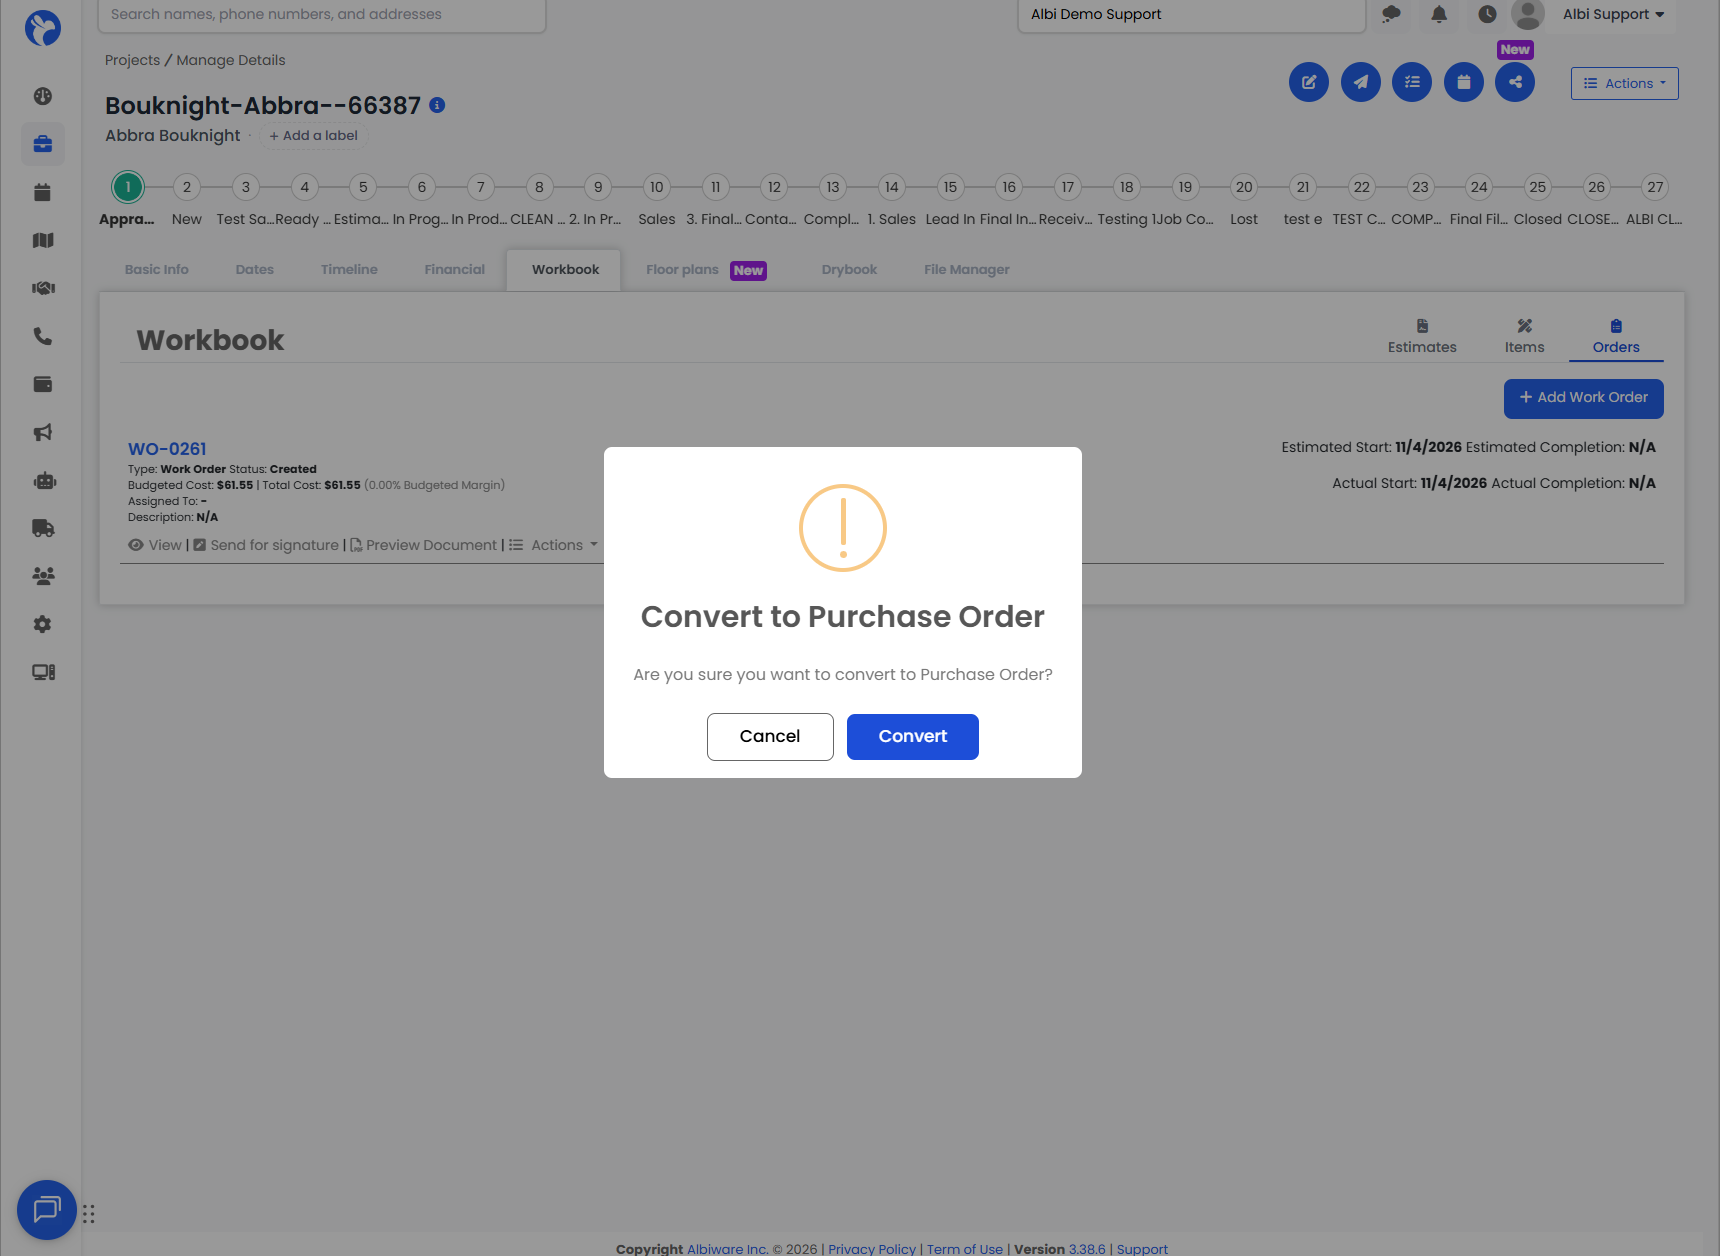
- Convert to Purchase Order: Create a Purchase Order from this work order's data. Albi asks you to confirm first.
Purchase Orders
Purchase Orders are created by converting an existing work order. The Purchase Order uses the same data as the work order, and it can't be turned back into a work order.
How to create a Purchase Order
- Create a work order in the project, if you haven't already. Every Purchase Order starts from a work order.
- Open the work order.
- Click Actions.
- Select Convert to Purchase Order.
- In the confirmation window, confirm the conversion.
Albi creates the Purchase Order using the same data from the work order.
The Purchase Order PDF
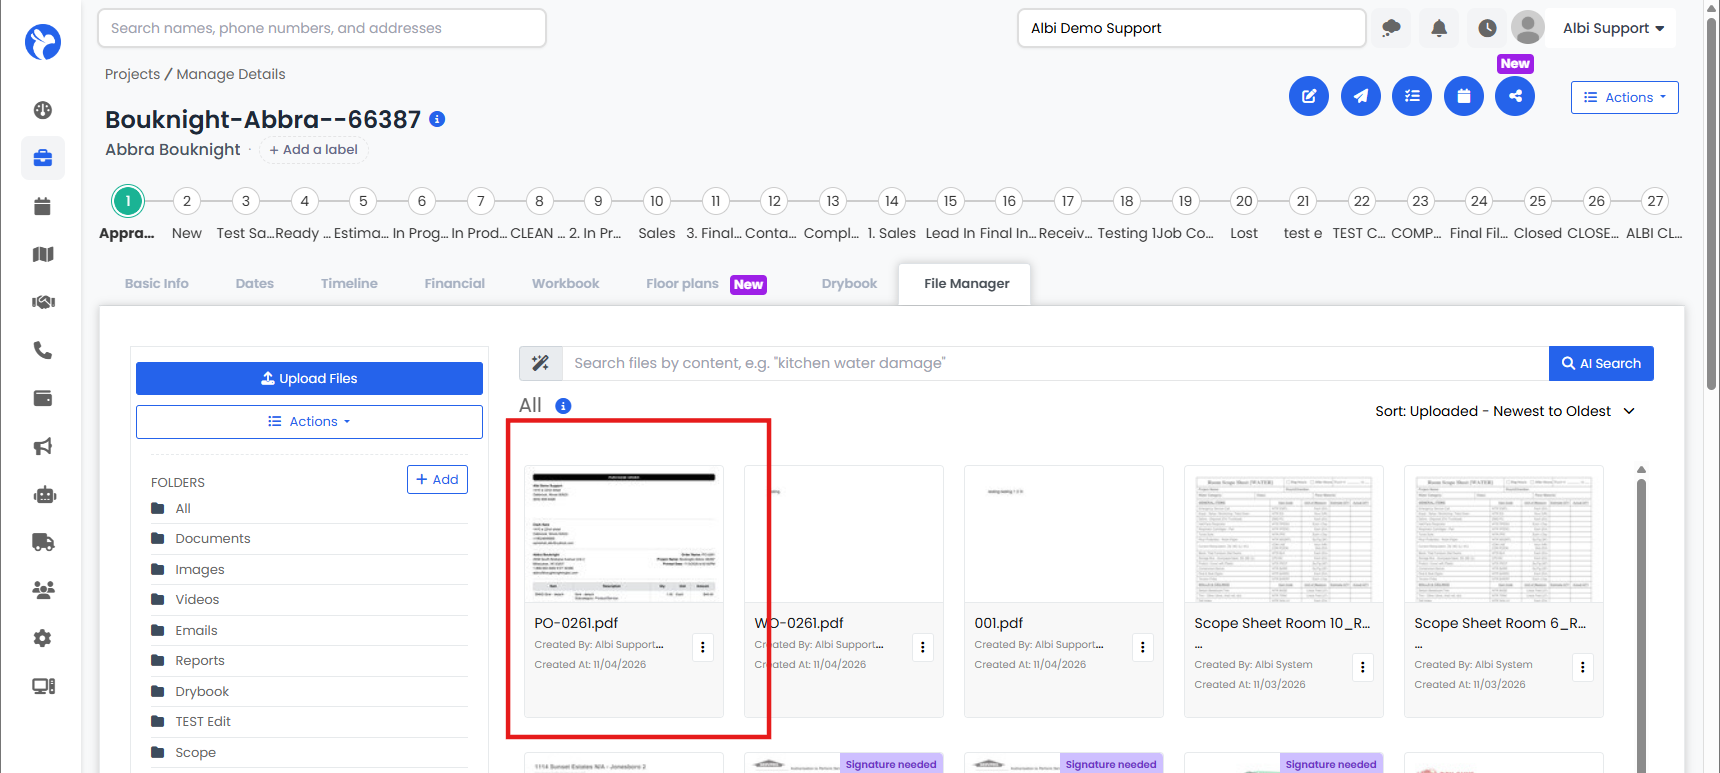
When you save a Purchase Order, Albi automatically creates a PDF of it and saves it to the project's File Manager. The PDF shows the Purchase Order as it is when saved, including:
- The item list
- The section layout
- Totals and section totals, if they're turned on
You can view, download, or share the PDF, or keep it for your records. Albi creates it whether or not the Purchase Order has been sent for signature.
Items on orders are locked
Once an item is added to a work order or Purchase Order, you can't delete it from the Workbook's Items list. This applies even if you later pull in a new estimate that replaces existing items.
Items tied to an order appear greyed out in the Items list, which shows they're locked to that order.
Important: After you convert a work order to a Purchase Order, you can't convert it back. See the Purchase Orders section below.
Intro and Closing File templates
If your company uses Intro and Closing File templates, Albi applies them to work order documents automatically. Templates are being moved to Snippets. To learn more, see Snippets: Save and Reuse Your Best Content.
Related articles