
How to Access Scheduler Settings
- Go to Settings from the left-hand menu.
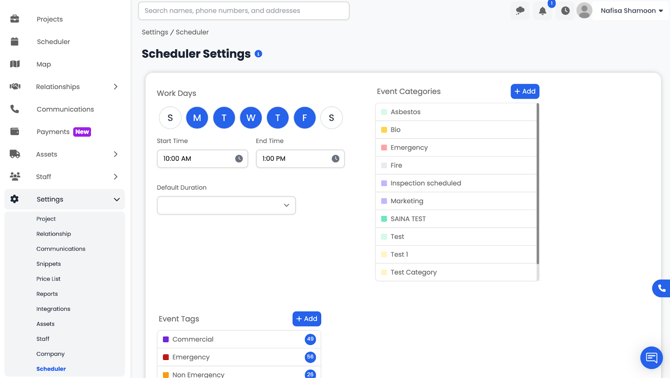
- Select Scheduler.
- The Scheduler Settings Dashboard will open.
From here, you can customize your company’s scheduling structure.
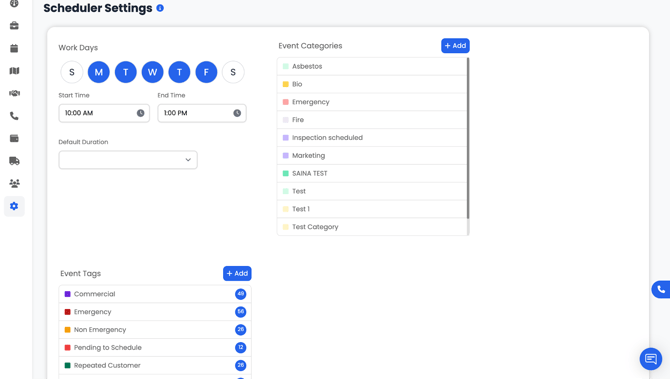
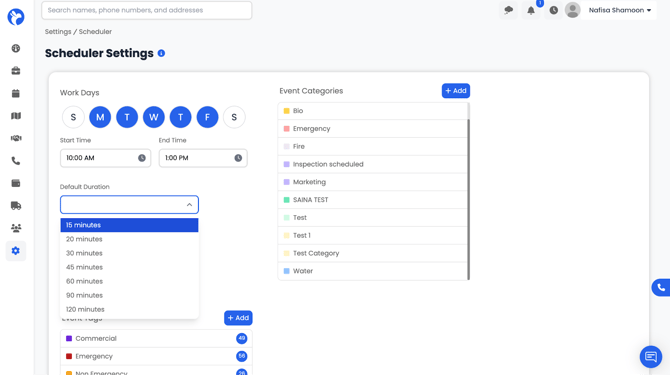
Workdays, Work Hours & Default Duration
Workdays: Select the days your company operates. Only selected days will appear as active on your Scheduler calendar.
Start & End Time: Define your default work hours. These times determine the visible start and end of your Scheduler timeline.
Default Duration:Choose the default appointment length (e.g., 15, 20, 30, 45 minutes, etc.).
This automatically applies to new events but can be changed when creating or editing events.
Event Categories
Event Categories help classify the type of event you are scheduling. Each category can be assigned a color so your calendar visually reflects different event types. Example: Fire, Emergency, Marketing, Inspection Scheduled, etc.
How to Add an Event Category
- In Scheduler Settings, go to Event Categories.
- Click the Add button (top right).
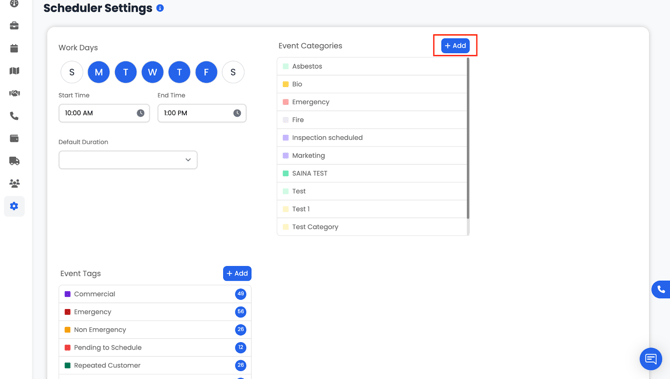
- Enter a Category Name and choose a color.

- Click Save.
These categories will now appear in the Scheduler when creating events and the scheduled event card will reflect the color chosen for that category.
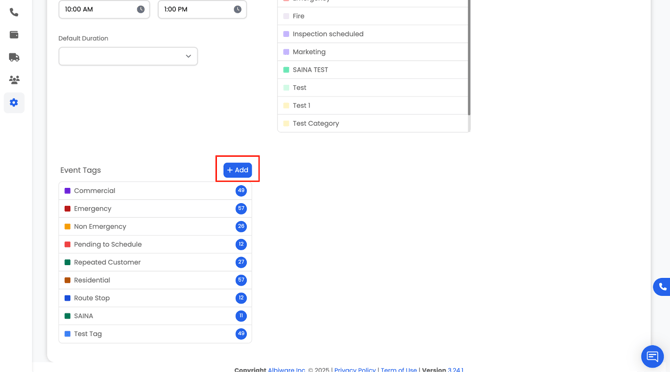
Event Tags
Event Tags give additional clarifying information about the scheduled event. Tags also have colors and can be combined with categories to provide more detail. Example: Emergency, Non-Emergency, Pending to Schedule, Repeated Customer, etc.
How to Add an Event Tag
- In Scheduler Settings, go to Event Tags.
- Click Add.
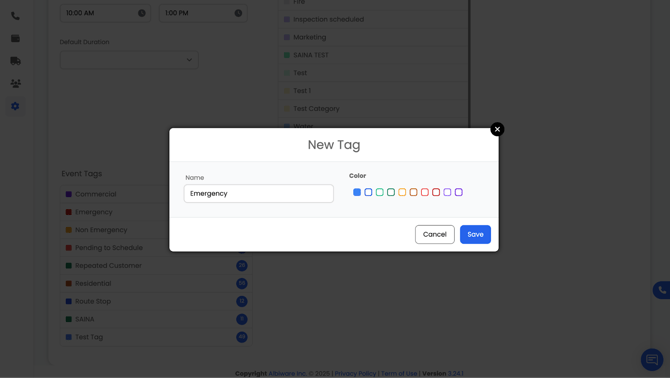
4. Click Save.
Tags help teams quickly recognize urgency, customer type, or job conditions at a glance.