
There are two ways of adding, editing, and deleting tasks. One is from the Dashboard> Tasks section and another one is from the Staff> Task section.
The difference between the two is that Dashboard> Task will show you only your tasks (created by you or by others) that are pending, whereas staff>task will show all staff member tasks as well as completed ones.
Managing Tasks
Note: There are two ways to create a new task.
- You can create a task for a staff member in the Tasks page of the Staff module.
- You can create a task from the Tasks Dashboard.
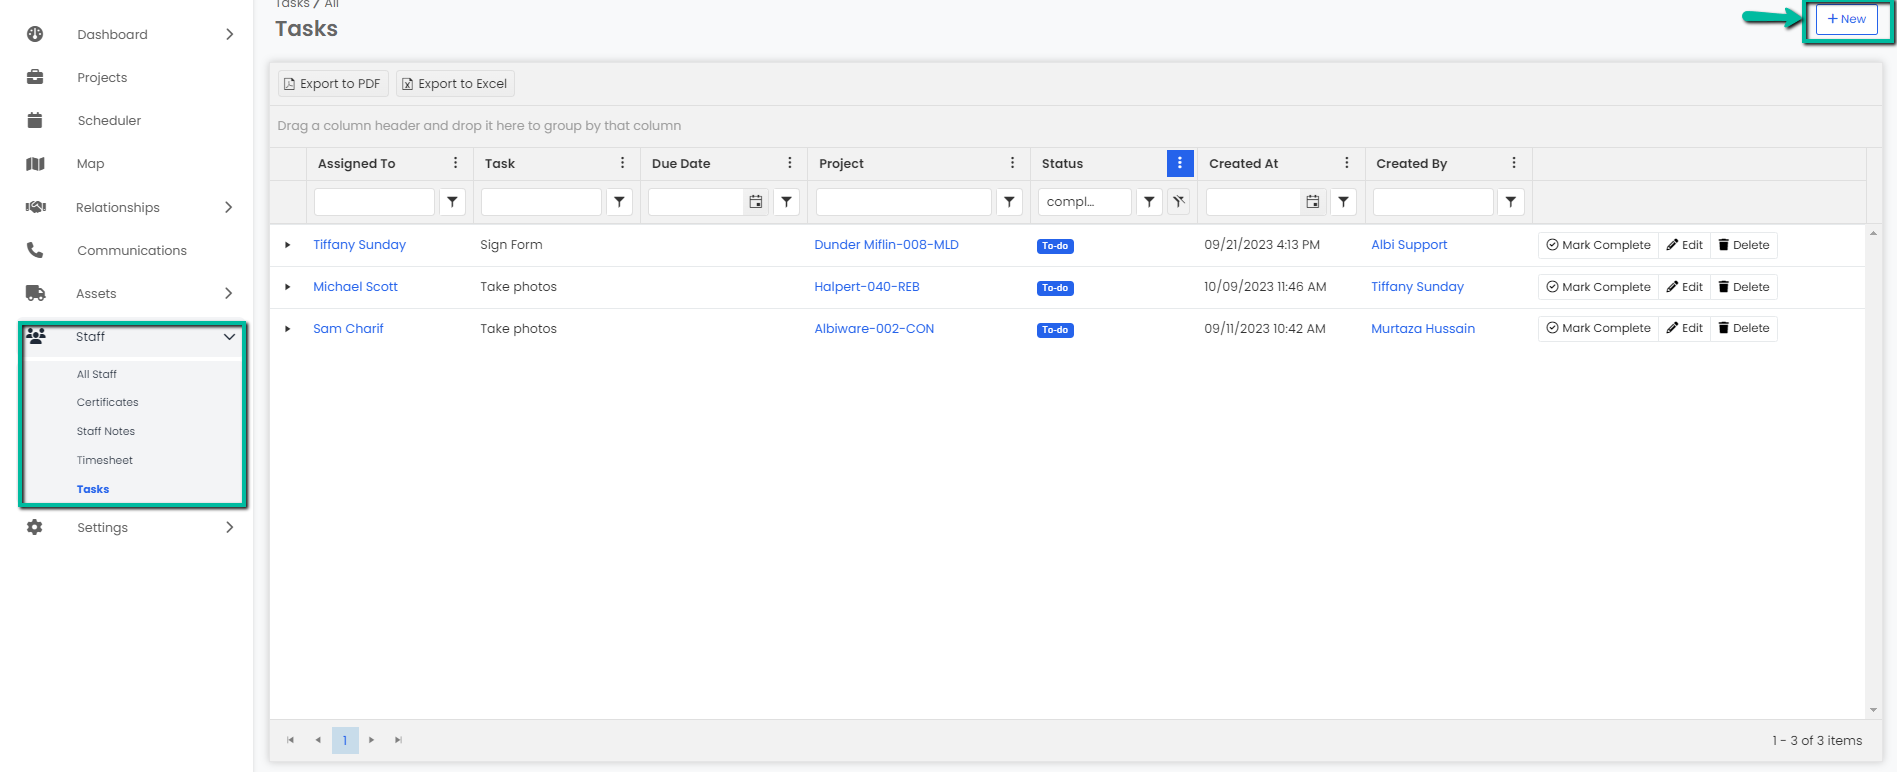
Creating a Task From the Tasks Page
- Navigate to the Staff module and go to the Tasks page using the sidebar and click on the Create New button.
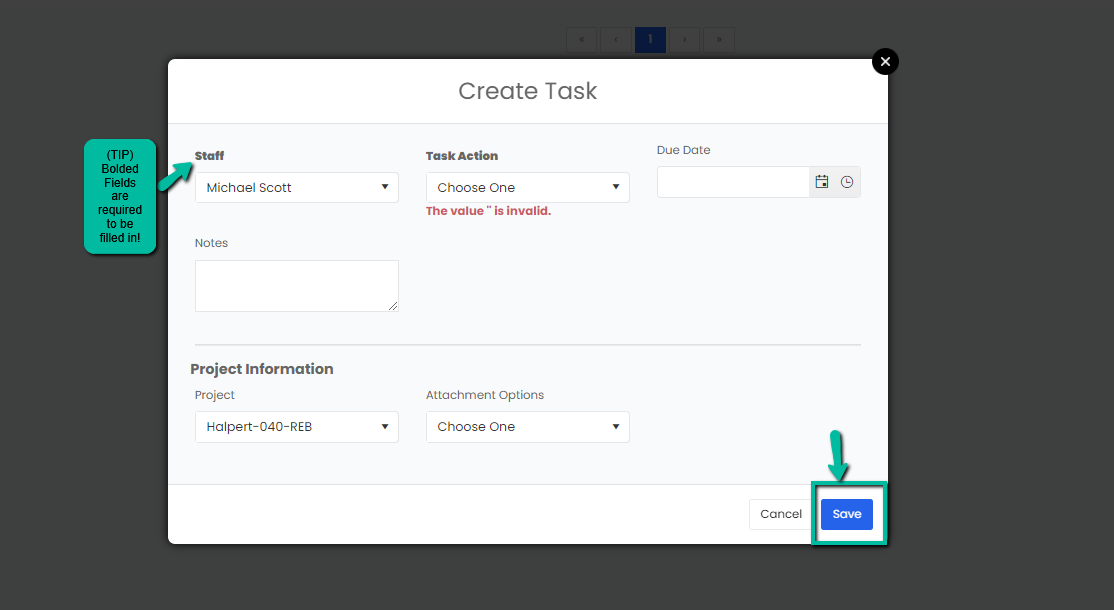
2. A Create Task modal will appear. Enter the details of the task. Keep in mind that the bold fields are required. Click on the blue Save button to save your task.
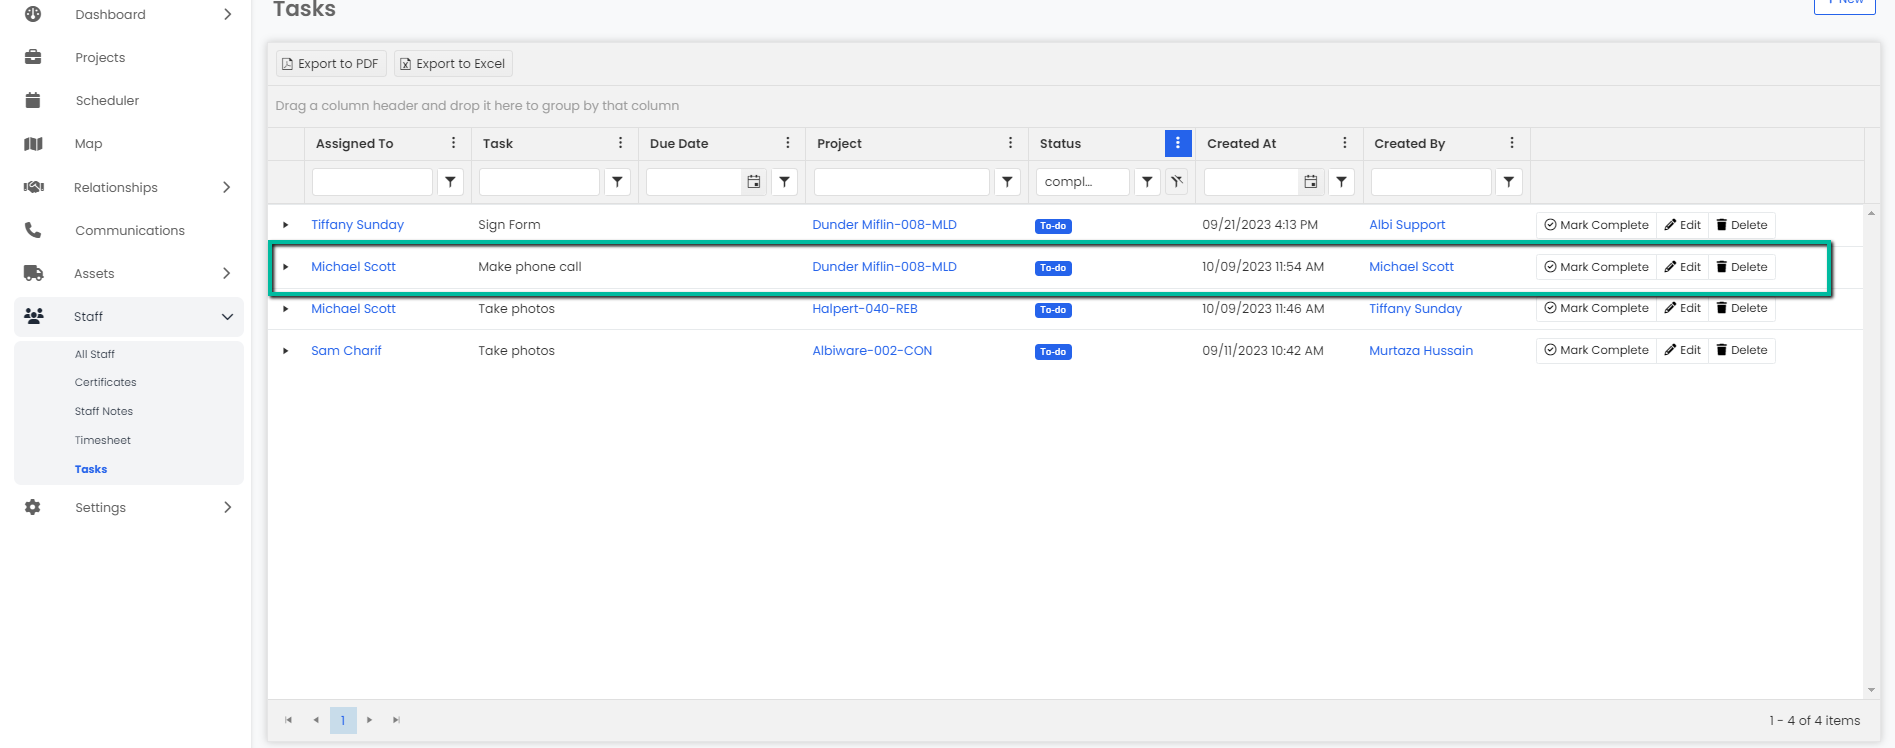
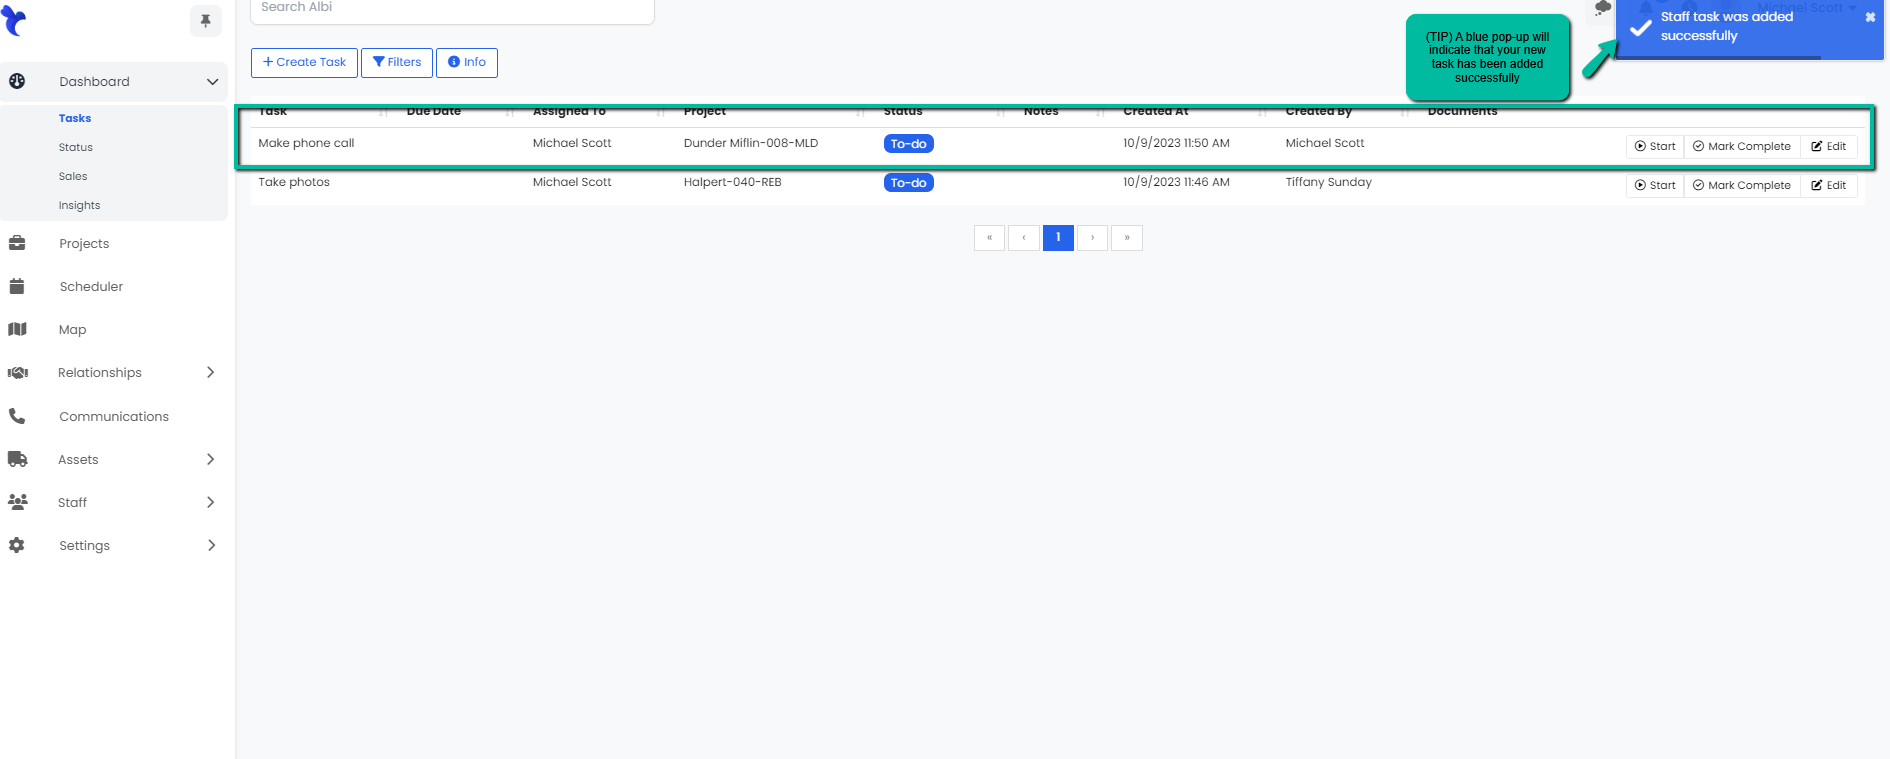
3. A blue pop-up notification will appear on the upper right corner of the screen indicating you have successfully created a task for the selected staff member. Your task will immediately appear on the All Tasks page.
Creating a Task from the Dashboard
- Navigate to the Dashboard module on the sidebar and select Tasks. Click the Create Task button.

2. A Create Task modal will pop-up. Enter the information required, remember to fill in the fields with bold labels, the form will not be saved without them.
3. Click the blue Save button to save your task. You will now be able to see your new task appear on the task table. A blue pop-up notification in the top right corner will appear notifying you that you’ve successfully created your task.
Notes:
- You can attach the task to a project by selecting the desired project in the “Project” field.
- If a task is attached to a project, you can add a relevant document to both the task and the project. This will also show the task on the timeline of the project.
- To select a document that has already been uploaded to the project, simply select “Select From Project” in the “Attachment Options” field. Then select the name of the document you would like to add from the “Project Document” field.
- To add a new document, select the appropriate project, then select the “Create New” option in the “Attachment Options” field. Select the folder and upload the file.