
What are Chambers?
Chambers represent logical zones or areas within a property. They group rooms that share similar drying conditions.

Examples of chambers:
- Downstairs Area
- Upstairs Area
- Basement
- Garage
Chambers help break large properties into manageable sections and allow readings and equipment to be tracked accurately.
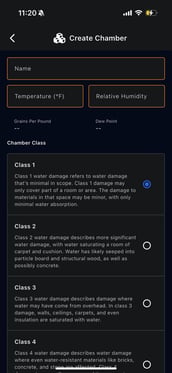
Creating a Chamber
To create a chamber:
- Open Chambers
- Tap the Add (+) icon

-
- Chamber name
- Temperature
- Relative humidity
Chamber Classes Eg. Water Damage (Class 1–4)
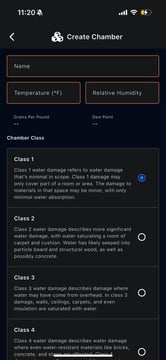
Chamber classes describe the severity of water damage:
- Class 1: Minimal water damage, limited absorption
- Class 2: Significant absorption into carpet and structural materials
- Class 3: Water has affected walls, ceilings, insulation
- Class 4: Specialty drying required (brick, concrete, stone)
Selecting the correct class is important for:
- Proper drying strategy
- Equipment planning
- Insurance documentation
What are Rooms?
Rooms exist inside chambers and represent individual physical spaces.
Examples:
- Living room
- Kitchen
- Bedroom
- Bathroom
Rooms allow data to be tied to specific locations, making documentation precise.
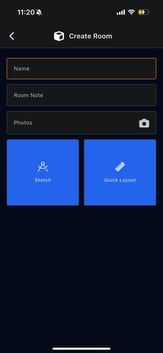
Creating a Room
- Open a chamber
- Tap Create Room

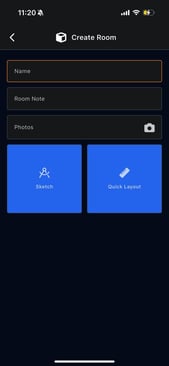
-
- Room name
- Room notes (optional)
4. Add photos if needed
Room Layouts
Room layouts are used to document room dimensions and shape, which helps calculate drying needs.
Quick Layout
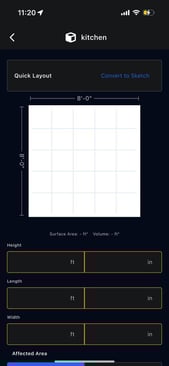
- Enter length, width, and height
- Automatically calculates:
- Surface area
- Volume
- Best for standard rectangular rooms
- This can be converted to a sketch
Sketch
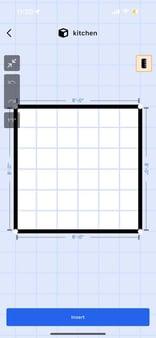
- Manually draw the room layout
- Adjust wall lengths visually
- Best for irregular or complex spaces
You can convert between Quick Layout and Sketch if needed.