
Setting the Loss Image
Each project will have a Loss Image that appears as the project’s main image.This image is the first uploaded image to the project.
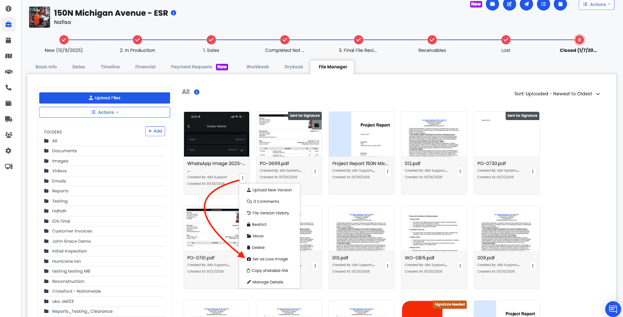
To set or update the Loss Image:
- Go to the project’s File Manager
- Open the Images folder
- Click the three-dot (⋯) menu on an image
- Select Set as Loss Image
The selected image will become the project’s main image.
Note:
Only images can be set as a Loss Image. You can change the Loss Image at any time by selecting a different image and setting it again.
Note: If an image is set as the Front Loss Image, the delete option will not be available. To delete the file, first assign a different image as the Front Loss Image. Once updated, the original file can be deleted.
